Getting that perfect sear on scallops is all about patience and precision. It’s a quick dance of heat and timing, but when done right, you get that gorgeous caramelized crust that’s just slightly crispy, contrasted by the tender, almost butter-like interior. This recipe is not about rushing through; it’s about feeling each step and trusting your senses to tell you when it’s right.
I’ve learned that the real trick is controlling the heat — too high and they burn; too low and they turn rubbery. It’s a fine line, but once you get familiar with the sound of the crackle and the look of the color change, it becomes almost meditative. Plus, it’s a dish that makes you feel like a pro, even if you’re just starting out.
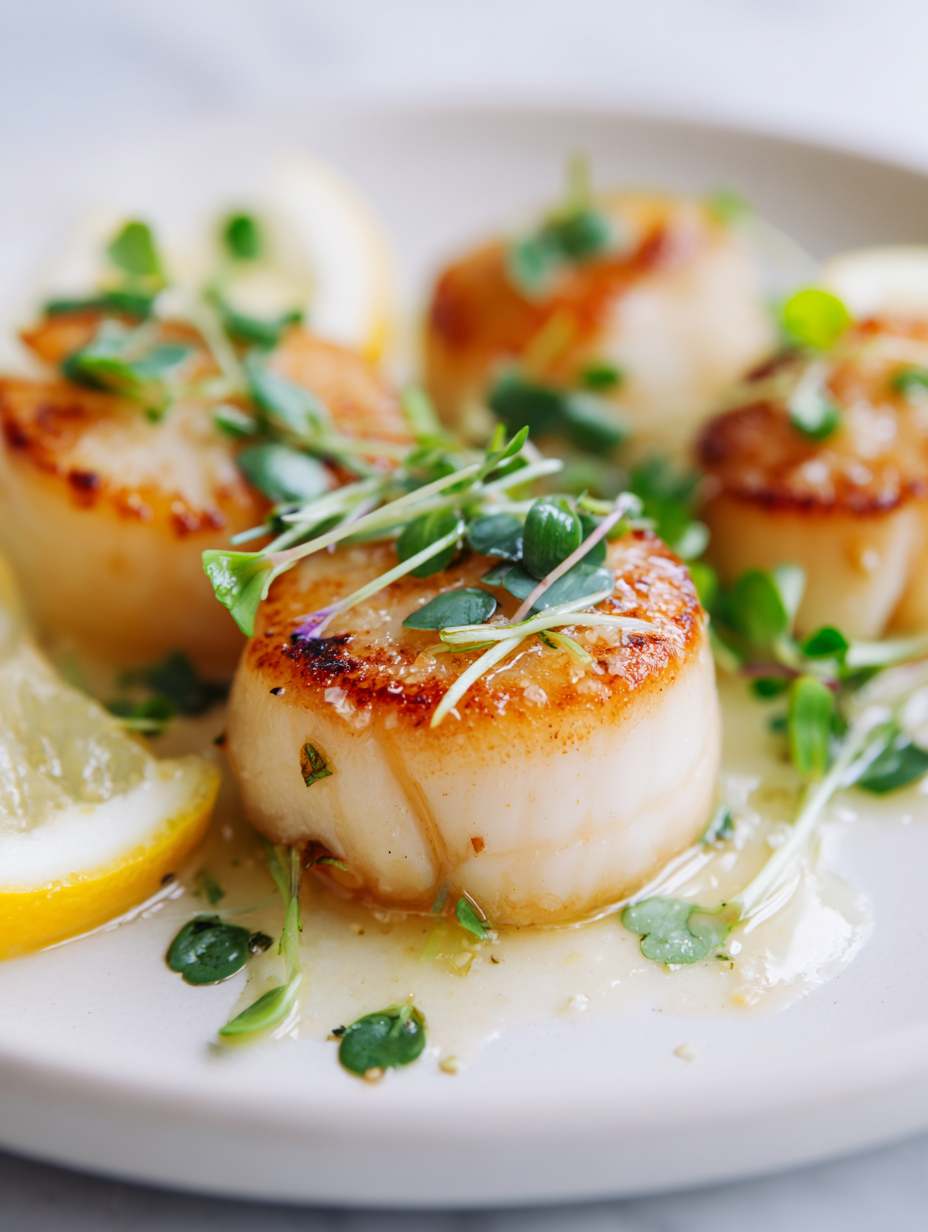
There’s something satisfying about turning simple, high-quality scallops into a restaurant-worthy plate in under 10 minutes. It’s honestly one of those dishes that feels fancy but is surprisingly straightforward once you understand the rhythm. And let’s be honest, that golden-brown crust paired with a squeeze of lemon is a flavor combo that’s hard to beat.
Focusing on the importance of precise heat control and timing to achieve the perfect caramelized crust without overcooking the tender interior.
Mastering the art of searing scallops transformed my weeknights. It’s not just about cooking; it’s about catching that fleeting moment when the surface turns a perfect amber, and the inside stays tender and sweet. This dish reminds me that simplicity, when done with care, can be utterly impressive. It’s become my go-to for celebrating small wins or turning a quiet evening into something special.
- Seared scallops remind me of summer evenings by the coast, where the smell of the ocean mingles with that perfect caramel crust.
- There’s a rush of pride when I get that golden-brown sear just right, especially after a few failed attempts that made me doubt my kitchen instincts.
- Cooking scallops this way feels like a small victory—quick, simple, and utterly satisfying, especially when they come out tender and crispy.
- The sound of the scallops crackling in the pan is oddly soothing, like a tiny celebration of good ingredients and good technique.
- Every time I sear scallops, I feel a little more confident in trusting my senses—listening, smelling, watching—and that’s a feeling I cherish.
The quiet thrill of perfect searing
- Seared scallops have always been a favorite, but I got hooked on perfecting that crust after a particularly busy night when I needed something quick yet impressive. Watching those plump, raw scallops transform into golden-brown morsels in just minutes felt like a small miracle. It’s a reminder that with just a little attention, simple ingredients can deliver a big impact.
- One evening, I was experimenting with different heat levels and oils, trying to get that elusive caramelized surface without overcooking the delicate interior. When I finally nailed the timing and temperature, I realized this dish isn’t just about technique—it’s about tuning into your senses. The sound of the crackle, the smell of toasted butter, the sight of that perfect sear—each cue guides you closer to mastery.
- heading: The quiet thrill of perfect searing
Contextual origin, trivia, or history in bullet list.
- The technique of searing seafood dates back to classical French cuisine, where the focus was on creating a perfect crust with a tender interior.
- Scallops have been a delicacy since ancient times, enjoyed by Romans and Greeks, often associated with luxury and celebration.
- The word ‘scallop’ comes from the Old French ‘escalope,’ meaning shell, highlighting the shellfish’s distinctive shape and texture.
Ingredient breakdown: key components and tips for perfect scallops
- Scallops: I look for those big, opaque, slightly firm ones with a bright, coral-orange color. You want them fresh and dry—pat them well before searing to avoid steaming. If they smell too fishy, skip or rinse thoroughly.
- Salt: I prefer sea salt for its clean, mineral-rich flavor. Be generous but controlled—salting right before searing helps draw out moisture and enhances that crust. Too much can overpower the delicate sweetness.
- Oil: I use a neutral oil with a high smoke point, like grapeseed or clarified butter. It helps get that crisp crust without burning. If you see smoke, your pan’s too hot—dial it back slightly for better control.
- Lemon: Brightens the dish with a squeeze of fresh lemon right after searing. I keep the zest aside for a burst of citrus aroma. Skip if you’re aiming for a more neutral profile, but don’t skip the squeeze—trust me.
- Butter: I finish my scallops with a pat of butter in the pan for richness and a glossy finish. If you’re dairy-free, a splash of olive oil works but won’t add that luscious sheen. Keep it gentle to avoid burning.
Spotlight on 1–2 key ingredients
Sea scallops:
- Scallops: I look for those big, opaque, slightly firm ones with a bright, coral-orange color. You want them fresh and dry—pat them well before searing to avoid steaming. If they smell too fishy, skip or rinse thoroughly.
- Salt: I prefer sea salt for its clean, mineral-rich flavor. Be generous but controlled—salting right before searing helps draw out moisture and enhances that crust. Too much can overpower the delicate sweetness.
Lemon:
- Oil: I use a neutral oil with a high smoke point, like grapeseed or clarified butter. It helps get that crisp crust without burning. If you see smoke, your pan’s too hot—dial it back slightly for better control.
- Brightens the dish with a squeeze of fresh lemon right after searing. I keep the zest aside for a burst of citrus aroma. Skip if you’re aiming for a more neutral profile, but don’t skip the squeeze—trust me.
Notes for ingredient swaps. Each bullet starts with bold category.
- Dairy-Free: Use olive oil or avocado oil instead of butter for a rich, smoky flavor without dairy. The crust might be slightly less glossy.
- Salt: Opt for kosher salt or sea salt for a cleaner taste. Fine table salt can be used but be mindful of the quantity to avoid over-salting.
- Oil: Grape seed or canola oil works well if you don’t have clarified butter. They have high smoke points and neutral flavors.
- Lemon: Lime or orange zest can substitute lemon for a different citrus twist. Skip if you prefer a more neutral, less bright flavor.
- Butter: Use a splash of olive oil for a dairy-free alternative, but expect a less luscious finish. Finish with a squeeze of lemon for brightness.
Equipment & Tools
- Heavy skillet or stainless steel pan: Provides even heat for proper searing
- Tongs or spatula: Handles scallops carefully without tearing
- Paper towels: Patting scallops dry for better crust
- Lemon or citrus squeezer: Finishing touch for brightness
Step-by-step guide to pan searing scallops like a pro
- Choose dry, fresh scallops—look for a firm, slightly opaque, bright orange or white. Pat them dry with paper towels to remove excess moisture, which helps achieve a good sear.
- Set your pan over medium-high heat (around 190°C/375°F). Add a tablespoon of neutral oil like grapeseed or clarified butter. Let it heat until shimmering but not smoking.
- Season scallops generously with sea salt on both sides. Place them in the hot pan, laying them away from you to avoid splatters. Do not crowd the pan; work in batches if needed.
- Sear scallops for about 2 minutes without moving, until the underside forms a deep golden-brown crust and they release easily from the pan. Flip carefully using tongs or a spatula.
- Cook the second side for another 1-2 minutes. They should be opaque and firm but still tender inside. Check the color—deep caramel is good, over-dark is burnt.
- Remove scallops from the pan and rest on a warm plate for 1 minute. Meanwhile, add a knob of butter and a squeeze of lemon to the pan, swirling to create a quick sauce.
- Finish with a drizzle of the pan sauce over the scallops. Plate immediately with extra lemon if desired.
Rest scallops on a warm plate for 1 minute. Finish with pan sauce and a squeeze of lemon. Serve immediately while caramelized crust is still crisp and hot.
How to Know It’s Done
- The scallops should develop a deep golden-brown crust on the first side.
- They should feel firm but not rubbery when gently pressed.
- The interior should be opaque and slightly springy, not translucent or overly soft.
Perfect Pan-Seared Scallops
Ingredients
Equipment
Method
- Use paper towels to thoroughly pat the scallops dry on all sides to remove excess moisture, which helps achieve a good sear. Set aside.
- Place your heavy skillet over medium-high heat and add a tablespoon of neutral oil. Let the oil heat until it shimmers and you can hear a faint crackle—this means it's ready.
- Generously season each scallop on all sides with sea salt, pressing lightly to help the salt adhere. Carefully place the scallops in the hot pan, laying them away from you to avoid splatters.
- Let the scallops cook without moving them for about 2 minutes, watching for a deep golden-brown crust to form underneath. You’ll hear a satisfying crackle as they sear.
- Carefully flip each scallop using tongs or a spatula, and cook for another 1-2 minutes until the second side is also golden and the scallops are opaque and firm to the touch.
- Remove the scallops from the pan and let them rest briefly on a warm plate. Meanwhile, add a tablespoon of butter to the pan and squeeze in fresh lemon juice, swirling to create a quick, glossy pan sauce.
- Drizzle the warm pan sauce over the scallops, and squeeze additional lemon juice for brightness. Serve immediately while the crust is crispy and the interior tender.
Pro tips for perfect pan-seared scallops
- Bolded mini-head: Ensure scallops are thoroughly patted dry; moisture is the enemy of that perfect sear—think crispy crust, not steamed texture.
- Bolded mini-head: Use a hot pan—aim for shimmering oil and listen for that initial crackle to confirm it’s ready for scallops.
- Bolded mini-head: Don’t overcrowd the pan; give each scallop space—crowding causes steaming, not searing, and ruins the crust.
- Bolded mini-head: Flip only once—wait until the underside is deep golden and easily releases from the pan before turning.
- Bolded mini-head: Rest scallops briefly after cooking—this helps juices redistribute and keeps them tender inside, not rubbery.
- Bolded mini-head: Finish with a quick butter and lemon swirl—this adds richness and brightens the flavor without overpowering.
- Bolded mini-head: Keep an eye on the heat—if the scallops start to burn or smoke too much, dial it back slightly for better control.
COMMON SEAR MISTAKES AND HOW TO FIX THEM
- TOO HIGH HEAT: Scallops burn quickly. Reduce heat slightly if they blacken too fast.
- TOO MUCH OIL: Excess oil causes splattering and soggy scallops. Use just enough to coat.
- OVERCOOKING: Overcooked scallops turn rubbery. Remove from heat as soon as they turn opaque.
- NOT DRYING SCALLOPS: Moisture prevents searing. Pat scallops dry thoroughly before cooking.
Quick fixes for perfect scallops: emergency tips and pantry swaps
- If/When scallops stick, splash a little hot water in the pan to loosen them.
- When scallops are overcooked, rescue with a quick splash of lemon juice to brighten.
- Splash a tiny bit of oil if the pan smokes too much during searing.
- Patch uneven sear by turning scallops more frequently for a consistent crust.
- Shield delicate scallops from direct flame if they start to burn, using a splatter guard.
Prep, store, and reheat with care for optimal flavor and texture
- You can prepare the scallops by thoroughly drying and seasoning them a few hours ahead; keep covered in the fridge to prevent moisture buildup.
- Store seared scallops in an airtight container in the fridge for up to 24 hours. They may lose some crispness but will still be tender and flavorful.
- Reheat gently in a hot skillet with a touch of oil or butter for about 30 seconds per side, until warmed through and slightly crispy on the edges, watching for overcooking.
- The flavors mellow slightly after resting, but the texture may soften. Serve immediately after reheating for the best sensory experience.
- Avoid freezing cooked scallops as reheating can make them rubbery; best enjoyed fresh or within a day of searing.
Top questions about pan seared scallops
1. How can I tell if scallops are fresh?
Look for scallops that are firm, dry, and have a bright, slightly translucent appearance. They should smell fresh, not fishy or sour.
2. Why do my scallops stick to the pan?
Pat them thoroughly dry with paper towels before cooking. Excess moisture causes steaming, which prevents that crispy crust.
3. How do I know when to flip the scallops?
Use a hot pan with enough oil or butter until shimmering. Only flip once the underside is deep golden and releases easily.
4. How long should I cook scallops?
Cook for about 2 minutes on the first side and 1-2 minutes on the second, until opaque and firm but still tender inside.
5. What happens if I overcook scallops?
Overcooked scallops turn rubbery and lose their delicate texture. Remove from heat as soon as they turn opaque and slightly firm.
6. Should I add lemon or sauce after cooking?
Finish with a squeeze of lemon or a drizzle of pan sauce. Serve immediately for the best texture and flavor.
7. What kind of oil should I use for searing?
Use high-smoke-point oils like grapeseed or clarified butter to prevent burning and achieve a crispy crust.
8. How hot should my pan be?
Ensure the pan is properly heated and the oil is shimmering before adding scallops. This prevents sticking and promotes even searing.
9. Can I make scallops ahead of time?
Store leftovers in an airtight container in the fridge for up to 24 hours. Reheat gently in a hot skillet for best results.
10. What if my scallops burn or burn too fast?
If you see smoke or the scallops are burning, lower the heat immediately. Splashing a little water can help deglaze and cool the pan.
Seared scallops remind me that good technique is often about patience and listening to your senses. When they’re perfectly caramelized and tender inside, it’s a small, satisfying victory that keeps the kitchen honest.
This dish is a reminder that sometimes, simplicity and attention to detail make all the difference. It’s a quick, elegant way to celebrate good ingredients and a skill that feels like a secret shared between cook and plate.