Halloween often feels like a mad dash for the perfect costume, but these cake pops bring a quieter, more creative joy. They’re a little messy, a little spooky, but always memorable. Making them is a chance to get your hands dirty in the best way—crumbling, mixing, decorating—like a small, sweet rebellion.
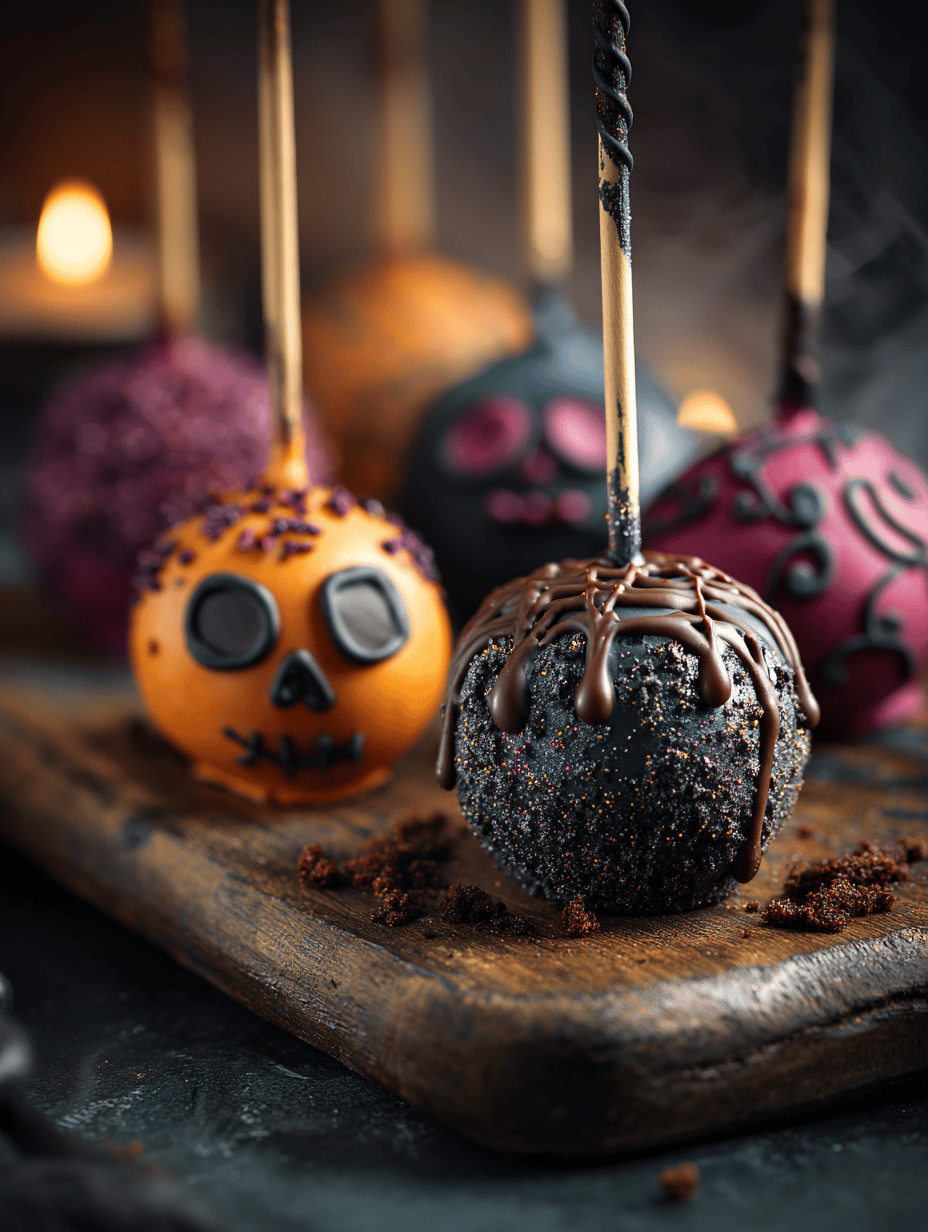
What makes this recipe stand out is the chance to personalize every single pop. Whether you go for classic orange and black or a haunted rainbow, it’s about making each one uniquely yours. Plus, they’re just so fun to share when the doorbell rings.
Why These Cake Pops Keep Calling Me Back
They’re endlessly customizable, and I love how a simple cake base turns into tiny, edible canvases. Plus, the messy, chaotic fun of decorating—especially with kids—makes every batch special. They taste better than any store-bought treat, with a homemade touch that’s impossible to beat. Most of all, they’re just fun to make, especially when Halloween’s the excuse to get a little spooky.
Inside the Spooky Pantry: Ingredient Insights
- Chocolate coating: I prefer dark chocolate for richness, but milk or white work too. The key is a shiny, temperable finish.
- Cake base (store-bought or homemade sponge): Moist, crumbly, and sweet. It’s the canvas for your spooky decorations.
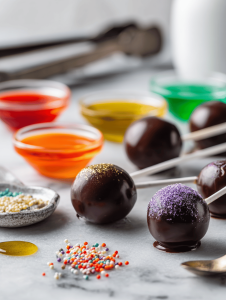
- Food coloring: Bright, bold, and vibrant. Use gel-based for less mess and more vivid hues.
- Sprinkles or edible glitter: Add that final flash of Halloween glam, shimmering under the light.
- Candy sticks: Thin, sturdy, and perfect for holding your little monsters.
- Spray or piping gel: Helps secure decorations or add glossy effects.
Tools of the Candy Crafting Trade
- Microwave or double boiler: Gently melt chocolate without scorching it.
- Piping bag or plastic sandwich bag: Control the coating application and decoration.
- Silicone mold or foam block: Hold dipped cake pops upright as they set.
- Candy thermometer (optional): Monitor chocolate temperature for perfect coating.
- Sharp knife or toothpick: Add spooky details or fix imperfections.
Crafting the Perfect Halloween Cake Pops
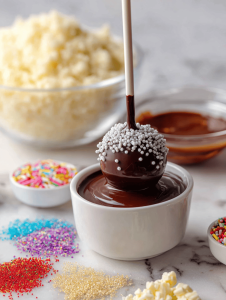
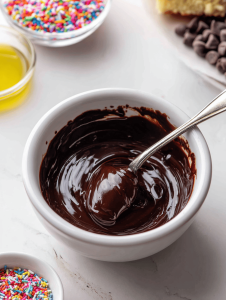
Step 1: Start by melting your chocolate until smooth and shiny, about 3 minutes in a microwave or double boiler.
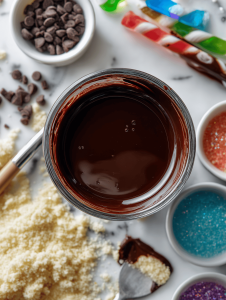
Step 2: Pour the melted chocolate into a tall, narrow glass for easy dipping.
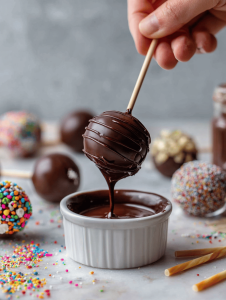
Step 3: Dip each cake pop, making sure it’s fully coated, then gently tap off excess.
Step 4: Place the coated pops on a parchment-lined tray and let them set in the fridge for at least 30 minutes.
Key Tips for Trick-or-Treating Success
- Ensure the cake mixture is firm enough to roll into balls without crumbling.
- Chill the cake balls thoroughly before dipping to prevent melting and coating slipping off.
- Use a deep enough glass for easy, even coating and to avoid drips.
- Avoid over-dipping; a quick, smooth dip keeps the coating even and neat.
Avoid These Common Halloween Cake Pop Pitfalls
- Overheated chocolate causing cracking.? If the coating cracks or flakes, lower the temperature of your chocolate.
- Cake balls falling off sticks.? Dab a tiny bit of warm chocolate if the cake balls aren’t sticking to the stick.
- Thick, uneven coating.? If the coating is too thick or gloopy, add a splash of vegetable oil.
- Skipping fridge chilling.? Don’t rush the chilling process; patience makes for crisp, neat coatings.
Halloween Cake Pops
Ingredients
Equipment
Method
- Crumb the cake into fine, even pieces until it resembles moist sand, then transfer to a mixing bowl.
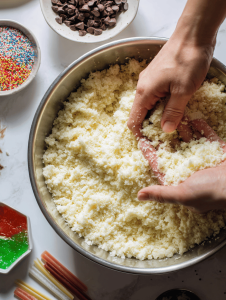
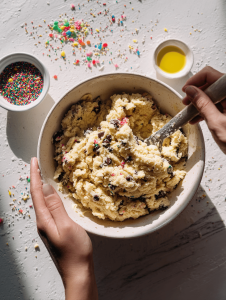
- Use your hands or a spatula to knead the crumbs together, forming a uniform dough that holds together when pressed.
- Scoop out small portions of the cake mixture and roll them into tight, smooth balls about the size of a golf ball.

- Insert a candy stick into each cake ball, pressing gently to secure it without cracking the cake.
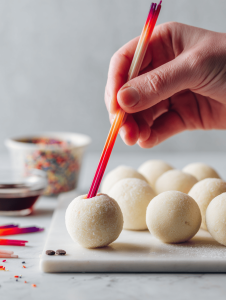
- Place the cake pops on a parchment-lined tray and chill in the refrigerator for at least 30 minutes to firm up.
- Meanwhile, melt the dark chocolate chips in a microwave in 30-second bursts, stirring until smooth and shiny. Add a splash of vegetable oil if the coating is too thick.
- Pour the melted chocolate into a tall glass to make dipping easier.
- Dip each chilled cake pop into the melted chocolate, swirling gently to coat evenly, then tap off any excess.
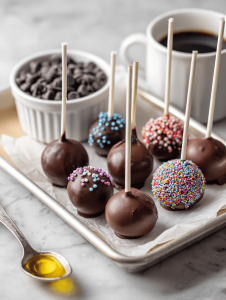
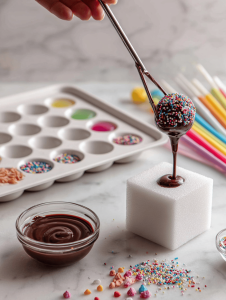
- Stick the coated cake pop into a foam block or silicone mold to set upright, then decorate with food coloring, sprinkles, or edible glitter to make them spooky and festive.
- Allow the decorated cake pops to sit at room temperature or in the fridge until the chocolate coating is firm and shiny.
- Once set, serve your spooky Halloween cake pops on a platter and enjoy the sweet, festive bites!