Category: Desserts

  • Spooky Delight: Halloween Monster Eyeball Cake Pops

    Spooky Delight: Halloween Monster Eyeball Cake Pops

    In the spooky season, baking takes a playful turn. These Monster Eyeball Cake Pops are more than treats; they’re mini works of art that straddle chaos and creativity. The act of sculpting tiny, grotesque eyes from vibrant candies and cake scraps makes every kitchen session a peculiar adventure.

    What makes this recipe special is not just its look but the process. It transforms a simple dessert into a spectacle of spooky fun, perfect for parties or just daring dessert lovers. The smell of vanilla and chocolate mingles with a hint of edible color chaos, creating an irresistible temptation.

    WHY I LOVE THIS RECIPE?

    • The chaos of creating tiny eyeballs sparks my nostalgic childhood DIY projects.
    • Joy explodes when the first creepy eye finally opens up with a gooey, sweet surprise.
    • It’s a proud moment to see guests reaction—both amused and slightly disturbed.
    • It combines the meditative process of baking with the wild fun of Halloween decor.

    AVOID MY DISASTER (You’re Welcome)

    • FORGOT: To chill the cake balls beforehand, they got squishy—freeze for 10 minutes to firm up.
    • DUMPED: The melted chocolate on the table—use parchment to catch drips, clean up is quicker.
    • OVER‑TORCHED: The candy eyeballs—watch carefully to prevent melting, keep a close eye on heat.
    • MISSED: The edible eye details—use a toothpick for precise placement, bad eyesight, good technique.

    QUICK FIXES THAT SAVE YOUR DAY

    • When the chocolate won’t set, splash a bit of coconut oil for gloss and quick setting.
    • Patch a cracked cake ball with extra frosting, then smooth with fingertips dusted in cocoa.
    • Shield your workspace with parchment when dipping—less mess, less stress.
    • If the eyes look flat, add a tiny more detail with melted chocolate.
    • When in doubt, swap candy eyes with mini edible pearls for instant creepy flair.

    Monster Eyeball Cake Pops

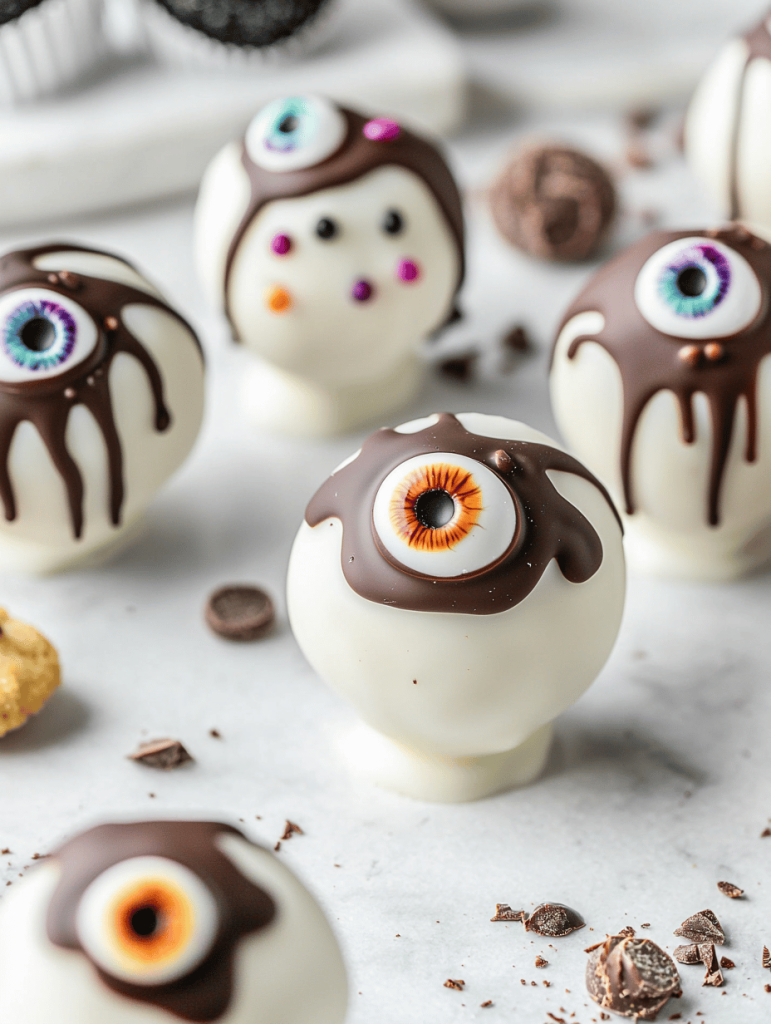
    Monster Eyeball Cake Pops are small, spherical confections made from cake scraps and frosting, coated in melted chocolate to resemble creepy eyeballs. Decorated with colorful candies and edible details, they have a glossy finish and a playful, grotesque appearance, perfect for Halloween festivities.
    Prep Time 30 minutes
    Total Time 30 minutes
    Servings: 12
    Course: Main Course
    Cuisine: Halloween
    Calories: 150

    Ingredients
      

    • 2 cups cake crumbs or crumbled baked cake preferably vanilla or chocolate flavor
    • 1/2 cup cream cheese or frosting to bind the cake crumbs into a dough
    • 8 oz melting chocolate white or dark, melted for coating
    • assorted candies candy eyeballs, colorful candies for decoration for the eyeball pupils and decoration
    • optional edible gel or chocolate for fine details for adding eyelids or veins
    • sprinkles or dusting powder colored edible powders for additional chaos and detail

    Equipment

    • Mixing bowls
    • Baking sheet
    • Parchment paper
    • Microwave or double boiler for melting chocolate
    • Toothpicks or small skewers
    • Small brushes or piping bags for details

    Method
     

    1. Place cake crumbs in a large mixing bowl and add cream cheese or frosting gradually, mixing until the mixture is firm and moldable. This creates a sticky dough ready for shaping.
    2. Use your hands to roll the mixture into small, smooth spheres, about the size of a golf ball. Place them on a baking sheet lined with parchment paper and chill in the freezer for 10 minutes to firm up.
    3. While the cake balls chill, melt the chocolate in a microwave-safe bowl or double boiler, heating in short bursts and stirring until smooth and glossy.
    4. Remove the chilled cake balls from the freezer and, using a toothpick or skewer, dip each one into the melted chocolate, coating evenly. Gently tap off excess chocolate and place the coated balls back on parchment to set.
    5. Once the chocolate coating is firm, use small candies to decorate the center as a pupil and add edible gel or chocolate details for veins or eyelids to give each eyeball a creepy, messy look.
    6. Finish by adding colored edible powders or sprinkles around the eyeballs for extra chaos and color. Place all the finished cake pops in a stand or styrofoam block to set completely before serving.

    These Halloween Monster Eyeball Cake Pops turn a simple baking project into a Halloween party standout. The fun lies in their chaotic charm and the satisfaction of crafting something so delightfully grotesque. This season, let your kitchen become a spooky workshop filled with colorful chaos and sweet surprises.

    Each bite delivers a crunch of candy and a burst of chocolate, making them perfect for celebrating the thrill of Halloween. No matter how many goofs occur, the joy of creating something so whimsically macabre makes it all worthwhile. Enjoy the process and the playful, spooky moments it brings to your home.

  • Spiced Pumpkin Cheesecake: A Cozy Autumn Twist

    Spiced Pumpkin Cheesecake: A Cozy Autumn Twist

    WHY I LOVE THIS RECIPE?

    • The nostalgic aroma of fall spices instantly lifts my mood.
    • Perfectly combines creamy texture with the crunch of a graham cracker crust.
    • Unexpectedly simple to prepare, yet looks elegant on any dessert table.
    • The seasonal flavors make it a real conversation starter during gatherings.
    • It’s a warm, inviting dessert that feels like a hug in every slice.

    AVOID MY DISASTER (You’re Welcome)

    • FORGOT to chill the cream cheese—causes lumps. Chill well before mixing.
    • DUMPED too much pumpkin—makes it dense. Measure carefully.
    • OVER-TORCHED the crust—browned too dark. Keep an eye during baking.
    • MISSED adding vanilla—lacks depth. Always add vanilla for richness.

    QUICK FIXES THAT SAVE YOUR DAY

    • When cracks appear, place a warm towel on the baking dish—shrinks stress lines.
    • Splash vanilla extract to deepen flavors if the taste falls flat.
    • Patch a cracked crust with extra crumbs—silences imperfections.
    • Shield the top with foil if it starts to brown too fast.
    • When in doubt, add a dash of cinnamon—the aroma alone saves the dessert.

    Pumpkin Cheesecake Bars

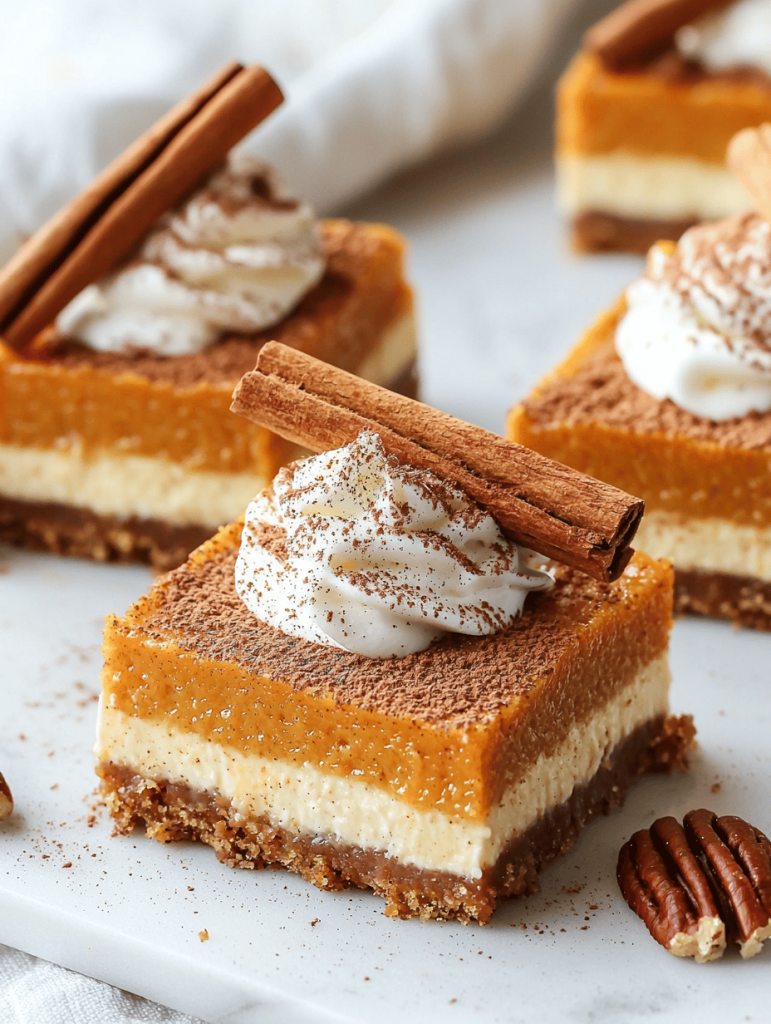
    Pumpkin cheesecake bars are a creamy, smooth dessert layered on a crunchy graham cracker crust. Made with pumpkin puree, cream cheese, and warm fall spices, they have a rich, velvety texture and a visually appealing slice appearance. The dessert is baked until set, resulting in a deliciously festive treat.
    Prep Time 20 minutes
    Cook Time 40 minutes
    Total Time 1 hour
    Servings: 12
    Course: Main Course
    Cuisine: American
    Calories: 350

    Ingredients
      

    • 1 1/2 cups graham cracker crumbs
    • 1/4 cup granulated sugar
    • 1/2 cup unsalted butter melted
    • 16 oz cream cheese softened
    • 1 cup granulated sugar
    • 1/2 teaspoon ground cinnamon
    • 1/4 teaspoon ground ginger
    • 1/4 teaspoon ground nutmeg
    • 1/4 teaspoon ground cloves
    • 1 cup pumpkin puree
    • 2 eggs large eggs
    • 1 teaspoon vanilla extract

    Equipment

    • Mixing bowls
    • 9×13 inch baking pan
    • Whisk
    • Spatula
    • Measuring cups and spoons
    • Food processor or zipper bag and rolling pin

    Method
     

    1. In a mixing bowl, combine graham cracker crumbs and sugar. Pour in melted butter and stir until the mixture resembles wet sand. Press this mixture firmly into the bottom of a parchment-lined 9×13 inch baking pan to form an even crust.
    2. Bake the crust in a preheated oven at 350°F (175°C) for 8-10 minutes until lightly golden. Remove and let it cool slightly as you prepare the filling.
    3. In a large bowl, beat softened cream cheese with a hand mixer or whisk until smooth and creamy, eliminating any lumps. Add sugar and spices, and continue mixing until well combined.
    4. Mix in pumpkin puree, eggs, and vanilla extract, one at a time, mixing well after each addition. The filling should be smooth and slightly fluffy, with a rich, orange hue.
    5. Pour the pumpkin cheesecake filling over the cooled crust, spreading it evenly with a spatula. Tap the pan gently on the counter to remove air bubbles and level the surface.
    6. Bake in the oven at 350°F (175°C) for 30-35 minutes, or until the edges are set but the center still slightly jiggles when gently shaken.
    7. Remove from the oven and let the bars cool completely on a wire rack. Once cooled, refrigerate for at least 2 hours or overnight to fully set.
    8. Cut into squares with a sharp knife, wiping the blade clean between cuts for neat edges. Serve chilled for the best texture and flavor.

    This pumpkin cheesecake captures the essence of autumn—rich, comforting, and layered with memories. It’s a dessert that transforms simple ingredients into something special, perfect for chilly nights or festive gatherings. The balance of spiced pumpkin and silky cream cheese feels like a warm blanket in dessert form.

    Every slice offers a sensual reminder of the season’s bounty, making it a delightful centerpiece. Even after the last crumb, the cozy feeling lingers, inspiring me to savor each moment of fall’s fleeting beauty.

  • The Unexpected Charm of Rustic Peach Crisp

    The Unexpected Charm of Rustic Peach Crisp

    Imagine walking into a kitchen filled with the warm, honeyed aroma of ripe peaches baking in buttery oats. This isn’t your typical dessert; it’s a nostalgic journey wrapped in a crispy topping that crunches with every bite. I love how this peach crisp transforms simple summer fruit into a comforting, unpredictable delight.

    In my version, I add a hint of cardamom, giving each bite a whisper of exotic spice against the sweet, juice-laden peaches. Cooking this dish feels like a small act of rebellion against overly processed treats—embracing rustic charm and imperfect perfection. It’s a recipe that invites chaos, laughter, and a little bit of soul into every serving.

    ## WHY I LOVE THIS RECIPE?
    – It captures spontaneous summer energy with its vibrant flavor.
    – The smell of caramelizing sugar & bubbling fruit makes everyone smile.
    – I love that it’s forgiving, perfect for any skill level.
    – This recipe creates a sense of cozy nostalgia I crave all year round.
    – It feels like a small celebration every time I make it.

    ## AVOID MY DISASTER (You’re Welcome)
    • FORGOT to preheat the oven – the topping turned soggy; reheated with a quick broil fixed it.
    • DUMPED too much sugar – the peaches ran and soaked; added a handful of oats saved the texture.
    • OVER‑TORCHED the edges – the topping blackened; kept a close eye and covered loosely with foil.
    • MISSED adding lemon juice – peaches lacked brightness; a spritz at the end brightened everything.

    ## QUICK FIXES THAT SAVE YOUR DAY
    • When the topping isn’t crispy—splash in a little extra butter & bake 5 more minutes.
    • When the peaches are too tart—patch with a drizzle of honey or maple syrup.
    • When the crisp is soggy—shield with foil and bake 10 minutes longer.
    • When the fruit is undercooked—stir and bake an extra 10 minutes.
    • When the aroma is dull—stand back and crack open a window, the smell gets intense.

    The magic of this peach crisp is that it feels both familiar and unexpectedly exciting. It’s perfect for humble summer gatherings or a quiet evening in. Playing with spices, textures, and a splash of lemon keeps each batch lively and lively. It’s a dessert that truly celebrates the joys of seasonal fruit.

    Peach Cardamom Crisp

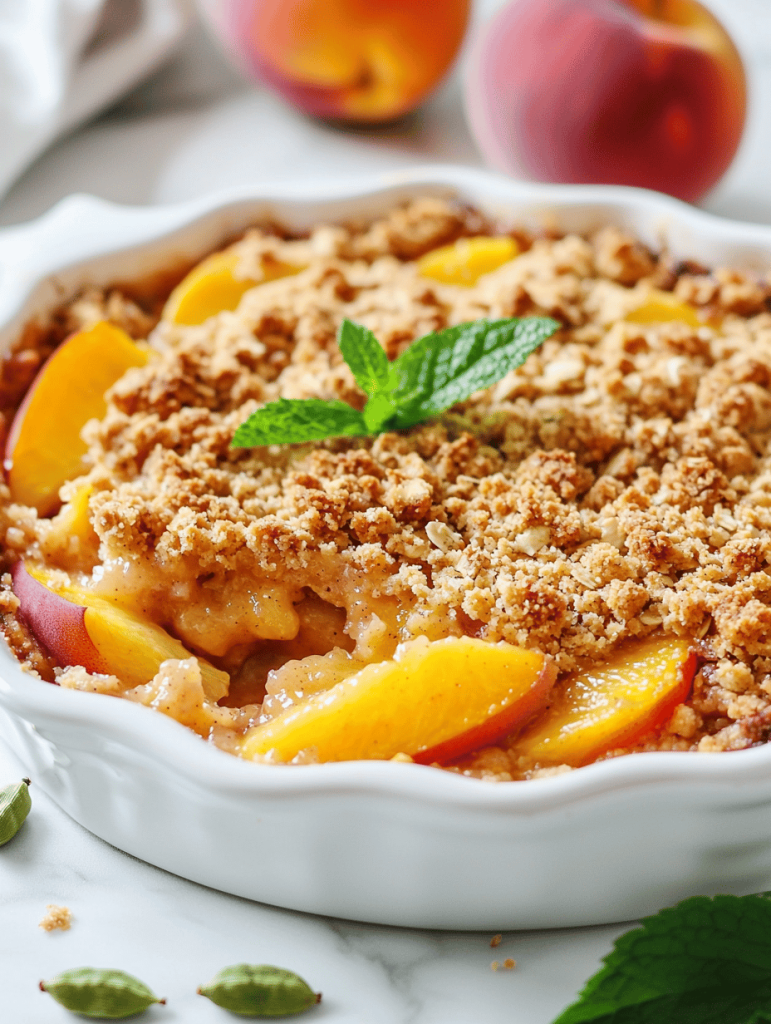
    A rustic dessert featuring ripe peaches baked under a buttery, oat-filled topping infused with aromatic cardamom. The dish has a tender, juicy fruit layer topped with a crisp, golden-brown crunch that offers a satisfying texture contrast. The final presentation is a bubbling, fragrant skillet or dish inviting for serving.
    Prep Time 15 minutes
    Cook Time 40 minutes
    Total Time 55 minutes
    Servings: 6
    Course: Main Course
    Cuisine: American
    Calories: 320

    Ingredients
      

    • 4 ripe peaches peeled, pitted, and sliced
    • 1/4 cup granulated sugar divided, for fruit and topping
    • 1 teaspoon ground cardamom freshly ground if possible
    • 1 tablespoon lemon juice to brighten the peaches
    • 1 cup old-fashioned rolled oats for the crumbly topping
    • 1/2 cup all-purpose flour
    • 1/2 cup unsalted butter cold, cut into small pieces
    • 1/4 cup brown sugar packed
    • pinch salt

    Equipment

    • Oven
    • Mixing bowls
    • Baking dish or skillet
    • Measuring cups and spoons
    • Peeler or knife for peeling peaches

    Method
     

    1. Preheat the oven to 375°F (190°C). Peel peaches if desired, then core and slice them into similar-sized pieces. Toss the peaches in a mixing bowl with a tablespoon of lemon juice, half of the sugar, and the ground cardamom to coat evenly.
      4 ripe peaches, 1 teaspoon ground cardamom, 1 tablespoon lemon juice, 1/4 cup granulated sugar
    2. Transfer the peach mixture to a baking dish or skillet, spreading it out in an even layer. Bubble lightly around the edges, signaling they’re starting to cook down.
    3. In a separate bowl, combine oats, flour, remaining sugar, and a pinch of salt. Add the cold butter pieces and use your fingers or a pastry cutter to work it into coarse, crumbly bits. This creates a flaky, crispy topping.
      1 cup old-fashioned rolled oats, 1/2 cup all-purpose flour, 1/2 cup unsalted butter, 1/4 cup brown sugar, pinch salt
    4. Spoon the crumb mixture evenly over the peaches, covering most of the fruit but leaving some peekaboo gaps for a rustic look. Press gently to help it adhere.
    5. Place the dish in the preheated oven and bake until the topping is golden brown and crispy, about 40 minutes. The filling should bubble up around the edges and smell warm and sweet.
    6. Remove from the oven and let cool slightly before serving. The fruit will be tender and juicy, contrasted with the crunchy, caramelized topping. Serve warm, preferably with a scoop of vanilla ice cream or a dollop of whipped cream or Greek yogurt.

    Notes

    Feel free to add a pinch of cinnamon or a splash of honey to customize the flavor. For extra crunch, sprinkle a handful of chopped nuts over the topping before baking.
    As the last scoop of warm peach crisp hits the bowl, I’m reminded how simple ingredients can create something deeply satisfying. Each bite offers a burst of sunshine, a little chaos, and lots of comfort. It’s often the unpretentious dishes like this that leave the longest-lasting impressions.

    When summer peaks, I turn to recipes like this for a taste of nostalgia and spontaneity. It’s a reminder to embrace imperfect moments and find joy even in small sparks of flavor. No matter the occasion, this rustic peach crisp always feels just right.

  • Unearthing Pumpkin Cookies: A Nostalgic Autumn Treasure

    Unearthing Pumpkin Cookies: A Nostalgic Autumn Treasure

    Imagine cutting into a batch of pumpkin cookies and releasing a fragrant cloud of cinnamon and nutmeg. This recipe isnt just about pumpkin flavor; its about capturing those fleeting autumn moments, infused with cozy memories. The dough feels soft and sticky, like a secret worth savoring, as your kitchen fills with the aroma of fall.

    Crafting these cookies is like a mini adventure, where each step unfolds like a autumn story. From the warm, spiced batter to the slight crunch of the edges, every bite takes you back to hayrides and crisp air. You dont need fancy ingredients, just a pinch of nostalgia and a dash of creativity.

    Spiced Pumpkin Cookies

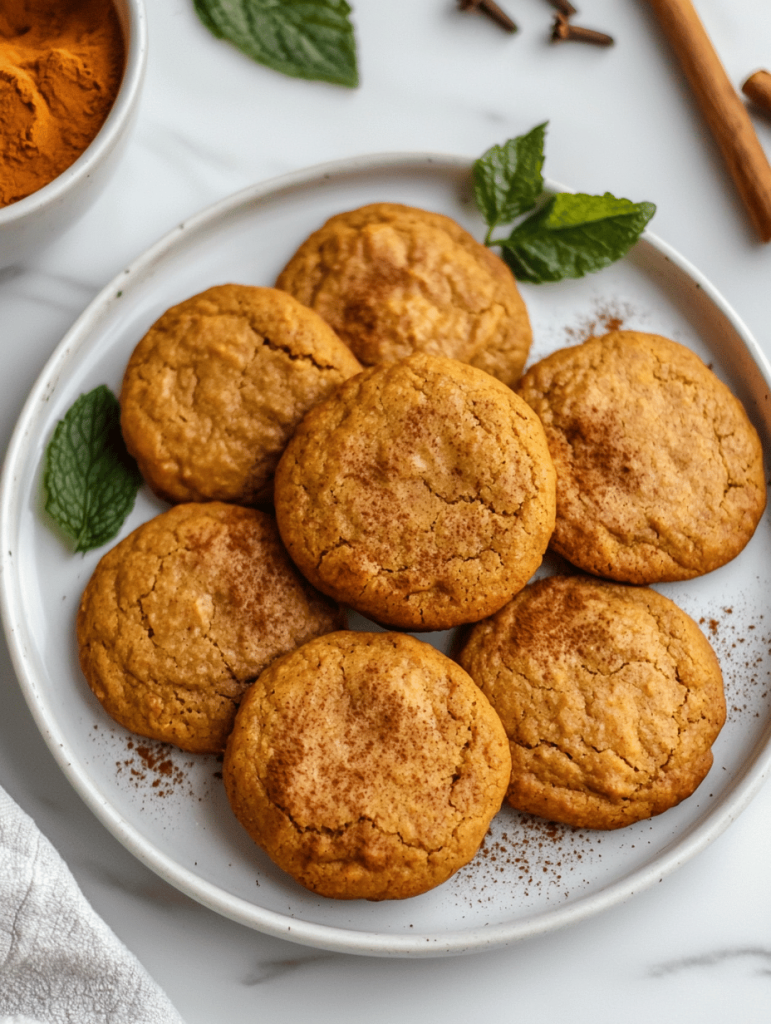
    These pumpkin cookies are soft and slightly chewy on the inside with crisp, golden edges. They are flavored with warm spices like cinnamon and nutmeg, resulting in a fragrant, autumn-inspired treat. The dough is sticky and easy to shape, and once baked, the cookies have a tender crumb with a subtle moistness from the pumpkin.
    Prep Time 20 minutes
    Cook Time 12 minutes
    Total Time 32 minutes
    Servings: 24
    Course: Main Course
    Cuisine: American
    Calories: 120

    Ingredients
      

    • 1 1/2 cups all-purpose flour
    • 1/2 cup granulated sugar
    • 1/2 cup packed brown sugar
    • 1/2 cup unsalted butter softened
    • 1/2 cup canned pumpkin puree
    • 1 large egg room temperature
    • 1 1/2 tsp ground cinnamon
    • 1/2 tsp ground nutmeg
    • 1/2 tsp baking soda
    • 1/4 tsp salt

    Equipment

    • Mixing bowls
    • Whisk
    • Baking sheet
    • Parchment paper
    • Cooling rack

    Method
     

    1. Preheat your oven to 350°F (175°C) and line a baking sheet with parchment paper.
    2. In a large mixing bowl, whisk together the flour, cinnamon, nutmeg, baking soda, and salt until evenly combined. This helps distribute the spices uniformly throughout the dough.
    3. In a separate bowl, cream together the softened butter, granulated sugar, and brown sugar until the mixture is light, fluffy, and smells mildly caramelized, about 2-3 minutes.
    4. Add the egg to the butter and sugar mixture, then beat until well incorporated and smooth.
    5. Stir in the pumpkin puree until the batter is uniform with a slightly thick, sticky texture and a warm, spicy aroma.
    6. Gradually fold the dry ingredients into the wet mixture, mixing just until combined. The dough will be thick and slightly sticky but workable.
    7. Using a tablespoon or a cookie scoop, portion the dough onto the prepared baking sheet, spacing them about 2 inches apart. The dough will be soft and sticky but easy to shape.
    8. Bake the cookies for 12-14 minutes, or until the edges turn golden brown and the centers look set. You may hear a faint sizzling as they bake, and the aroma of spices will fill your kitchen.
    9. Remove the baking sheet from the oven and let the cookies cool on it for 5 minutes, then transfer them to a wire rack to cool completely. The cookies will firm up slightly as they cool, with a tender crumb inside.
    10. Once cooled, enjoy these soft, spiced pumpkin cookies with a cup of tea or coffee, reveling in the cozy aroma and comforting flavor, perfect for autumn days.

    Notes

    For extra texture, fold in chopped nuts or dried cranberries before baking.
    These pumpkin cookies are perfect for lazy weekend baking or festive gatherings. They remind us that some of the best flavors come from simple, heartfelt touches. Enjoy them warm or cooled, with a glass of milk or a splash of cider.

    In a world rushing by, these cookies offer a moment to pause and appreciate the beauty of seasonal baking. Their moist, spiced crumb and the delightful aroma make every bite a small celebration of fall.