Category: Desserts

  • Bewitching Poison Toffee Apples for Halloween

    Bewitching Poison Toffee Apples for Halloween

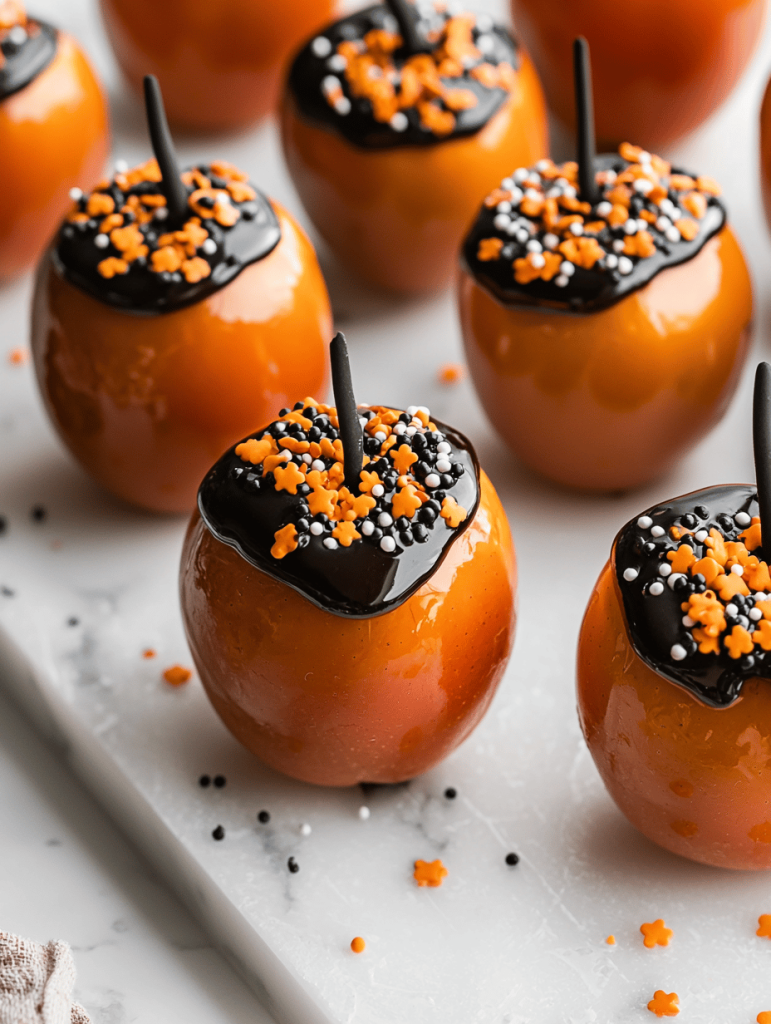
    Every October, I crave something both nostalgic and wickedly fun, and these Halloween Poison Toffee Apples hit the sweet spot. Unlike ordinary toffee apples, I infuse a mysterious, eerie twist with dark, glossy coating and a hint of chaos in the candy drizzle. Their unsettling charm makes them perfect for spooky gatherings or a daring treat on the night of tricks.

    Imagine biting into a crisp apple, only to be met with a crackling toffee shell that tastes like a potion brewed in a cauldron. The rich caramel flavor mingles with a whisper of vanilla and just a touch of bitter black food dye, making each bite an adventure. These aren’t just candies—they’re edible spells that turn simple fruit into a wicked delight.

    Halloween Poison Toffee Apples

    This dessert features crisp apples coated in a glossy, dark toffee shell infused with black food dye, creating an eerie, spooky appearance. The toffee is made by caramelizing sugar with butter and cream, then poured over apples and decorated with a candy drizzle, resulting in crunchy, sticky, and visually striking treats perfect for Halloween.
    Prep Time 15 minutes
    Cook Time 20 minutes
    Total Time 35 minutes
    Servings: 8
    Course: Main Course
    Cuisine: Halloween
    Calories: 250

    Ingredients
      

    • 8 medium firm apples (such as Fuji or Gala) washed and patted dry
    • 2 cups granulated sugar for caramelization
    • 1/2 cup unsalted butter cut into pieces
    • 1/2 cup heavy cream for smoothness
    • 1 teaspoon vanilla extract
    • 2 drops black gel food coloring to create the eerie black coating
    • Melted dark chocolate or black candy melts for decoration optional, for drizzle

    Equipment

    • Candy thermometer
    • Cooking pot

    Method
     

    1. Prepare the apples by inserting sticks into the stems and setting them on a parchment-lined tray for easy handling.
    2. Combine the sugar, butter, and heavy cream in a medium-sized saucepan over medium heat. Stir constantly until the mixture begins to bubble and turn a golden amber color, around 8-10 minutes. Use a candy thermometer to monitor temperature.
    3. Once the caramel reaches 300°F (hard crack stage), remove from heat and stir in the vanilla extract and black food coloring, mixing quickly until evenly combined. Be careful—the mixture will bubble vigorously.
    4. Quickly dip each apple into the toffee, tilting the pan to cover as much surface as possible. Allow excess to drip off before placing the coated apple onto the prepared tray. Repeat with all apples, then let the toffee harden at room temperature for about 15 minutes.
    5. Prepare the chocolate drizzle by melting dark chocolate or black candy melts until smooth and glossy, either in a microwave-safe bowl in 20-second intervals or using a double boiler.
    6. Transfer the melted chocolate into a piping bag or squeeze bottle, then carefully drizzle over the coated apples in a zigzag pattern to add an ominous, spooky effect.
    7. Allow the decorated apples to set for another 10-15 minutes until the drizzle firms up, resulting in a glossy, eerie, black toffee coating with decorative accents.

    Crafting these Poison Toffee Apples turns into a festive ritual that sparks joy and a dash of chaos in the kitchen. They’re more than treats—they’re part of a Halloween story you make yourself. Watching friends bite into these mysterious, shiny apples adds a little extra thrill to the night.

    Seasons come and go, but the fun of creating spooky treats like these never fades. With their dark allure and irresistible crunch, they make every Halloween a little more magical. Enjoy concocting your own eerie creations and letting the spooky spirit take over.

    ,

  • Spooky Gooey Halloween Dirt Cake with Gummy Worms

    Spooky Gooey Halloween Dirt Cake with Gummy Worms

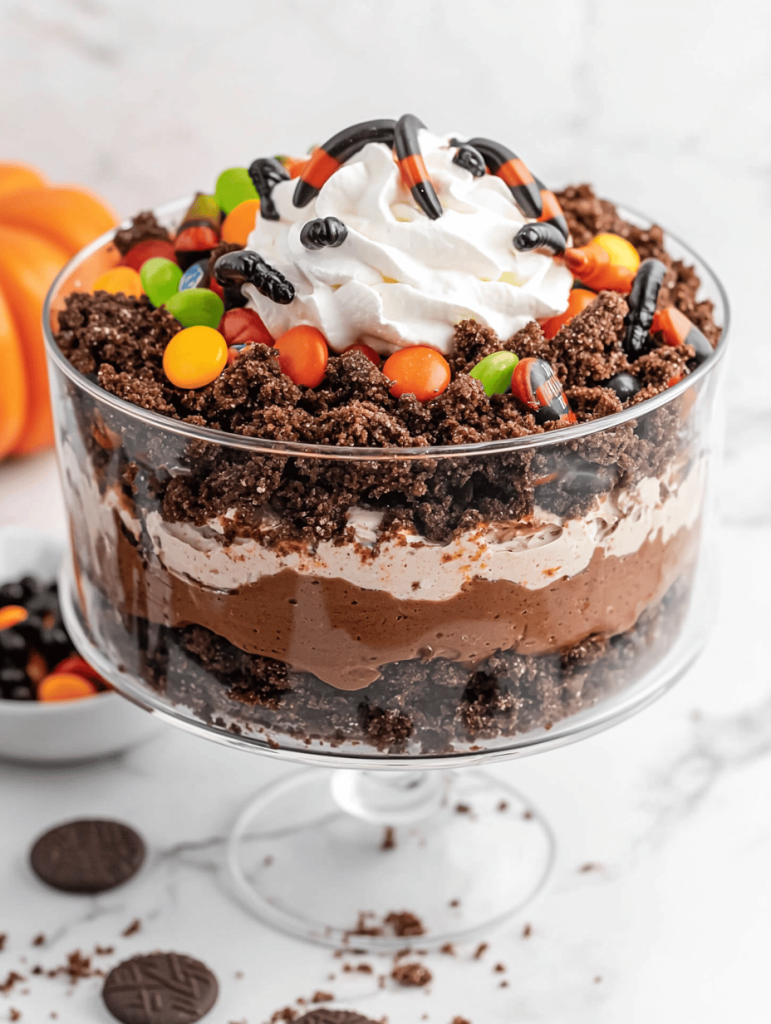
    Every October, I turn to nostalgic recipes that spark childhood memories and add a touch of chaos to my kitchen. This Halloween Dirt Cake is no ordinary dessert; it’s a playful, messy masterpiece that invites giggles and sticky fingers. The best part? It’s surprisingly simple to make, even amidst the costume chaos.

    Imagine a rich chocolate pudding layered with crushed cookies, topped with colorful gummy worms crawling out of the dirt. The aroma of cocoa and vanilla fills the room, reminiscent of Halloween nights from my youth. This dessert isn’t just a treat; it’s a full-on celebration of spooky season’s fun and chaos.

    Halloween Dirt Cake

    Halloween Dirt Cake is a playful dessert featuring layered chocolate pudding and crushed cookies to resemble dirt, topped with colorful gummy worms. The finished cake has a smooth, creamy texture from the pudding, combined with a crumbly base and fun gummy decorations that create a messy, whimsical appearance.
    Prep Time 20 minutes
    Total Time 20 minutes
    Servings: 8
    Course: Main Course
    Cuisine: American
    Calories: 250

    Ingredients
      

    • 1 package chocolate instant pudding mix about 3.9 oz
    • 2 cups cold milk
    • 1 cup crushed chocolate cookies store-bought or homemade
    • 1/2 cup gummy worms assorted colors
    • to taste additional crushed cookies for topping

    Equipment

    • Mixing bowls
    • Whisk
    • Measuring cups and spoons
    • 8×8-inch baking dish or similar
    • Plastic wrap or foil

    Method
     

    1. In a mixing bowl, whisk together the chocolate pudding mix and cold milk until the mixture thickens and becomes smooth, about 2-3 minutes. This creates a rich, creamy pudding base.
    2. Spread a layer of crushed cookies evenly at the bottom of the baking dish, forming a crumbly ‘dirt’ base.
    3. Pour the prepared chocolate pudding over the cookie layer, smoothing it out with a spatula to create an even, glossy surface that resembles soil.
    4. Sprinkle additional crushed cookies on top of the pudding to add texture and enhance the dirt-like appearance.
    5. Decorate the surface with colorful gummy worms, arranging them to appear as if they’re crawling out of the dirt.
    6. Cover the dish with plastic wrap or foil and refrigerate for at least 2 hours, allowing the pudding to set and flavors to meld.
    7. Once set, sprinkle more crushed cookies around the edges for extra dirt effect if desired, and add additional gummy worms for extra fun.
    8. Serve the Halloween Dirt Cake in bowls or cups, ensuring each portion has plenty of the crumbly dirt and playful worms for a messy, fun treat.

    This dirt cake is perfect for any spooky gathering or a quick family treat. Its playful presentation makes it endlessly shareable and amusing for kids and adults alike. Plus, it’s a fantastic way to bring a little messy joy into your holiday table.

    As fall winds down and Halloween doors open, this recipe offers a delightful escape into nostalgic chaos. It’s more than just a dessert; it’s a sprinkle of childhood magic with each gooey bite and crawling worm. Enjoy the fun, and let the good times roll on your Halloween table.

  • Hidden Spice Twist on Classic Apple Cake

    Hidden Spice Twist on Classic Apple Cake

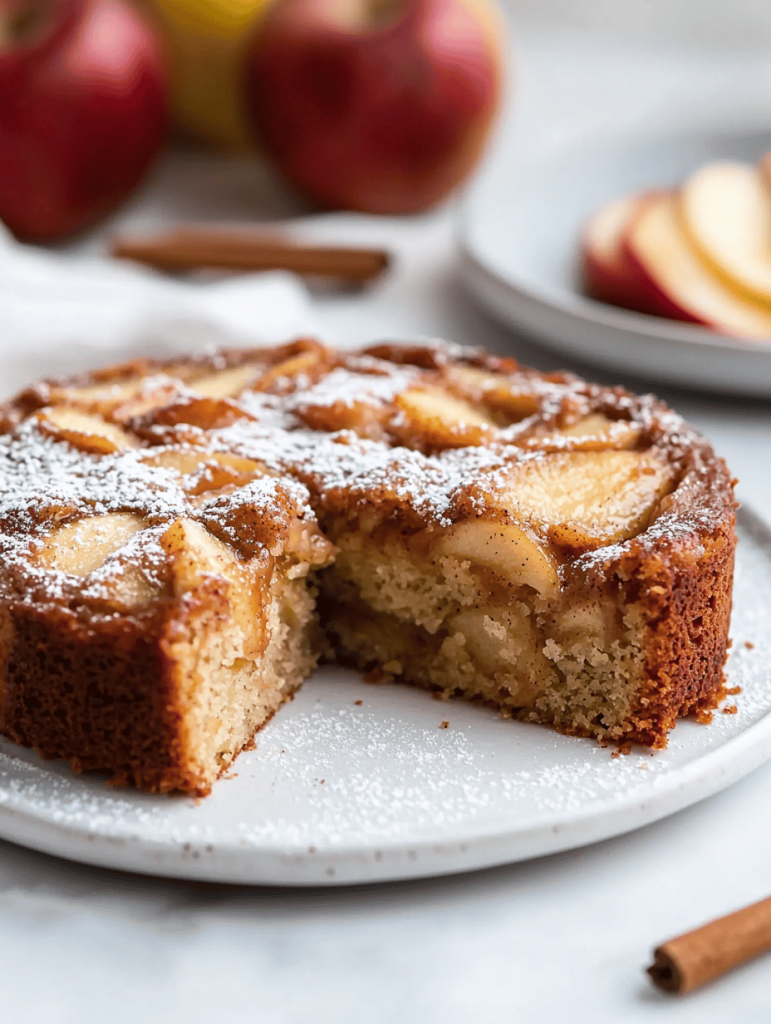
    Most apple cakes are sweet and familiar, but this recipe takes an unexpected turn by incorporating a hint of cinnamon and a dash of ground ginger, giving it a warm, spicy depth. The infusion of these spices makes the aroma alone worth baking for, filling your kitchen with a cozy scent that beckons everyone in. It’s perfect for crisp autumn days when apples are ripe and your mood calls for something a little different.

    Besides the spice, I love how this cake balances tender fruit and moist crumb with a slightly dense texture that’s just right. The secret ingredient? A splash of apple cider in the batter, adding a subtle tang and moisture. Every bite promises a burst of apple flavor complemented by those fragrant spices, making it both nostalgic and intriguingly new.

    This recipe is about elevating a classic with warmth and complexity, transforming simple ingredients into a comforting, sophisticated treat. It’s a celebration of fall’s bounty with a surprising twist. Baking it always feels like packaging a little bit of the season’s magic into every slice.

    Spiced Apple Cake

    This apple cake combines tender, moist crumbs with chunks of fresh apple, enhanced by warm cinnamon and ground ginger. The batter is infused with apple cider, resulting in a moist texture and a fragrant aroma. Its slightly dense crumb and caramelized apple pieces create a cozy, yet complex dessert appearance.
    Prep Time 15 minutes
    Cook Time 40 minutes
    Total Time 55 minutes
    Servings: 8
    Course: Main Course
    Cuisine: American
    Calories: 250

    Ingredients
      

    • 2 cups all-purpose flour sifted
    • 1 teaspoon ground cinnamon
    • 1/2 teaspoon ground ginger
    • 1 cup granulated sugar
    • 1/2 cup unsalted butter melted and cooled slightly
    • 2 large eggs
    • 1 cup apple cider
    • 2 large apples peeled, cored, and chopped
    • 1 teaspoon vanilla extract
    • 1/2 teaspoon baking powder
    • 1/4 teaspoon salt

    Equipment

    • Mixing bowls
    • Whisk
    • Rubber spatula
    • 9-inch baking pan
    • Cooling rack

    Method
     

    1. Preheat your oven to 350°F (175°C) and grease a 9-inch baking pan to prepare for baking.
    2. In a large mixing bowl, whisk together the sifted flour, ground cinnamon, ground ginger, baking powder, and salt until evenly combined. This creates the dry base for the batter.
    3. In another bowl, beat the eggs and granulated sugar with a whisk until the mixture is smooth and slightly frothy, about 1-2 minutes.
    4. Stir in the melted butter, vanilla extract, and apple cider into the egg and sugar mixture until well combined. The mixture should be glossy and fragrant.
    5. Fold the wet mixture into the dry ingredients using a spatula, mixing until just combined; avoid overmixing to keep the batter tender.
    6. Gently fold in the chopped apples until evenly distributed throughout the batter, which will look slightly thick and speckled with apple pieces.
    7. Pour the batter into the prepared baking pan and smooth the top with a spatula for even baking.
    8. Bake in the preheated oven for 40-45 minutes, or until the cake is golden brown on top and a toothpick inserted in the center comes out clean.
    9. Once baked, remove the cake from the oven and set on a cooling rack; allow to cool for at least 15 minutes to set properly.
    10. Slice the cake and serve warm or at room temperature, enjoying the moist crumb speckled with tender apple pieces and fragrant spices.

    Sharing this cake is like wrapping someone in a blanket of cinnamon and apple goodness. It’s the kind of dessert that tastes even better slightly warm, with a drizzle of honey or a dusting of powdered sugar for extra charm. There’s something deeply satisfying about slicing through that caramelized top and revealing the moist, spice-kissed crumb beneath.

    In a world that moves fast, this apple cake offers a moment of slow pleasure. Its combination of flavors feels like a warm hug from an old friend—familiar but always a little bit special. Slightly spicy, softly textured, it’s a reminder that sometimes the simplest ingredients create the most memorable bites.

  • Spooky Delight: Halloween Ghost Brownies with a Twist

    Spooky Delight: Halloween Ghost Brownies with a Twist

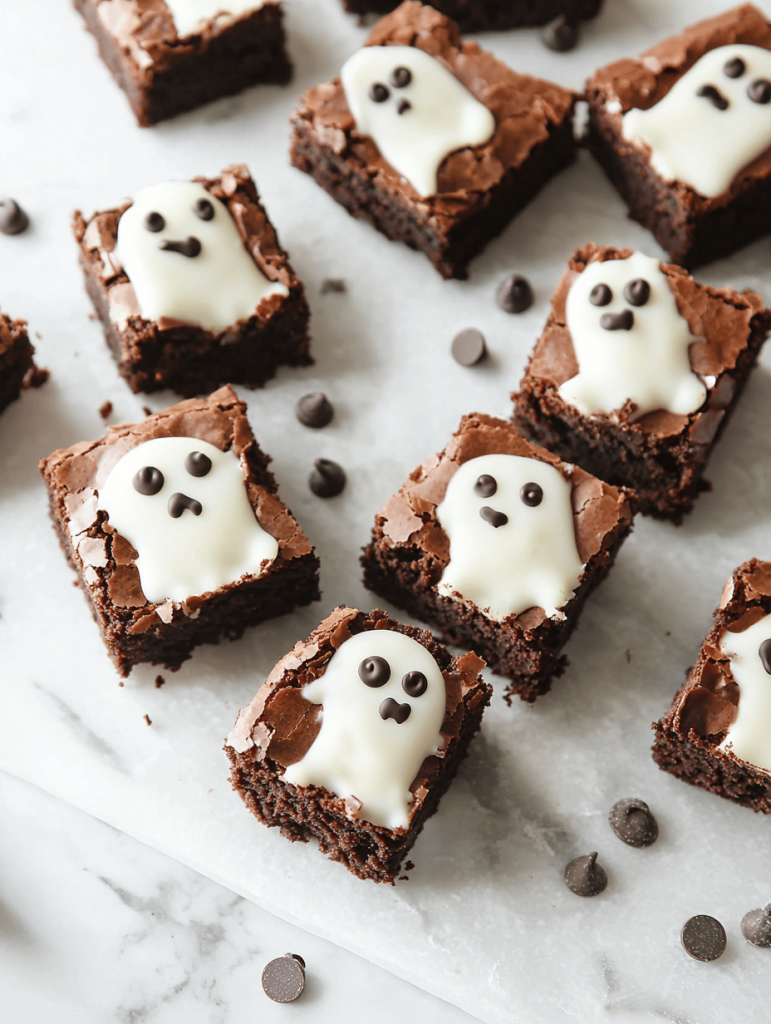
    Halloween is my favorite season for baking, but I love to do something unexpected. This year, I thought, why not turn classic brownies into adorable ghost-shaped treats that look straight out of a ghost story? The process is simple, but the effect is ridiculously charming, especially when you see the kids’ faces light up.

    What makes these Ghost Brownies special isn’t just their spooky appearance. It’s how they combine rich chocolate flavor with a playful, chaotic design that sparks joy and nostalgia. Plus, they’re perfect for both kids’ parties and grown-up gatherings that want a touch of whimsy.

    Ghost-Shaped Brownies

    This recipe transforms classic chocolate brownies into adorable ghost-shaped treats. The brownies are baked until set, then decorated with white icing and chocolate chips to resemble friendly ghosts, resulting in a soft, fudgy interior with a smooth, slightly crisp exterior that’s perfect for Halloween celebrations.
    Prep Time 20 minutes
    Cook Time 25 minutes
    Total Time 45 minutes
    Servings: 12
    Course: Main Course
    Cuisine: American
    Calories: 150

    Ingredients
      

    • 1 box brownie mix (or homemade brownie batter)
    • 1 cup white frosting for decorating
    • 48 chocolate chips chocolate chips for eyes

    Equipment

    • Mixing bowls
    • Whisk or spoon
    • 9×13 inch baking pan
    • Parchment paper
    • Cooling rack
    • Piping bag or plastic squeeze bottle
    • Small spoon or toothpick

    Method
     

    1. Preheat the oven to 350°F (175°C). Line the baking pan with parchment paper, leaving overhang for easy removal.
    2. Mix the brownie batter according to the package instructions or prepare your homemade batter, ensuring it’s smooth and well combined.
    3. Pour the batter into the prepared pan and spread evenly with a spatula. Tap the pan gently to remove air bubbles.
    4. Bake in the oven for about 25 minutes, or until a toothpick inserted in the center comes out with moist crumbs.
    5. Remove the pan from the oven and let the brownies cool completely on a wire rack. This helps them set and makes decorating easier.
    6. Once cooled, lift the brownies out of the pan using the parchment overhang, and cut into small, irregular ghost-shaped pieces.
    7. Fill a piping bag or squeeze bottle with white frosting. Pipe a rounded, ghostly head on each brownie piece, leaving a little space at the top to form the ghost’s
    8. Use chocolate chips to create small, round eyes on each ghost, pressing them gently into the frosting to secure.
    9. Optionally, pipe small drips of frosting from the bottom of each ghost to give a floating, spectral appearance.
    10. Arrange the decorated ghost brownies on a platter, and they are ready to serve. Enjoy their soft, fudgy texture with playful, spooky decorations.

    Notes

    For added fun, experiment with different shapes and expressions for your ghosts. Using mini marshmallows or candies can add variety to the decorations.
    As the evening falls and the ghosts of Halloween start to haunt the streets, these brownies will bring smiles and a little bit of spooky fun to your party. They’re a reminder that sometimes, the best treats are the ones that make us laugh and relax. No matter how you decorate, these ghostly confections are sure to cast a sweet spell.

    Enjoy baking and sharing these playful brownies — a perfect mix of chaos, charm, and chocolate. They’re simple enough to whip up in a hurry but impressive enough to be the star of your dessert table. After all, Halloween is about celebrating creativity and a touch of spooky magic.

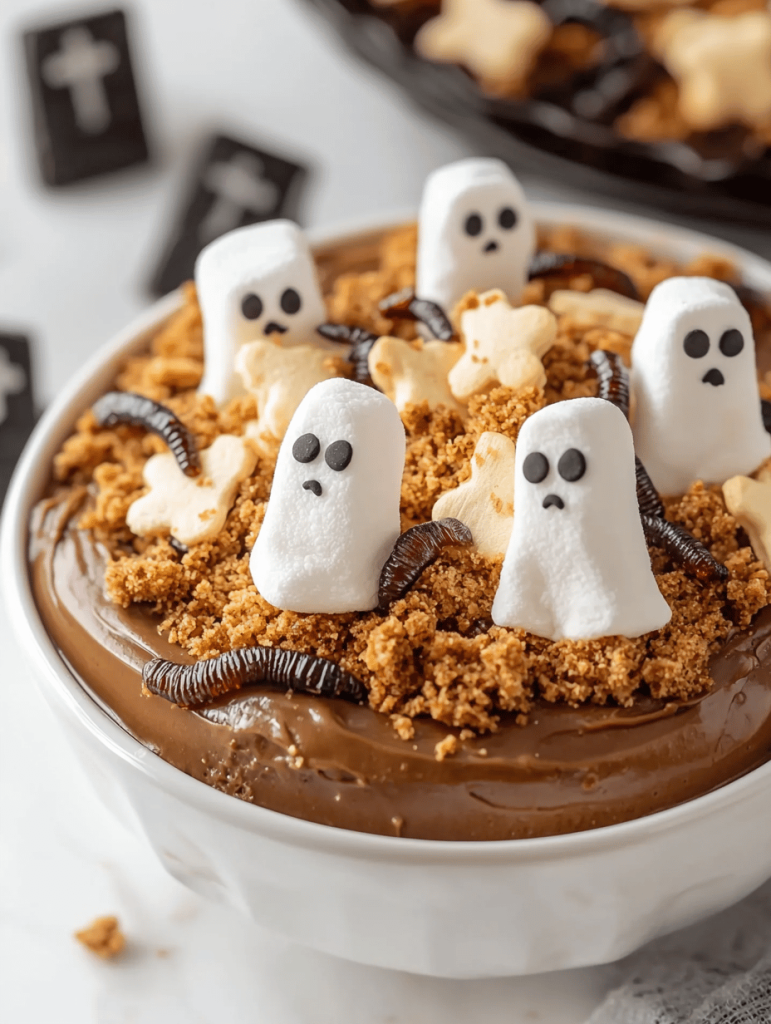
  • Spooky Sweetness: Halloween Graveyard Pudding Cups

    Spooky Sweetness: Halloween Graveyard Pudding Cups

    As the leaves turn and the air chills, I find myself drawn to the whimsical chaos of Halloween. This year, I want to elevate the classic pudding cup by transforming it into a miniature graveyard—an edible scene straight out of a spooky story. It’s a perfect activity to bring a little eerie fun to the dessert table.

    Each layer of this graveyard pudding is a blend of childhood nostalgia and creative chaos. The combination of creamy chocolate pudding, crushed cookies, and quirky edible details feels like a delightful spell cast on your taste buds. Plus, who can resist digging into such a fun, spooky treat with a tiny shovel?

    Spooky Halloween Graveyard Pudding

    This dessert consists of layered chocolate pudding, crushed cookies, and edible decorations arranged to resemble a miniature spooky graveyard. The creamy pudding provides a smooth base, while the crushed cookies add texture and a dark, soil-like appearance. Final presentation features small edible gravestones and spooky details, creating a fun, eerie scene suitable for a festive occasion.
    Prep Time 20 minutes
    Cook Time 10 minutes
    Total Time 30 minutes
    Servings: 4
    Course: Main Course
    Cuisine: festive
    Calories: 250

    Ingredients
      

    • 2 cups milk for pudding
    • 1 packet chocolate pudding mix instant
    • 1 cup heavy cream for extra creaminess
    • 1/2 cup granulated sugar optional, for whipped topping
    • 1 cup crushed cookies graham crackers or chocolate cookies
    • small edible gravestone decorations pre-made or homemade fondant stones
    • optional spooky edible details tiny plastic spiders, edible eyes, or candy cobwebs

    Equipment

    • Mixing bowls
    • Whisk
    • Measuring cups and spoons
    • Small spatula
    • Serving cups or small jars
    • Spoons

    Method
     

    1. Prepare the chocolate pudding by whisking the pudding mix with milk until smooth and slightly thickened, about 2-3 minutes. Pour the prepared pudding into a bowl and set aside.
    2. In a separate bowl, whip the heavy cream (and sugar if using) until soft peaks form, creating a fluffy whipped topping.
    3. Gently fold the whipped cream into the prepared pudding to create a creamy, layered mixture.
    4. Spoon a layer of the pudding mixture into the bottom of each serving cup or small jar, smoothing the surface with the back of a spoon.
    5. Sprinkle a generous layer of crushed cookies over the pudding to resemble dark soil, creating a textured, earthy surface.
    6. Repeat layering with another spoonful of pudding and a sprinkle of crushed cookies to build a mini graveyard scene.
    7. Decorate the top with edible gravestone decorations, inserting small fondant stones or placing pre-made gravestones into the pudding layers.
    8. Add spooky edible details, such as tiny candy spiders or web decorations, to enhance the eerie effect.
    9. Optional: Chill the assembled desserts in the refrigerator for at least 10 minutes to set the layers and meld the flavors.
    10. Serve immediately or refrigerate until ready to enjoy, revealing a spooky miniature landscape of chocolate, cookies, and festive decorations.

    This Graveyard Pudding Cups recipe reminds us that Halloween is more than just tricks—it’s about creating moments of laughter and surprise. Putting these creepy little cups together makes the celebration feel extra special, especially when shared with loved ones. It’s a fun tradition that sparks giggles and uninhibited creativity.

    As the season’s chills settle in, cozy up with your spooky creations and enjoy the simple thrill of turning dessert into a scare-worthy scene. Sometimes, the chaos of decorating a spooky treat is what makes the holiday memorable. So, gather your ingredients and get ready to turn dessert into a creepy masterpiece.

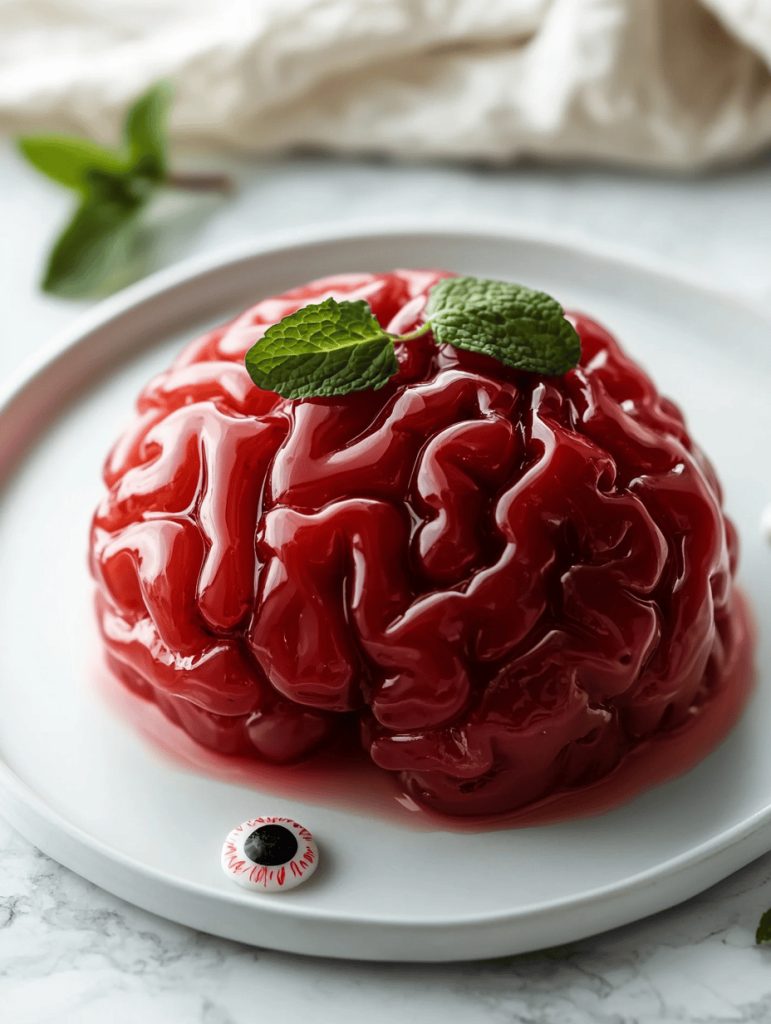
  • Ghastly Gourmet: Halloween Brain Jello Mold

    Ghastly Gourmet: Halloween Brain Jello Mold

    Every October, I chase after the weirdest, most spellbinding treats to celebrate the spooky season. This year, I stumbled upon a bizarrely delightful idea—turning Jello into a creepy, brain-like mold that looks more terrifying than tasty. The smell of citrus and cherry gelatin bubbling together makes my kitchen feel like a haunted laboratory.

    Crafting this spooky brain takes me back to childhood Halloweens when gross-out treats reigned supreme. But adding a touch of my own chaos turns it into a centerpiece that’s as much a conversation starter as it is a dessert. With just a few simple ingredients and a dash of humor, this dish is pure mischief on a plate.

    Spooky Brain Jello Mold

    This dish is a gelatin-based dessert that mimics a creepy, brain-like appearance using cherry and citrus-flavored gelatin layers. The recipe involves dissolving gelatin in hot liquids, pouring into molds, and chilling until set to create a textured, jiggly final look. The result is a visually startling, semi-soft mold with a distinctive brain-like surface, perfect for Halloween parties.
    Prep Time 15 minutes
    Cook Time 10 minutes
    Total Time 4 minutes
    Servings: 8
    Course: Main Course
    Cuisine: seasonal
    Calories: 80

    Ingredients
      

    • 1 package cherry-flavored gelatin e.g., Jello brand
    • 1 cup hot water boiling or very hot
    • 1 cup cold citrus juice orange or lemon juice
    • 1 cup cold water

    Equipment

    • Saucepan
    • Mold or Brain-shaped silicone mold
    • Whisk
    • Measuring cups and spoons
    • Mixing bowls

    Method
     

    1. Place the cherry-flavored gelatin powder in a mixing bowl, ready for mixing.
    2. Pour the hot water over the gelatin powder and whisk vigorously until the powder is completely dissolved and the mixture is clear.
    3. Add the cold citrus juice and cold water to the hot gelatin mixture, stirring gently to combine. The mixture will start to thicken slightly and turn vibrant red.
    4. Pour the gelatin mixture into a skull or brain-shaped mold, filling it about halfway to create layers that resemble brain tissue.
    5. Place the mold in the refrigerator and chill until the gelatin is firm, about 1 to 2 hours.
    6. Remove the mold from the fridge and gently pour a second layer of gelatin over the first, adding more of the mixture to build up a thicker brain-like structure.
    7. Return the mold to the refrigerator and chill again until fully set, about another 2 hours or overnight for best results.
    8. Once set, gently loosen the edges of the gelatin from the mold with a butter knife and carefully invert onto a serving plate.
    9. Carefully lift the mold away, revealing the creepy, brain-like gelatin structure with textured ridges and folds.
    10. Optionally, garnish with edible eyes, red syrup, or additional citrus slices for a more gruesome effect.
    11. Serve chilled and enjoy the spooky, jiggly, brain-like dessert that’s perfect for Halloween celebrations.

    Filling a room with squeals or giggles, this Brain Jello Mold is perfect for any haunted party or creepy gathering. Its gory appearance is balanced by a surprisingly fruity flavor, making it oddly satisfying. Plus, it’s a stress-relieving project that turns out to be more fun than scary.

    Enjoy pulling the gooey, wobbly brains apart at the table, watching everyone’s reactions. This recipe isn’t just about the looks—it’s about creating memorable moments in the chaos of Halloween. A little bit gross, a little bit genius, it’s the kind of treat that keeps the spirit mischievous and lively.

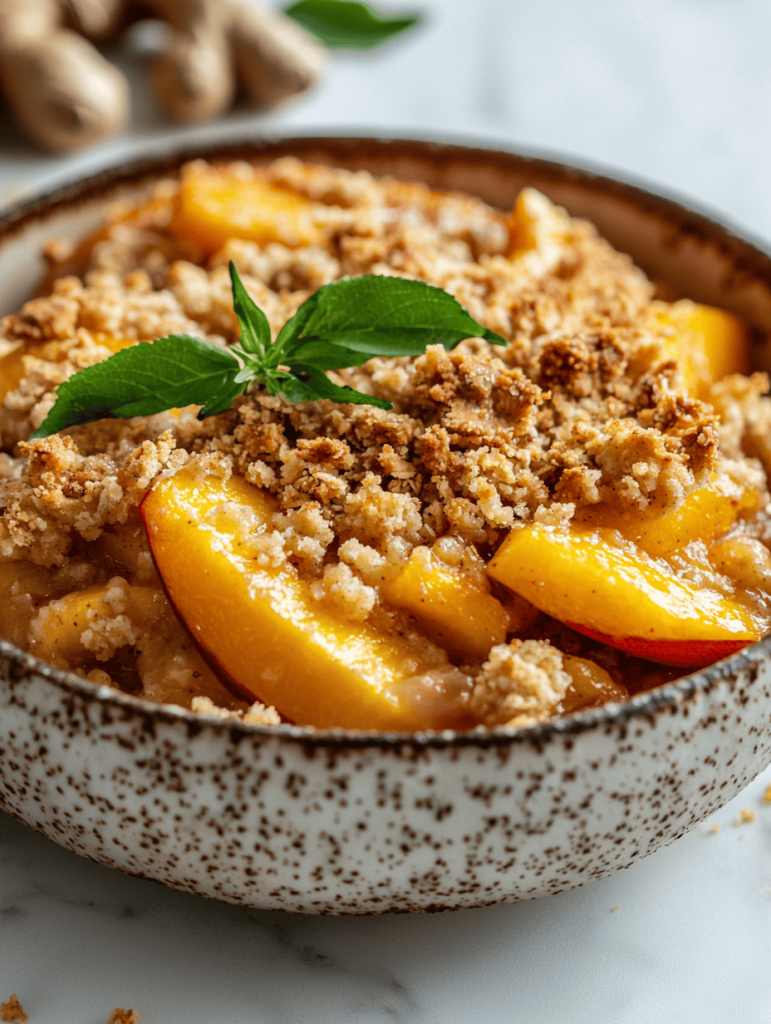
  • Summer Peach Crumble with a Secret Twist

    Summer Peach Crumble with a Secret Twist

    Few desserts scream nostalgia louder than a bubbling peach crumble. The way the sweet juices mingle with buttery oats is a smell that can warm even the coldest days. But this version? It’s a whisper of a secret ingredient—ginger—that makes every bite unexpectedly bold.

    Imagine slicing into ripe, fragrant peaches just as they release a burst of juice, topped with crispy, golden oats that crackle under your fork. This isn’t just comfort food; it’s an adventure for your taste buds, blending the summery sweetness with a spicy hint of ginger. Perfect for slow afternoons or spontaneous gatherings.

    Ginger Peach Crumble

    This peach crumble combines ripe, juicy peaches with a crispy oat topping infused with warming ginger. The dish is assembled in layers and baked until bubbling and golden brown, resulting in a sweet and spicy dessert with a tender fruit interior and crunchy topping.
    Prep Time 15 minutes
    Cook Time 40 minutes
    Total Time 55 minutes
    Servings: 6
    Course: Main Course
    Cuisine: American
    Calories: 320

    Ingredients
      

    • 4 cups peach slices ripe and fragrant
    • 1 tablespoon granulated sugar for peaches
    • 1 teaspoon ground ginger adds warmth and spice
    • 1 cup old-fashioned oats for topping
    • 1/2 cup all-purpose flour creates crumbly texture
    • 1/2 cup packed brown sugar for sweetness and moisture
    • 1/2 cup unsalted butter cold and cubed for crumble topping

    Equipment

    • Mixing bowls
    • Baking dish
    • Oven
    • Peeler

    Method
     

    1. Preheat your oven to 375°F (190°C). Prepare the baking dish by lightly greasing it or lining with parchment paper.
    2. Slice ripe peaches into thin wedges, discarding pits, and place them in a mixing bowl.
    3. Add sugar and ground ginger to the peaches, then gently toss everything together until the slices are evenly coated and fragrant.
    4. Transfer the coated peaches into the prepared baking dish, spreading them out into an even layer.
    5. In a separate mixing bowl, combine oats, flour, and brown sugar, stirring to blend.
    6. Add the cold, cubed butter to the dry mixture and use your fingers or a pastry cutter to work it in until the mixture resembles coarse crumbs.
    7. Spoon the crumble mixture evenly over the peaches, covering all the fruit with a crumbly layer.
    8. Place the baking dish in the oven and bake for about 40 minutes, or until the topping is golden brown and bubbling around the edges.
    9. Remove from oven and let cool for a few minutes; the juices will thicken slightly as it rests.
    10. Serve warm, perhaps with a scoop of vanilla ice cream or a dollop of whipped cream for added indulgence.

    So, whether you’re celebrating a summer bounty or just craving a cozy dessert, this peach crumble offers a delightful twist. Its smell alone is enough to bring everyone together around the table. No matter the occasion, it’s a simple way to dive into the season’s best flavors.

    Get ready for the aroma of baked peaches mingling with caramelized oats that makes the kitchen smell like a memory in the making. It’s a dessert that’s quick to assemble but waiting to impress. The kind of dish that leaves a little extra space on your plate for the next forkful.

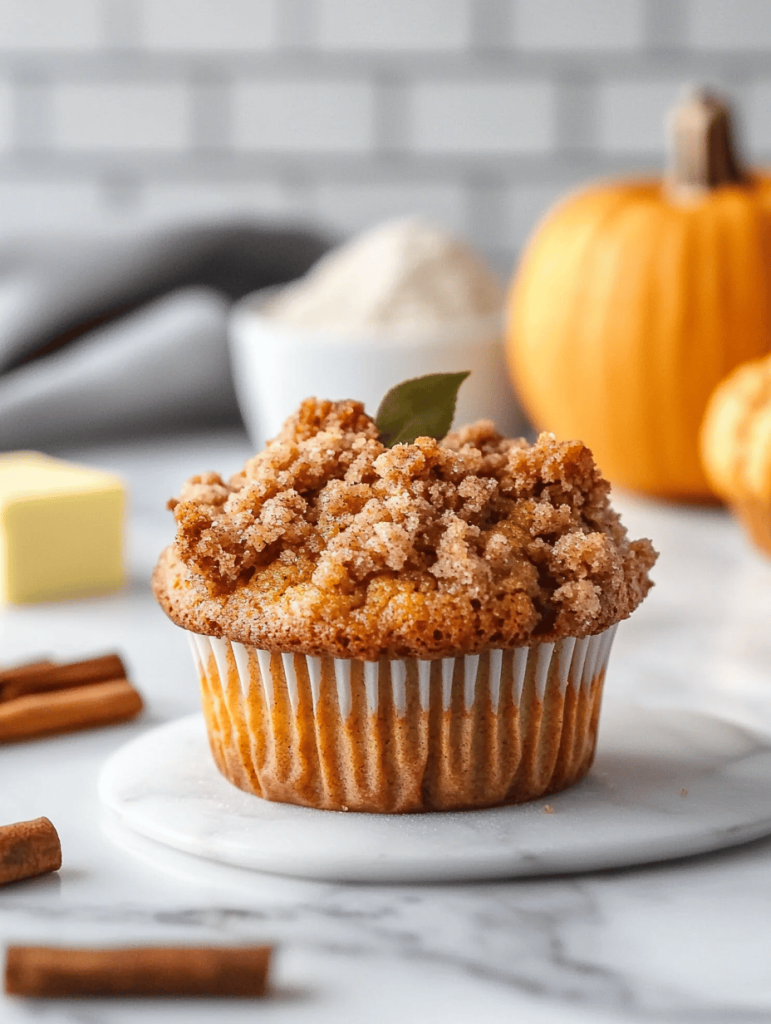
  • Spiced Pumpkin Muffins: A Cozy Fall Twist

    Spiced Pumpkin Muffins: A Cozy Fall Twist

    As the leaves turn amber and the air grows crisp, I find myself craving more than just a scoop of pumpkin-spiced latte. These pumpkin muffins bring a comforting scent of cinnamon and nutmeg that instantly transports me to autumn mornings. The best part? They’re surprisingly simple to whip up with a handful of pantry staples.

    This recipe isn’t just about pumpkin; it’s about layering flavors and textures. Each bite delivers a moist crumb with a hint of sweetness, complemented by crunchy streusel topping. These muffins are perfect for brunch or a mid-morning treat while watching the seasonal change outside.

    Pumpkin Muffins with Streusel Topping

    These pumpkin muffins are moist and tender with a hint of cinnamon and nutmeg, featuring a crunchy streusel topping for added texture. They are made by mixing wet and dry ingredients, assembling with a crumble topping, and baking until golden brown for a fluffy, visually appealing final product.
    Prep Time 15 minutes
    Cook Time 20 minutes
    Total Time 35 minutes
    Servings: 12
    Course: Main Course
    Cuisine: American
    Calories: 220

    Ingredients
      

    • 1 ½ cups all-purpose flour
    • 1 cup granulated sugar
    • 1 cup canned pumpkin unsweetened
    • ½ cup vegetable oil
    • 3 large eggs
    • 1 ½ teaspoons baking powder
    • 1 teaspoon ground cinnamon
    • ½ teaspoon ground nutmeg
    • ¼ teaspoon salt
    • ½ cup brown sugar for streusel topping
    • cup all-purpose flour for topping
    • ¼ cup granulated sugar for topping
    • ¼ cup unsalted butter cold

    Equipment

    • Mixing bowls
    • Whisk
    • Muffin tin
    • Measuring cups and spoons
    • Small bowl for streusel
    • Pastry cutter or fork

    Method
     

    1. Preheat your oven to 375°F (190°C) and line a muffin tin with paper liners.
    2. In a large mixing bowl, whisk together the flour, sugar, baking powder, cinnamon, nutmeg, and salt until well combined.
    3. In a separate bowl, beat the eggs, then stir in the pumpkin and vegetable oil until smooth.
    4. Pour the wet mixture into the dry ingredients and fold gently until just combined, avoiding overmixing to keep the muffins tender.
    5. Spoon the batter into the prepared muffin tin, filling each cup about ¾ full.
    6. To make the streusel topping, combine brown sugar, flour, and granulated sugar in a small bowl. Dice the cold butter and cut it into the dry mixture using a pastry cutter or fork until crumbly.
    7. Sprinkle the streusel evenly over the muffin batter.
    8. Bake the muffins in the preheated oven for 20-25 minutes, or until a toothpick inserted into the center comes out clean and the tops are golden brown.
    9. Remove the muffins from the oven and let them cool for a few minutes before transferring to a wire rack to cool completely. The streusel will be crisp and the muffins moist and fluffy inside.
    Baking these pumpkin muffins adds a warm touch to any fall day. The aroma alone makes the whole house feel cozy and inviting. Once they’re out of the oven, the bits of toasted streusel echo the crisp fall air around us.

    The joy of baking something so versatile and flavorful reminds me how comforting simple ingredients can become. They’re excellent with a splash of cold milk or a dollop of whipped cream. In a season full of change, these muffins offer a small, satisfying moment of warmth and nostalgia.

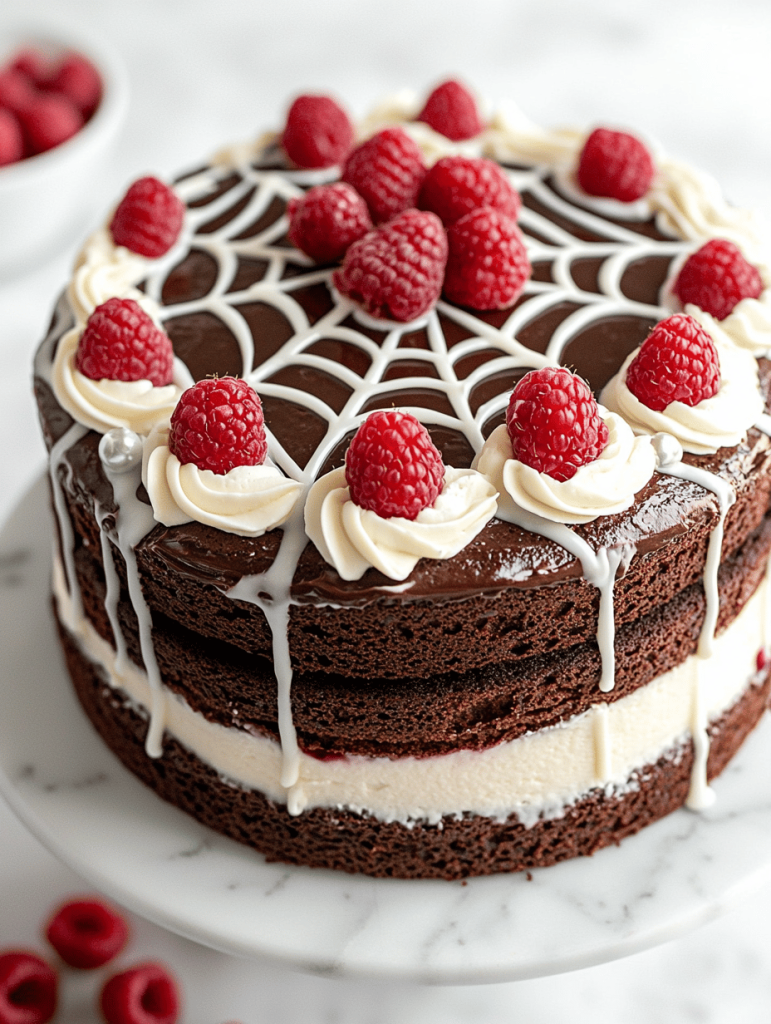
  • Spooky Webbed Wonder: The Halloween Spider Web Cake

    Spooky Webbed Wonder: The Halloween Spider Web Cake

    Every October, I find myself longing for a dessert that captures the spooky spirit of Halloween while satisfying my sweet tooth. This year, I decided to craft something both visually haunting and delicious—a Spider Web Cake that looks like it came straight from a haunted house. The best part? It’s easy to assemble, even in the chaos of a holiday rush.

    As a baker fascinated by decorating tricks, I love how this cake transforms a simple layered treat into a creepy masterpiece that’s fun to make and even more fun to serve. The web design can be customized with different colors, making it perfect for any spooky theme. Plus, the smell of vanilla and chocolate swirling together as it bakes is pure autumn magic.

    Spider Web Cake

    This Spider Web Cake is a layered chocolate and vanilla sponge adorned with a chocolate web pattern. The cake combines moist, tender crumb textures with a decorative topping that replicates a spooky spider web design, perfect for Halloween festivities.
    Prep Time 30 minutes
    Cook Time 30 minutes
    Total Time 1 hour
    Servings: 8
    Course: Main Course
    Cuisine: American
    Calories: 580

    Ingredients
      

    • 2 cups all-purpose flour sifted
    • 1.5 cups granulated sugar
    • 1/2 cup unsweetened cocoa powder sifted
    • 1 tsp baking powder
    • 1/2 tsp baking soda
    • 1/2 tsp salt
    • 1 cup buttermilk at room temperature
    • 1/2 cup vegetable oil
    • 3 large eggs at room temperature
    • 2 tsp vanilla extract
    • 1.5 cups all-purpose flour sifted for vanilla sponge
    • 1 cup granulated sugar
    • 1/2 tsp baking powder
    • 1/4 tsp salt
    • 1/2 cup milk whole or 2%
    • 1/3 cup vegetable oil
    • 2 large eggs at room temperature
    • 2 tsp vanilla extract
    • 1 pound dark chocolate chopped
    • 1 cup heavy cream
    • 1 cup powdered sugar
    • 1 tsp vanilla extract
    • 1 black gel food coloring for web pattern or black cocoa powder as alternative

    Equipment

    • Mixing bowls
    • Electric mixer or whisk
    • Cake pans (8-inch round)
    • Cooling racks
    • Piping bag with fine tip
    • Spatula

    Method
     

    1. Preheat your oven to 350°F (175°C). Grease two 8-inch round cake pans and line the bottoms with parchment paper for easy removal.
    2. In a large bowl, whisk together 2 cups of sifted flour, sugar, cocoa powder, baking powder, baking soda, and salt until well combined and smooth.
    3. Add the buttermilk, vegetable oil, eggs, and vanilla extract to the dry mixture. Mix on medium speed until the batter is smooth, about 2-3 minutes. Scrape down the sides as needed.
    4. Divide the batter evenly between the prepared cake pans and smooth the tops with a spatula. Bake for 25-30 minutes, or until a toothpick inserted in the center comes out clean.
    5. Allow the cakes to cool in the pans for 10 minutes, then turn them out onto cooling racks to cool completely.
    6. Meanwhile, prepare the chocolate ganache by heating the heavy cream until just simmering, then pouring it over the chopped dark chocolate. Let sit for 2 minutes, then stir until smooth and glossy. Chill until slightly thickened.
    7. Whip the chilled heavy cream with powdered sugar, vanilla, and one teaspoon of vanilla extract until stiff peaks form. Set aside.
    8. Spread a layer of whipped cream frosting over the first cake layer, then top with the second layer. Cover the entire cake with a thin coat of frosting to seal in crumbs, then chill for 30 minutes.
    9. Apply a final smooth layer of frosting over the chilled cake. Pour the cooled ganache over the top, allowing it to drip down the sides naturally for a layered effect.
    10. Fill a piping bag fitted with a fine tip with the black food coloring or cocoa powder mixture. Pipe concentric circles across the top of the cake and use a toothpick to draw lines from the center outward, creating a web pattern.
    11. Finish by adding small spider decorations if desired, or extra web details for a spooky effect. Slice and serve to reveal the layered interior and striking web design.

    Notes

    For best results, chill the assembled cake for at least an hour before decorating. Use a steady hand for piping the web and consider using food coloring gel for vibrant, precise lines.

    This Spider Web Cake is more than just a dessert; it’s an experience that makes Halloween feel a bit more magical and a lot more mischievous. Its haunting design is perfect for parties or a cozy night in with friends and family. As you slice into it, you’ll love how the web pattern holds up, revealing soft layers of chocolate and vanilla.

    With a few simple supplies and a touch of creativity, you can turn an ordinary cake into a spooky centerpiece. The fun of this project lies in the little details—twisted web lines and gooey spider accents—that add charm and chaos to your spooky spread. Here’s to trying new tricks and tasting sweet successes every October.

  • Spooky Sweetness: Halloween Pumpkin Cheesecake Bars You Can’t Miss

    Spooky Sweetness: Halloween Pumpkin Cheesecake Bars You Can’t Miss

    Every October, my kitchen transforms into a pumpkin patch of chaos and delight. But this year, I decided to embrace the wild side of Halloween baking with a twist on the classic pumpkin treat. Imagine a creamy, velvety cheesecake layer nestled into a buttery graham cracker crust, all dressed up with spooky, edible decoration.

    What makes these Pumpkin Cheesecake Bars stand out isn’t just the vibrant orange hue or the holiday appeal. It’s the subtle spice, the silky texture, and the way they evoke childhood memories of carving pumpkins and trick-or-treating. Plus, they’re easier to serve than a whole pumpkin-shaped dessert, making them perfect for spooky gatherings.

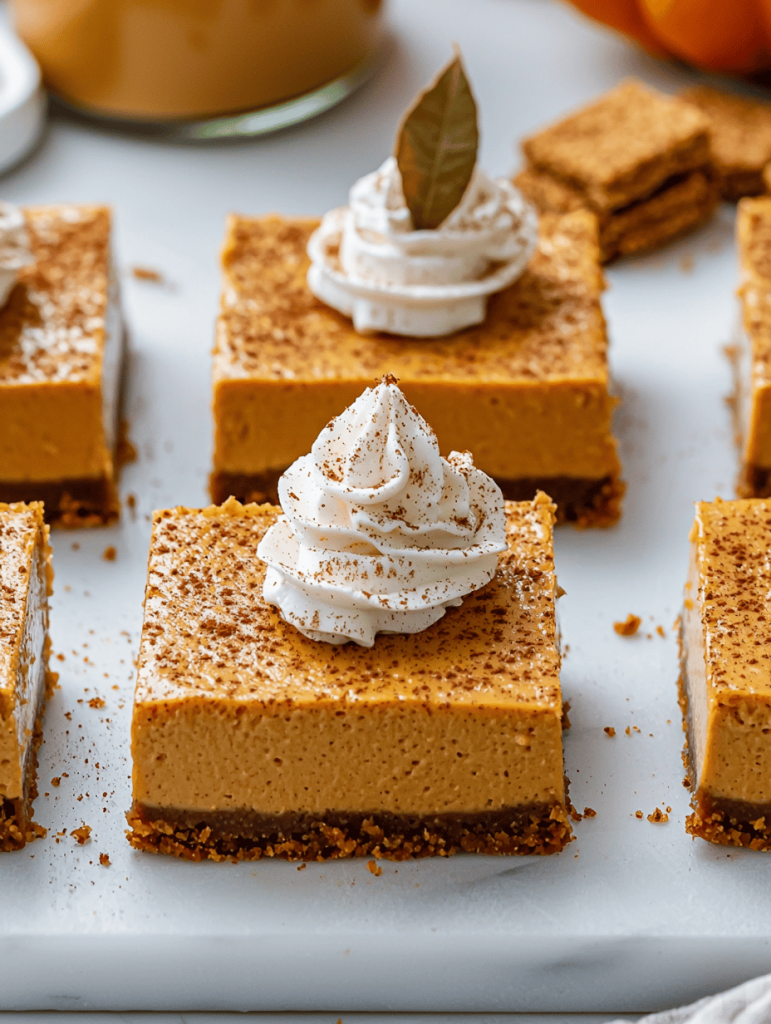
    Pumpkin Cheesecake Bars

    Pumpkin Cheesecake Bars consist of a buttery graham cracker crust topped with a silky, spiced pumpkin cream cheese layer. The dessert features a smooth, velvety texture with vibrant orange coloring, finished with festive edible decorations. They are baked until set and have a creamy yet firm bite, ideal for seasonal gatherings.
    Prep Time 20 minutes
    Cook Time 30 minutes
    Total Time 50 minutes
    Servings: 12
    Course: Main Course
    Cuisine: American
    Calories: 290

    Ingredients
      

    • 1 1/2 cups graham cracker crumbs about 10-12 whole graham crackers processed
    • 1/4 cup granulated sugar
    • 6 tablespoons unsalted butter melted
    • 16 oz cream cheese softened
    • 3/4 cup packed light brown sugar
    • 1 cup canned pumpkin puree
    • 3 large eggs
    • 1 1/2 teaspoons ground cinnamon
    • 1/2 teaspoon ground ginger
    • 1/4 teaspoon ground nutmeg
    • 1/4 teaspoon ground cloves
    • 1/2 teaspoon vanilla extract

    Equipment

    • 9×13 inch baking pan
    • Mixing bowls
    • Electric mixer or whisk
    • Rubber spatula
    • Measuring cups and spoons
    • Baking sheet
    • Cooling rack

    Method
     

    1. Preheat your oven to 350°F (175°C). In a mixing bowl, combine graham cracker crumbs and granulated sugar. Stir in melted butter until the mixture resembles wet sand. Press this mixture evenly into the bottom of a lined 9×13 inch baking pan to form the crust. Bake for 8-10 minutes, then remove and let cool slightly.
    2. In a large mixing bowl, beat softened cream cheese and light brown sugar with an electric mixer until smooth and creamy, about 2-3 minutes.
    3. Add canned pumpkin puree, eggs, ground cinnamon, ginger, nutmeg, cloves, and vanilla extract to the cream cheese mixture. Whisk or beat until fully combined and the mixture is smooth, about 2-3 minutes. The filling should be bright orange and velvety.
    4. Pour the pumpkin cheesecake filling over the cooled crust, spreading it evenly with a spatula. Smooth the top so it’s flat and level.
    5. Bake in the preheated oven for 25-30 minutes, or until the edges are set and the center has a slight jiggle. The filling may puff up a bit, and the surface will turn a deeper orange hue.
    6. Once baked, remove from oven and transfer to a wire rack to cool completely. Refrigerate for at least 2 hours or until chilled and firm before slicing.
    7. Cut into squares or bars with a sharp knife, creating clean, even pieces. Decorate with edible decorations like candy eyes or sprinkles for a festive look, if desired.

    These bars are not just a dessert; they’re a celebration of the season’s cozy, spicy essence. As the cool air settles in, the scent of cinnamon and pumpkin fills the house, bringing everyone together around the table. It’s amazing how a simple treat can spark such festive cheer.

    Whether for a last-minute party or a quiet night in with a horror flick, these pumpkin cheesecake bars add that extra touch of seasonal charm. They’re a reminder that the best treats don’t have to be complicated — just creamy, spicy, and unexpectedly joyful.