Category: Appetizers

  • Spooky Halloween Deviled Egg Eyeballs for a Ghoulish Party

    Spooky Halloween Deviled Egg Eyeballs for a Ghoulish Party

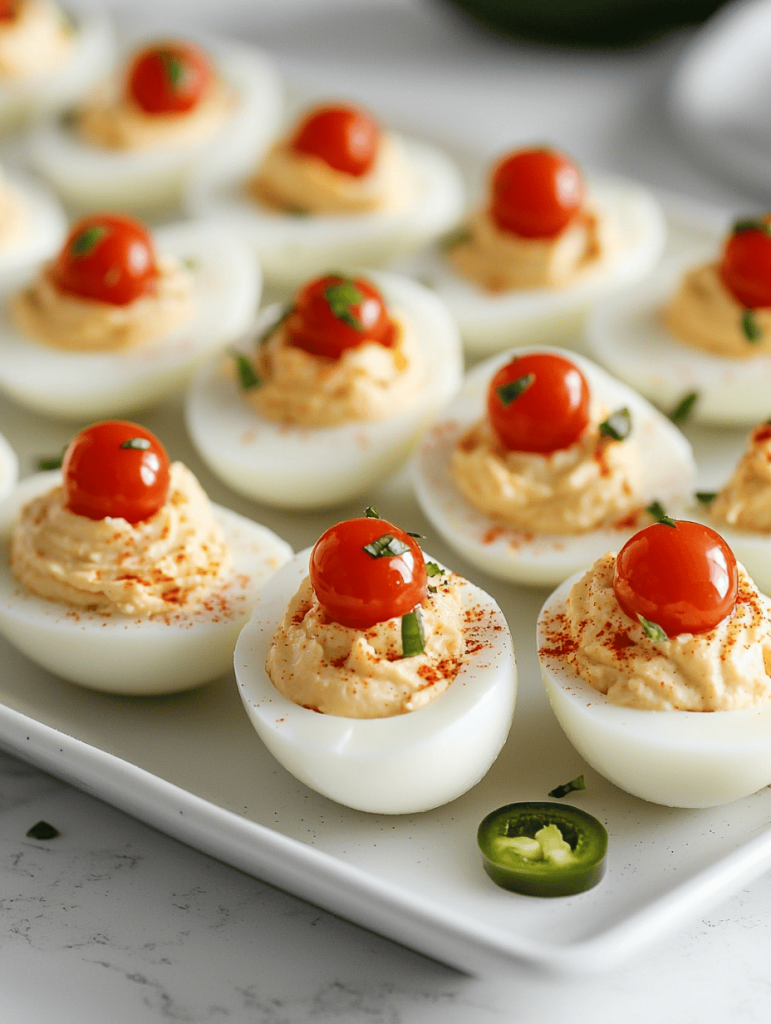
    Halloween is the perfect time to embrace the creepy and the kooky, and what better way than with these eyeball-inspired deviled eggs? Using simple ingredients, you can turn ordinary eggs into a sinister snack that fascinates both kids and adults alike. The squeal of delight or giggles they trigger are a testament to their creepy charm.

    What makes this recipe so fun is the combination of familiar flavors with a spooky twist. The creamy yolk filling, marred with a touch of food coloring and topped with a faux iris of olive or pimiento, creates a realistic eyeball effect. It’s as if vampires or monsters themselves served these up for a midnight feast.

    Eyeball-Inspired Deviled Eggs

    This dish features hard-boiled eggs with creamy yolk filling that is colored and shaped to resemble creepy eyeballs. The eggs are topped with pimiento or olive slices to mimic irises, creating a spooky and fun appetizer with a smooth, firm texture and a striking appearance.
    Prep Time 20 minutes
    Cook Time 10 minutes
    Total Time 30 minutes
    Servings: 12
    Course: Main Course
    Cuisine: American
    Calories: 85

    Ingredients
      

    • 6 large eggs for boiling and filling
    • 3 tablespoons mayonnaise for creamy filling
    • 1 teaspoon yellow mustard adds tang to the filling
    • to taste salt and pepper for seasoning
    • 2 drops food coloring red food coloring to tint yolk for creepy effect
    • 6 small pimientos or green olives for iris detail

    Equipment

    • Saucepan
    • Mixing bowl
    • Whisk
    • Piping bag or plastic sandwich bag
    • Small knife

    Method
     

    1. Place eggs in a saucepan and cover with water. Bring to a boil over medium-high heat, then reduce to a simmer and cook for 10 minutes. Remove eggs and transfer to cold water; let them cool completely.
    2. Gently tap each egg on the counter to crack the shell, then peel carefully to reveal the smooth white and yolk inside.
    3. Slice each peeled egg in half lengthwise and carefully scoop out the yolks into a mixing bowl. Set the whites aside.
    4. Add mayonnaise and yellow mustard to the yolks. Mix until smooth and creamy. If desired, add a few drops of red food coloring and fold in gently to tint the mixture for a spooky look.
    5. Transfer the yolk mixture into a piping bag fitted with a small tip or a plastic sandwich bag with the corner snipped off. Pipe the filling back into each egg white half, creating a rounded, slightly domed top.
    6. Take small slices of pimientos or olives and cut them into tiny circles or ovals.
    7. Place one pimiento or olive slice on top of each filled egg to mimic the iris of an eyeball. For added creepy detail, you can add a smaller dot of green or contrasting color inside.
    8. Arrange the completed eyeball deviled eggs on a serving platter. Chill in the refrigerator if not serving immediately to keep them firm and fresh.

    Notes

    For extra creepy effects, use black sesame seeds for pupils or add a tiny drop of food coloring inside the iris slides.

    These deviled egg eyeballs are a perfect appetizer for Halloween gatherings, creating a comic but slightly chilling atmosphere. They’re quick to prepare and surprisingly easy to customize with different edible eyes or colors. Plus, they make for a fun kitchen project that sparks the imagination.

    Enjoy their playful spookiness as part of your haunted feast. The mix of textures and vibrant colors will keep guests amazed and on their toes. These creepy little bites bring a dash of chaos and a lot of cheer to any spooky celebration.

  • Spooktacular Ghost Veggie Platter for a Hauntingly Good Time

    Spooktacular Ghost Veggie Platter for a Hauntingly Good Time

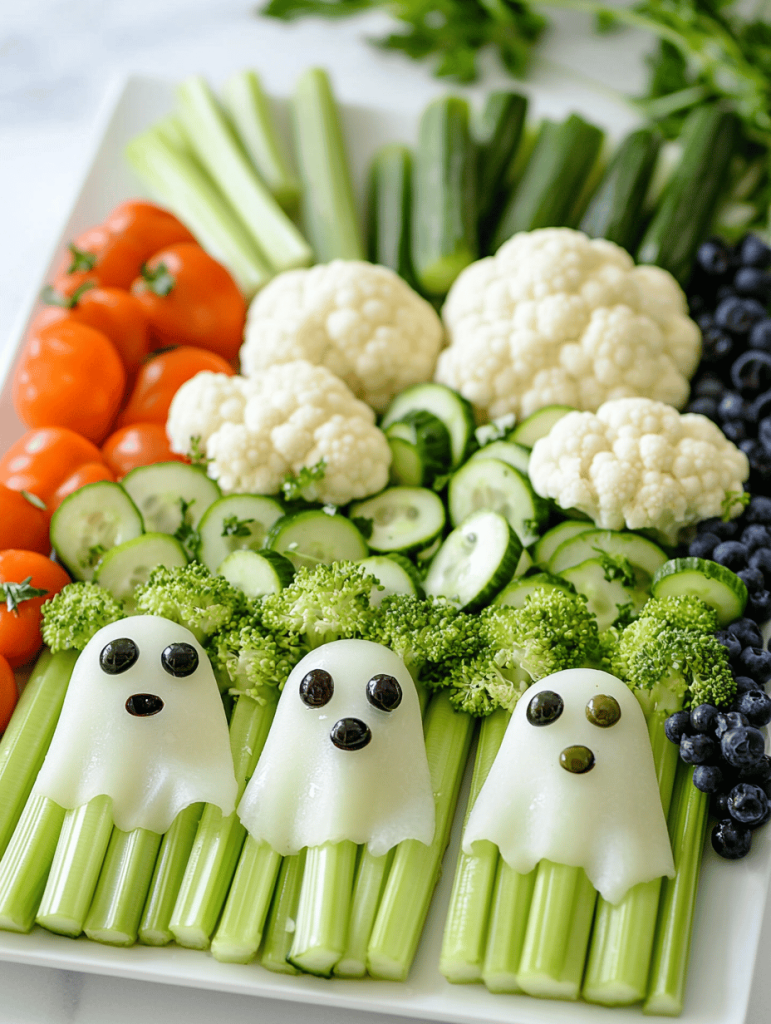
    Creating a Halloween centerpiece that delights both the eyes and the taste buds is easier than you’d think. This Ghost Veggie Platter turns crisp vegetables into adorable, spooky figures that are perfect for any party table. The best part? It’s surprisingly simple to assemble, with just a few ingredients and a sprinkle of creativity.

    Imagine a platter where crunchy cucumbers become ghostly faces, and bright bell peppers add cheerful pops of color. It’s a festive way to encourage veggie eating during the spooky season. Plus, it’s a fantastic conversation starter that will have your guests smiling before they even dig in.

    Ghost Veggie Platter

    This Ghost Veggie Platter features crisp, fresh vegetables arranged into fun, spooky ghost shapes, accented with edible decorations to bring Halloween cheer to the table. The vegetables are sliced, arranged, and decorated to create adorable ghostly figures with a playful and festive appearance. The final presentation is colorful, inviting, and perfect for a Halloween party centerpiece.
    Prep Time 15 minutes
    Total Time 15 minutes
    Servings: 8
    Course: Main Course
    Cuisine: Halloween
    Calories: 20

    Ingredients
      

    • 2 cups cucumber slices sliced into rounds
    • 1 red bell pepper red bell pepper seeds removed and sliced into strips
    • 1 yellow bell pepper yellow bell pepper sliced into thin strips
    • 1 carrot carrot cut into small rounds or thin strips
    • optional small edible decorations or food-safe markers for eyes and mouth details

    Equipment

    • Serving platter
    • Small knives
    • Cutting Board
    • Food-safe markers or small edible decorations

    Method
     

    1. Arrange cucumber slices on the platter to form the body of ghost figures, leaving space between each for decoration.
    2. Use small pieces of red or yellow bell pepper to create arms or additional features on the ghosts, positioning them appropriately.
    3. Slice a small piece of carrot into tiny rounds or strips to serve as eyes and mouths for each ghost figure.
    4. Place the carrot rounds carefully onto the cucumber slices to resemble eyes and mouths, balancing gently to prevent shifting.
    5. Optional: Use edible food-safe markers to draw spooky or playful expressions on the vegetables, enhancing the ghostly appearance.
    6. Arrange the finished veggie ghosts and decorations attractively on the serving platter, interspersing colorful peppers for visual fun.

    Notes

    Feel free to add other vegetables like radishes or cherry tomatoes for variety. Using food-safe markers makes facial details easy and fun.
    This Ghost Veggie Platter is more than just eye-catching; it’s also a healthy, fun addition to any Halloween celebration. Kids and adults alike will enjoy munching on these eerie, adorable veggies. It’s a playful way to bring a touch of ghostly charm to your season.

    As haunted house parties and pumpkin patches fill your calendar, this platter offers a cheerful, no-fuss snack that fits right in. The fresh crunch and vibrant colors are perfect for chasing away the seasonal gloom. Enjoy creating this treat and watch as it instantly transforms your table into a festive, spooky scene.

  • Spook-tacular Halloween Mummy Hot Dogs: A Delightful Nightmare

    Spook-tacular Halloween Mummy Hot Dogs: A Delightful Nightmare

    Halloween is the perfect time to unleash your inner culinary monster. These Mummy Hot Dogs combine playful spookiness with nostalgic comfort, making them a hit at any spooky gathering. I love how they turn simple ingredients into adorable, edible creatures that spark joy and a little chaos in the kitchen.

    As I wrap tiny strips of dough around hot dogs, I’m transported back to childhood Halloweens, where every bite had a hint of magic. This recipe is a fun way to get everyone involved, from chopping ingredients to the squeals of delight when they see these creepy mummies. Plus, they’re quick to make, so no need for hours in the kitchen—just pure, messy fun.

    These mummy hot dogs are more than just party snacks. They’re a conversation starter, perfect for falling leaves and crisp autumn air. Making food at home this season feels extra special when it’s a little wild and a lot adorable.

    Mummy Hot Dogs

    Mummy Hot Dogs are a savory appetizer featuring hot dogs wrapped in strips of dough to resemble mummies. The dough crisps up during baking, while the hot dogs retain a chewy texture, with playful
    Prep Time 15 minutes
    Cook Time 15 minutes
    Total Time 30 minutes
    Servings: 8
    Course: Main Course
    Cuisine: Halloween
    Calories: 220

    Ingredients
      

    • 8 pieces hot dogs standard size
    • 1 roll canned crescent roll dough or pre-made pizza dough
    • 1 egg egg wash beaten, for brushing
    • Optional for decoration small candies or black edible markers for eyes

    Equipment

    • Baking sheet
    • Cooking scissors or knife

    Method
     

    1. Preheat your oven to 375°F (190°C) and line a baking sheet with parchment paper for easy cleanup.
    2. Unroll the crescent dough onto a clean surface and cut it into thin strips, approximately 1/4 inch wide, using sharp scissors or a knife. These strips will become the mummy ‘bandages.’
    3. Place each hot dog on the baking sheet. Use a small spoon or your fingers to slightly flatten the hot dogs if needed, so the dough can wrap evenly around them.
    4. Wrap the strips of dough around each hot dog, overlapping slightly and leaving a small space at the top for the ‘face.’ Press the ends of the dough gently to seal as you go, creating a bandaged mummy appearance.
    5. Once wrapped, brush each mummy with the beaten egg wash. This will give the dough a shiny, golden finish as it bakes.
    6. Bake in the preheated oven for about 12-15 minutes, or until the dough turns golden brown and crispy. Keep an eye on them to prevent burning.
    7. Remove the mummies from the oven and let them cool for a few minutes. If desired, add small candies or use edible markers to draw eyes on the exposed hot dog ends to give your mummies spooky faces.
    8. Serve your Mummy Hot Dogs warm, arranged on a platter, for a fun and spooky treat that’s perfect for Halloween gatherings.

    Notes

    Feel free to customize with different eyes or add additional decorations for extra spooky fun.
    In the end, Halloween is all about embracing the silly and spooky. These mummy hot dogs are a simple way to add a bit of magic to your table without much fuss. They’re a reminder that the best bites are those filled with a little imagination and a lot of flavor.

    So, gather your ingredients, turn up some spooky tunes, and let the chaos of decorating and assembling begin. These creepy little hot dogs are sure to become a Halloween tradition, whispering tales of past spooky nights and tasty memories to come.

  • Spooky Bat-Shaped Halloween Guacamole That Will Charm Every Guest

    Spooky Bat-Shaped Halloween Guacamole That Will Charm Every Guest

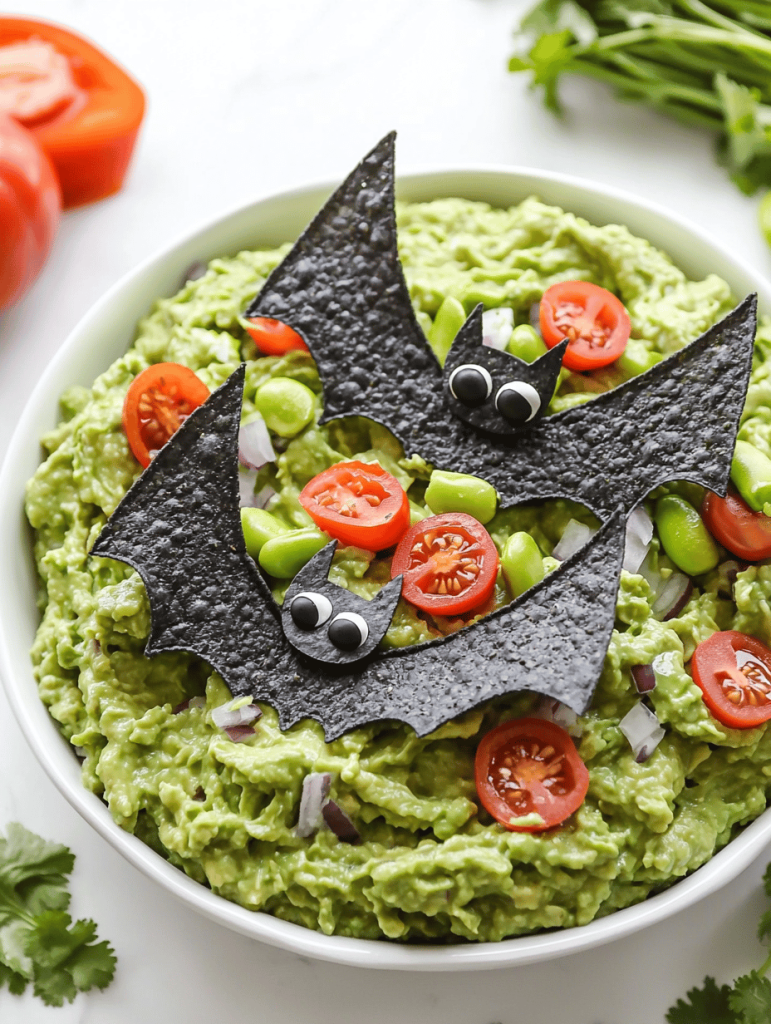
    Halloween is the perfect time to unleash creativity in the kitchen, and this bats-themed guacamole does just that. It transforms a simple dip into a festive centerpiece with just a few clever touches, making it a hit at any spooky gathering. The aroma of ripe avocados mixed with zesty lime and cilantro fills the air, promising refreshment and fun.

    Using tortilla chips shaped like bats adds an extra layer of charm. These crunchy artwork pieces evoke both nostalgia and chaos—it’s hard not to smile as guests dip into the green, glossy guacamole. Plus, it’s impressively easy to assemble, allowing you to focus on all the spooky details around your party.

    Halloween Bats Guacamole

    This festive guacamole features a creamy blend of ripe avocados, lime juice, and cilantro, combined with visual touches resembling bats. The dip has a smooth, vibrant green appearance with a glossy texture, topped with bat-shaped tortilla chips for a playful presentation. It’s perfect as a colorful, flavorful appetizer for Halloween gatherings.
    Prep Time 15 minutes
    Total Time 15 minutes
    Servings: 6
    Course: Main Course
    Calories: 180

    Ingredients
      

    • 3 ripe avocados halved, pitted
    • 1 lime lime juice freshly squeezed
    • 1/4 cup cilantro chopped
    • 1/2 tsp salt or to taste
    • 1/4 cup diced tomato optional, for garnish
    • for serving tortilla chips bats-shaped for decoration

    Equipment

    • Mixing bowl
    • Fork or potato masher
    • Knife
    • Cutting Board
    • Serving platter

    Method
     

    1. Scoop the avocado flesh into a mixing bowl and mash it with a fork or potato masher until smooth but still slightly chunky.
    2. Add freshly squeezed lime juice to the mashed avocado to help preserve color and add brightness. Mix well to combine.
    3. Stir in the chopped cilantro and salt, adjusting the seasoning to taste. Continue to mix until evenly incorporated.
    4. Transfer the guacamole into a serving dish and smooth the top with the back of a spoon for an even surface.
    5. Place bat-shaped tortilla chips onto the surface of the guacamole, arranging them to resemble fluttering bats flying across the dip.
    6. Optionally, sprinkle some diced tomato around the bats for added color and a fresh touch.

    Notes

    Ensure the tortilla chips are shaped like bats beforehand. The guacamole can be made ahead and kept refrigerated until serving. Assemble just before guests arrive for the best presentation.

    This Halloween, turn your snack table into a spooky scene with this playful guacamole. It’s not just about taste but creating a visual feast that sparks conversation and giggles. Guests will love the surprise of bat-shaped chips and the fresh, vibrant flavors of the dip.

    In a season ripe with costumes and tricks, this recipe reminds us that the little details make the festivities special. Whether you’re hosting a small gathering or a big blowout, the combination of bright green guacamole and black bat chips keeps everyone delighted and coming back for more. Happy haunting!

  • Spooky Charm: The Halloween Spider Cheese Ball

    Spooky Charm: The Halloween Spider Cheese Ball

    Halloween parties crave a mix of creepiness and deliciousness, and what better way to surprise your guests than with a Spider Cheese Ball? Its jovial, creepy crawly look transforms a simple cheese appetizer into a festive centerpiece. The aroma of softened cream cheese and sharp cheddar blends with the earthy scent of black olives, making it oddly irresistible.

    This recipe is all about unexpected fun. Assemble it in minutes, but its spidery silhouette sparks joy and a bit of chaos at the table. Plus, it’s incredibly versatile—perfect for both playful kids and bold adult palates. It’s a perfect project for a chilly October evening filled with spooky movies and pumpkin carving.<\/p>

    Spider Cheese Ball

    The Spider Cheese Ball is a creamy, savory cheese spread shaped into a spherical form with black olive details to resemble a spider. It features softened cream cheese mixed with sharp cheddar, creating a smooth texture, and is decorated with olive pieces for the spider’s body and legs. The final presentation is a playful, creepy crawly appetizer perfect for Halloween parties.
    Prep Time 15 minutes
    Total Time 15 minutes
    Servings: 8
    Course: Main Course
    Cuisine: American
    Calories: 180

    Ingredients
      

    • 8 oz cream cheese, softened room temperature
    • 1 1/2 cups shredded sharp cheddar cheese
    • 1/2 cup finely chopped green onions
    • 1 tsp garlic powder
    • black olives, sliced and halved

    Equipment

    • Mixing bowl
    • Plastic wrap
    • Serving platter
    • Small sharp knife
    • Spoon

    Method
     

    1. Combine the softened cream cheese, shredded cheddar, chopped green onions, and garlic powder in a mixing bowl. Mix thoroughly with a spoon until the mixture is smooth, evenly combined, and slightly sticky, with a bright yellow-orange hue.
    2. Transfer the mixture onto a large piece of plastic wrap. Shape it with your hands into a tight, smooth sphere, pressing gently to eliminate cracks. Wrap it securely in plastic and refrigerate for at least 30 minutes to firm up.
    3. Once chilled, carefully unwrap the cheese ball and place it on a serving platter. Use a spoon to smooth out the surface if needed for a clean look.
    4. Gently press sliced black olives onto the top of the cheese ball to create the spider’s body, arranging pieces to resemble a round torso.
    5. Using a small sharp knife, cut additional olive slices in half lengthwise to create the spider’s legs. Carefully insert eight olive halves around the body, four on each side, to mimic spider legs.
    6. Adjust the olives and shape the spider as desired for a balanced, spooky look, making sure the legs are evenly spaced.
    7. Serve immediately with crackers, sliced baguette, or vegetable sticks for a fun Halloween appetizer. The cheese ball can also be made a day ahead and kept refrigerated until ready to serve.

    Notes

    For a more realistic spider, use small pieces of pretzels for legs or add decorative eyes with tiny bits of black olive or peppercorns.

    As the evening winds down, one thing is certain—this Halloween Spider Cheese Ball will leave everyone smiling and snacking. Its combination of tactile textures and savory flavors strikes just the right balance between spooky and tasty. It’s a reminder that holiday treats can be both playful and comforting, even in the midst of the October rush.

    Enjoy crafting this fun dish and watch it become a new Halloween favorite. The gooey, cheesy goodness with its creepy crawly appearance captures the spirit of the season perfectly. With just a little effort, you’ll have a festive something that sparks conversations and keeps the party lively.

  • Spooky Savory: Halloween Stuffed Bell Pepper Jack-o’-Lanterns

    Spooky Savory: Halloween Stuffed Bell Pepper Jack-o’-Lanterns

    Creating Halloween-themed dishes often involves heavy, sugary treats. But this year, I dared to do something different: turning vibrant bell peppers into spooky Jack-o’-Lanterns filled with savory goodness. The visual contrast of orange peppers with melting cheese makes them both a feast for the eyes and the palate.

    This recipe taps into childhood nostalgia while adding a playful, slightly chaotic twist. It’s perfect for those who love a bit of culinary mischief and want to impress guests without a ton of fuss. Plus, it’s a fantastic way to use up leftover vegetables in a fun, festive way.

    Stuffed Halloween Bell Peppers

    This dish features vibrant orange bell peppers hollowed out and filled with a savory mixture of cooked rice, ground meat, vegetables, and seasonings. The peppers are baked until tender and the filling is bubbling, with melted cheese on top for a cheesy, rustic appearance. The final presentation resembles festive Jack-o’-Lanterns with a warm, hearty interior.
    Prep Time 15 minutes
    Cook Time 30 minutes
    Total Time 45 minutes
    Servings: 4
    Course: Main Course
    Cuisine: American
    Calories: 320

    Ingredients
      

    • 4 large orange bell peppers preferably firm and fresh
    • 1 cup cooked rice white or brown rice, cooled
    • 1/2 pound ground beef or turkey/chicken
    • 1 cup chopped vegetables such as onion, celery, or carrots
    • 1 cup shredded cheese cheddar or mozzarella
    • 2 cloves garlic minced
    • 2 tablespoons olive oil
    • 1 teaspoon dried oregano
    • to taste salt and pepper for seasoning

    Equipment

    • Baking dish
    • Chef’s knife
    • Spoon or spatula
    • Cutting Board

    Method
     

    1. Preheat your oven to 375°F (190°C). Slice the tops off the bell peppers and carefully scoop out the seeds and membranes, creating hollow shells. Place the hollowed peppers in a baking dish.
    2. Heat olive oil in a skillet over medium heat. Add the minced garlic and chopped vegetables, sautéing until fragrant and slightly softened, about 3-4 minutes. Transfer the cooked veggies to a bowl and set aside.
    3. In the same skillet, cook the ground meat until browned and cooked through, breaking it apart with a spoon as it cooks. Season with salt, pepper, and oregano. Once done, combine with the sautéed vegetables and cooked rice, mixing well to incorporate all flavors.
    4. Spoon the filling mixture evenly into each hollowed-out pepper, pressing gently to pack the filling. Top each stuffed pepper with a generous amount of shredded cheese.
    5. Cover the baking dish with foil and bake in the preheated oven for 20 minutes, or until the peppers are tender and the filling is heated through. Remove the foil for the last 5 minutes to allow the cheese to melt and bubble.
    6. Carefully remove the dish from the oven and let the peppers cool for a few minutes. Serve hot, showcasing the vibrant orange color and melted cheese topping for a festive presentation.

    Notes

    Feel free to customize the filling with other vegetables or spices for variation. Using a sharp knife makes hollowing out the peppers easier. For a vegetarian version, substitute the meat with beans or additional vegetables.

    The bold colors and cheesy surprises make these stuffed peppers a memorable centerpiece for any Halloween gathering. They bring a cheerful, mischievous energy to the table, pairing well with fall flavors and crisp evening air. Honestly, there’s no better way to enjoy the holiday’s spirit than with a little edible art.

    As the season shifts, embracing playful, eye-catching dishes like these keeps the tradition fresh and exciting. They remind us that cooking can be as much about fun as it is about flavor. So grab your knives and cheeses—let the spooky season inspire a bit of culinary chaos.

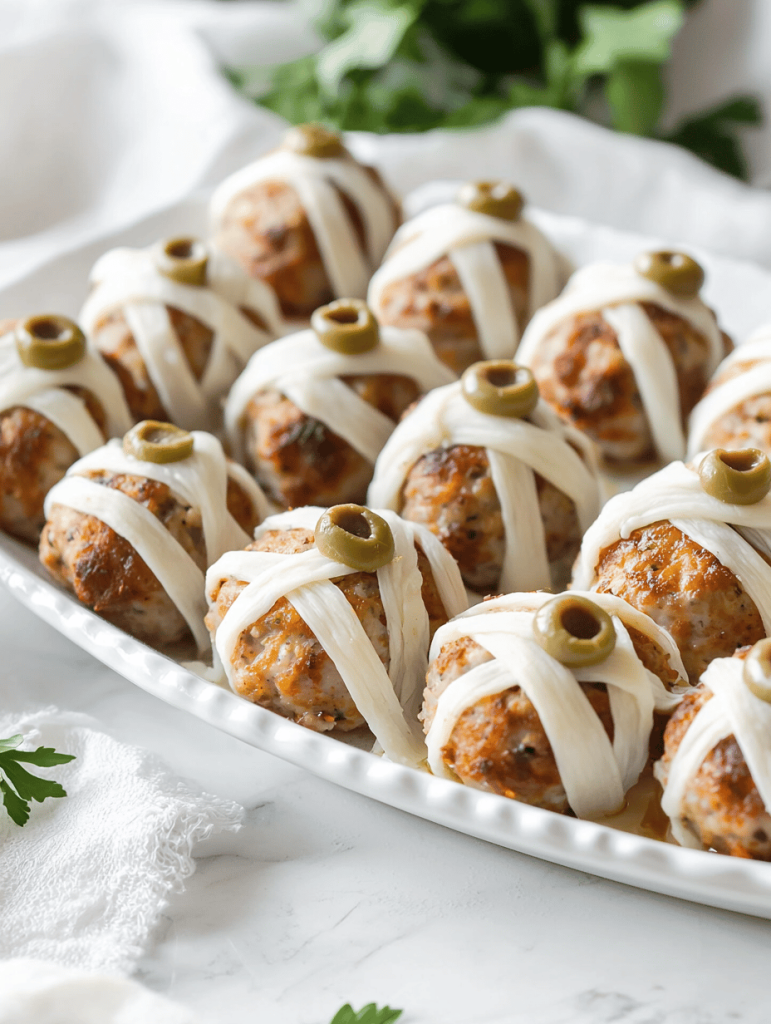
  • Spooktacularly Creepy Halloween Mummy Meatballs

    Spooktacularly Creepy Halloween Mummy Meatballs

    Halloween is my favorite time to embrace chaos and fun in the kitchen. This year, I wanted to create something that’s both spooky and nostalgic—enter the Mummy Meatballs, with an extra creepy twist. The smell of savory beef, mingled with the zing of herbs, fills my kitchen every time I make these—perfect for a holiday gathering filled with kids’ giggles and grown-up chuckles.

    What makes these meatballs special isn’t just their haunted appearance but the story behind them. I remember helping my grandma roll meatballs as a kid, the flour dust on our hands, and the warm, comforting aroma wafting through the house. This recipe makes that sense of tradition and the thrill of Halloween collide, creating a dish that’s as fun to make as it is to eat.

    Halloween Mummy Meatballs

    These Mummy Meatballs are savory beef meatballs wrapped in strips of puff pastry or crescent dough, baked until golden. Their appearance resembles tiny mummies with twisting bandages, and they have a tender, juicy interior with a crispy exterior, perfect for festive gatherings.
    Prep Time 20 minutes
    Cook Time 25 minutes
    Total Time 45 minutes
    Servings: 8
    Course: Main Course
    Cuisine: American
    Calories: 250

    Ingredients
      

    • 1 ½ pounds ground beef preferably 80/20 for juiciness
    • 1/2 cup breadcrumbs
    • 1 large egg
    • 2 cloves garlic minced
    • 2 tablespoons fresh parsley chopped
    • 1/2 teaspoon salt
    • 1/4 teaspoon black pepper
    • 1 sheet puff pastry or crescent dough dough sheets thawed if frozen
    • 1 egg beaten egg for brushing
    • optional black olives or peppercorns for eyes

    Equipment

    • Baking sheet
    • Oven
    • Mixing bowl
    • Fork
    • Baking parchment
    • Knife

    Method
     

    1. Preheat your oven to 375°F (190°C) and line a baking sheet with parchment paper.
    2. In a mixing bowl, combine the ground beef, breadcrumbs, egg, minced garlic, chopped parsley, salt, and black pepper. Mix everything together using a fork until well incorporated and the mixture is slightly sticky.
    3. Shape the meat mixture into small, roughly 1-inch diameter meatballs, placing them on the prepared baking sheet spaced evenly apart.
    4. Wrap each meatball with strips of puff pastry or crescent dough, crisscrossing the strips to resemble mummy bandages. Leave small gaps for the ‘eyes’ if desired.
    5. Brush each wrapped meatball lightly with the beaten egg to promote a golden crust during baking.
    6. Bake in the preheated oven for 20 to 25 minutes, or until the pastry is puffed and golden brown, and the meat is cooked through.
    7. Once baked, remove the mummy meatballs from the oven and let them cool slightly. For eyes, place small pieces of black olive or a peppercorn on the front of each mummy’s face.
      1 ½ pounds ground beef
    8. Arrange the mummy meatballs on a serving platter for a fun, spooky presentation. Serve warm or at room temperature.

    Notes

    For extra creepiness, you can add tiny strips of red pepper or sauce for ‘blood’ effects. Make sure to watch the baking time carefully so the pastry doesn’t burn.

    There’s something delightful about turning a simple meatball into a spooky mummy—perfect for celebrating the season. These little monsters are a hit with both kids and adults, sparking giggles and appreciation alike. Plus, they’re quick to whip up, so no one has to wait long for the fun to begin.

    As the days get shorter and the air chills, a plate of these creepy creations can bring a burst of festive cheer. Their crispy wrapping and juicy center are a reminder that sometimes, a little chaos in the kitchen makes the best memories. Happy haunting, and enjoy the spooky bites that make Halloween culinary magic.

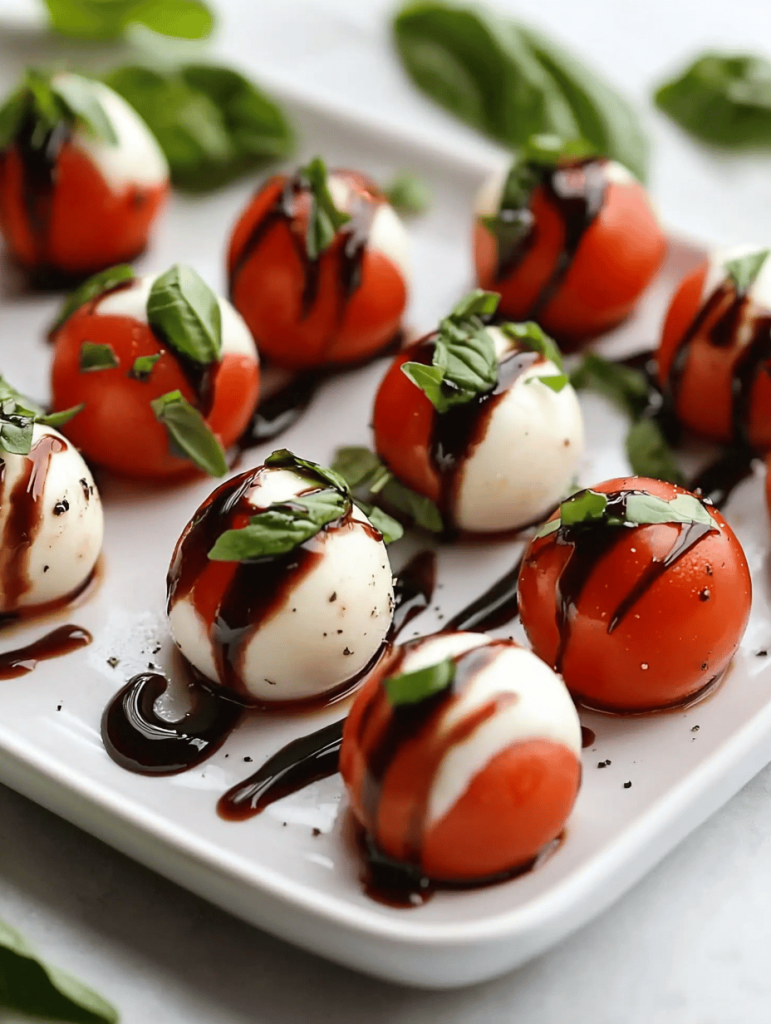
  • Spooky & Stylish: Halloween Eyeball Caprese Bites

    Spooky & Stylish: Halloween Eyeball Caprese Bites

    Halloween brings out the fun, creepy, and colorful side of the kitchen. These Eyeball Caprese Bites are a playful twist on the classic Italian starter, turning fresh mozzarella and cherry tomatoes into tiny, spooky eyes. They’re perfect for attaching a bit of whimsy to your spooky spread without much fuss.

    Imagine biting into a small orb with a ooey-gooey mozzarella center, surrounded by a bright red tomato “iris.” The little black olive or peppercorn pupil adds a creepy glare, making your guests do double takes. Despite their spooky appearance, they’re a simple, fresh, and surprisingly elegant bite-sized snack.

    WHY I LOVE THIS RECIPE?

    • The mix of bright flavors makes my taste buds dance while still looking terrifying.
    • I love how easy it is to assemble these gruesome little eyeballs with kids or friends in a chaos-filled kitchen.
    • This recipe sparks nostalgia for childhood Halloween parties — but with a chic, modern twist.
    • They look almost too fun to eat, but somehow disappear at every gathering I host.
    • The combination of textures — juicy tomato, creamy mozzarella, and crunchy skewer — is pure joy.

    AVOID MY DISASTER (You’re Welcome)

    • FORGOT to soak the skewers—rigid wood split when pierced, switch to thinner toothpicks instead.
    • DUMPED olive juice on the mozzarella—caused dull spots, rinse olives before inserting.
    • OVER-TORCHED the cheese—melty mess that oozed everywhere, keep broiler distant and watch closely.
    • FORGOT the basil leaf—missed a pop of green, tuck leaves for freshness and color contrast.

    QUICK FIXES THAT SAVE YOUR DAY

    • When mozzarella shrinks, splash with a tiny spritz of lemon juice for freshness.
    • PATCH out-of-place pupil with a fresh olive or peppercorn if it falls off.
    • Shield the mozzarella with a damp cloth if it starts to sweat or stick.
    • When olive juice stains, wipe quickly with a paper towel for clean eyes.
    • If cheese overheats, pop it in the fridge for a few minutes to firm up.

    As fall settles in and Halloween approaches, these eyeballs add a fun, unexpected touch to your party platter. They’re quick to assemble but pack enough charm and fright to spark conversation. Plus, they look super impressive on a cheese board or served as a spooky appetizer.

    Creating a themed menu doesn’t need to be complicated, and these creepy little bites prove that. With just a handful of ingredients, you can turn a simple appetizer into a memorable Halloween moment. They’ll have everyone talking and maybe even a bit squeamish — in the best way.

    ,

    Eyeball Caprese Bites

    These Eyeball Caprese Bites are small, fun appetizers made by assembling fresh mozzarella balls, cherry tomatoes, black olives or peppercorns, and basil leaves. They are assembled with toothpicks to resemble creepy eyeballs, showcasing vibrant colors and contrasting textures of creamy cheese, juicy tomatoes, and crunchy garnishes. The final presentation looks like tiny, spooky eyes perfect for Halloween parties.
    Prep Time 15 minutes
    Total Time 15 minutes
    Servings: 12
    Course: Main Course
    Cuisine: international
    Calories: 60

    Ingredients
      

    • 12 pieces fresh mozzarella balls (bocconcini or ciliegine) preferably chilled
    • 12 pieces cherry tomatoes preferably ripe and firm
    • 12 pieces black olives or peppercorns for the pupils
    • 12 leaves fresh basil leaves for green detail
    • 12 small toothpicks wooden or bamboo

    Equipment

    • Small sharp knife
    • Serving platter

    Method
     

    1. Gather all your ingredients and have your toothpicks ready. Carefully rinse the cherry tomatoes and mozzarella balls to ensure they’re clean and dry. Pluck small basil leaves and set aside.
    2. Using a small sharp knife, make a tiny incision in each cherry tomato to create an opening for the mozzarella, if needed. Carefully insert a mozzarella ball into the tomato, gently pressing to ensure it stays put.
    3. Slide a basil leaf into the mozzarella to add a pop of green and fresh flavor, placing it between the cheese and tomato if possible.
    4. Pierce a black olive or peppercorn with a toothpick and place it on top of the mozzarella to resemble a dark, creepy pupil.
    5. Insert the toothpick vertically through the tomato, mozzarella, basil, and olive, ensuring all layers are secure and the ‘eye’ is assembled.
    6. Repeat these steps for each bite, arranging them on a serving platter for a fun, spooky display.
    7. If any of the eyes need touching up, adjust the placement of pupils or basil leaves to ensure they look dramatic and uniform.
    8. Serve immediately, or chill briefly in the fridge if you want the ingredients to set nicely before presenting your spooky Halloween snack.

    Notes

    For extra creepiness, use different colored peppers or olives for pupils. Keep the mozzarella slightly chilled for easier handling. Use short, sturdy toothpicks for stability.

    In the glow of jack-o’-lanterns and the scent of cinnamon, these Eyeball Caprese Bites fit right into the season’s playful spirit. They serve as a reminder that food can be both beautiful and a little bit grotesque. It’s this fun contrast that makes Halloween gatherings so special and memorable.

    So, whether you’re hosting friends or just indulging in some seasonal fun, these eyeballs are sure to add a creative twist to your table. They’re a cheerful, slightly spooky treat that invites curiosity and cheers. Enjoy every creepy, cheesy bite of it — your Halloween will thank you for the extra flair.