Author: SophiaReed

  • A Cozy Twist: Unveiling the Secrets of the Ultimate Taco Soup

    A Cozy Twist: Unveiling the Secrets of the Ultimate Taco Soup

    Imagine a bowl that captures the essence of a street taco, yet offers the warmth and comfort of traditional soup. That?s the magic of Taco Soup, a dish that transforms simple ingredients into a fiesta of flavors. Perfect for chilly evenings or whenever you need a quick crowd-pleaser, this recipe is your new go-to.

    As someone who loves blending culinary worlds, I find the layers of flavors in Taco Soup irresistible. The aroma alone, with cumin and chili notes mingling in the air, makes my stomach rumble with anticipation. It?s like a culinary hug in every spoonful, offering both nostalgia and a touch of adventurous spice.

    Taco Soup

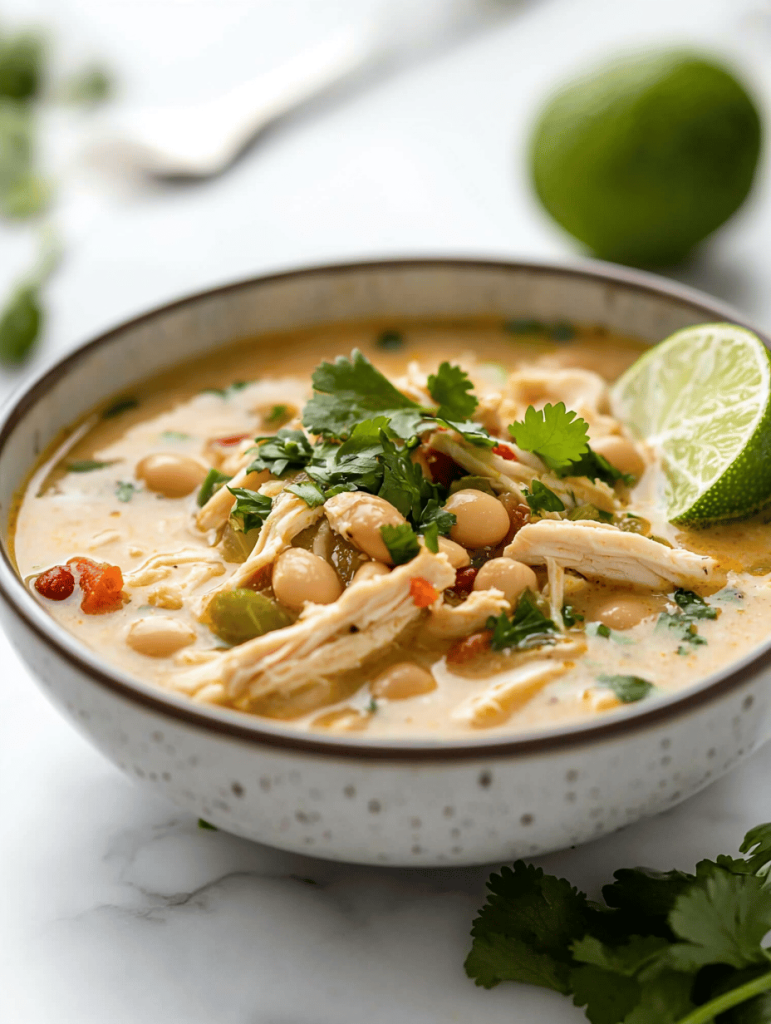
    Taco Soup is a hearty and flavorful dish combining elements of a street taco and traditional soup. It features ground meat, beans, corn, and seasonings simmered together, resulting in a thick, fragrant broth with a colorful, chunky appearance. The texture is comforting and satisfying, with tender ingredients and bold spices in every spoonful.
    Prep Time 10 minutes
    Cook Time 30 minutes
    Total Time 40 minutes
    Servings: 6
    Course: Main Course
    Cuisine: Mexican
    Calories: 250

    Ingredients
      

    • 1 pound ground beef or ground turkey
    • 1 small onion finely chopped
    • 2 cloves garlic minced
    • 1 can (15 oz) diced tomatoes
    • 1 can (15 oz) black beans drained and rinsed
    • 1 can (15 oz) corn kernels drained
    • 2 cups chicken broth
    • 2 teaspoons cumin
    • 1 teaspoon chili powder
    • 1 teaspoon paprika
    • to taste salt and pepper

    Equipment

    • Large pot
    • Wooden spoon

    Method
     

    1. Heat a large pot over medium heat and add the ground beef. Cook, breaking it apart with a wooden spoon, until browned and cooked through. Drain excess fat if necessary.
    2. Add the chopped onion and cook for about 3 minutes until translucent and fragrant. Stir occasionally to prevent sticking.
    3. Stir in the minced garlic and cook for another minute until it becomes aromatic.
    4. Add the diced tomatoes, black beans, and corn to the pot. Mix everything together evenly.
    5. Pour in the chicken broth and sprinkle in the cumin, chili powder, paprika, salt, and pepper. Stir well to combine all the flavors.
    6. Bring the mixture to a boil, then reduce the heat to low. Cover the pot and let it simmer for about 20 minutes, allowing the flavors to meld and the soup to thicken slightly.
    7. Remove the lid and give the soup a gentle stir. Taste and adjust seasoning with additional salt and pepper if needed.
    8. Serve the Taco Soup hot in bowls, garnished with your favorite toppings like shredded cheese, sour cream, or fresh cilantro if desired.
    This Taco Soup is a reminder that comfort food can also be packed with bold flavors and personality. It?s a flexible recipe that invites improvisation, making each pot a little masterpiece. Sharing it around a table turns an ordinary meal into a lively celebration.

    In a world where quick, satisfying dishes are gold, this soup stands out with its vibrant ingredients and easy steps. Plus, it?s perfect for using up pantry staples. As the seasons shift, I find myself craving warm, hearty bowls like this one — dishes that fill the kitchen with familiar aromas and spark joyful gatherings.

  • Enchanted Darkness: Halloween Black Magic Margarita

    Enchanted Darkness: Halloween Black Magic Margarita

    Ever wonder how to turn a classic margarita into a spellbinding potion? This Black Magic Margarita uses black volcanic salt and a mysterious, deep color that feels like Halloween in a glass. Perfect for adding a touch of ominous elegance to your spooky night.

    Imagine the silken texture of the tequila, kissed with smoky notes, swirling with the vivid darkness of blackberries and activated charcoal. The frosty rim, sprinkled with shimmering black salt, crackles softly as you sip, unveiling a vibrant citrus burst that cuts through the darkness. It’s a drink that is both a visual feast and an intoxicating thrill.

    This recipe isn’t just about the aesthetic; it’s about creating a mischievous moment that invites curiosity and laughter. A little chaos, a little magic—this margarita is your new Halloween ritual, blending the strange and the sublime in every sip.

    Black Magic Margarita

    A visually striking cocktail featuring a deep black hue achieved with activated charcoal and black volcanic salt. The margarita combines smooth, smoky tequila with bright citrus flavors, finished with a shimmering black salt rim and icy texture, creating a mysterious yet refreshing drink.
    Prep Time 10 minutes
    Total Time 10 minutes
    Servings: 2
    Course: Main Course
    Cuisine: cocktail
    Calories: 180

    Ingredients
      

    • 3 oz blanco tequila
    • 1 oz fresh lime juice preferably freshly squeezed
    • 0.5 oz simple syrup adjust for sweetness
    • 1 pinch activated charcoal powder food grade for drinks
    • 1 tbsp black volcanic salt for rimming the glass
    • Ice cubes ice for shaking and serving
    • Lime wedge lime wedge for garnish and moistening the glass rim

    Equipment

    • Cocktail shaker
    • Lime juicer
    • Rimming dish or shallow plate
    • Small spoon or cocktail pick

    Method
     

    1. Start by preparing your glass rims: use a lime wedge to moisten the edge of each glass, then press them into the black volcanic salt spread in a shallow dish to create a shimmering black rim.
    2. Fill your cocktail shaker with ice cubes, then pour in the tequila, fresh lime juice, and simple syrup.
    3. Add a pinch of activated charcoal powder to the shaker. This gives the cocktail its deep, smoky black color. Secure the lid tightly.
    4. Shake vigorously for about 15 seconds until the mixture is well chilled and the charcoal is fully dispersed, turning the drink a mystical deep black.
    5. Strain the mixture into the prepared glasses, pouring carefully over fresh ice if desired, to maintain clarity and color.
    6. Garnish each glass with a lime wedge on the rim and add a small spoonful of black volcanic salt on top for a shimmering, crackling garnish.

    Notes

    Ensure you use food-grade activated charcoal to avoid any health risks. Adjust the amount of simple syrup for sweeter or more tart flavors. For an extra spooky effect, serve with dry ice (with caution) to add mist around the glass.
    As the night deepens, this Black Magic Margarita remains a mysterious companion. Its rich, dark allure will surprise guests and conjure conversation. A perfect mix of fun and eerie elegance, it will make your Halloween gathering unforgettable.

    Stay playful and daring in the kitchen, and let every sip be a little spell of joy. Halloween is about embracing the wild, enchanting spirit we rarely reveal. Cheers to creating magic in every glass, one hauntingly good margarita at a time.

  • Spooky Charm: The Halloween Spider Cheese Ball

    Spooky Charm: The Halloween Spider Cheese Ball

    Halloween parties crave a mix of creepiness and deliciousness, and what better way to surprise your guests than with a Spider Cheese Ball? Its jovial, creepy crawly look transforms a simple cheese appetizer into a festive centerpiece. The aroma of softened cream cheese and sharp cheddar blends with the earthy scent of black olives, making it oddly irresistible.

    This recipe is all about unexpected fun. Assemble it in minutes, but its spidery silhouette sparks joy and a bit of chaos at the table. Plus, it’s incredibly versatile—perfect for both playful kids and bold adult palates. It’s a perfect project for a chilly October evening filled with spooky movies and pumpkin carving.<\/p>

    Spider Cheese Ball

    The Spider Cheese Ball is a creamy, savory cheese spread shaped into a spherical form with black olive details to resemble a spider. It features softened cream cheese mixed with sharp cheddar, creating a smooth texture, and is decorated with olive pieces for the spider’s body and legs. The final presentation is a playful, creepy crawly appetizer perfect for Halloween parties.
    Prep Time 15 minutes
    Total Time 15 minutes
    Servings: 8
    Course: Main Course
    Cuisine: American
    Calories: 180

    Ingredients
      

    • 8 oz cream cheese, softened room temperature
    • 1 1/2 cups shredded sharp cheddar cheese
    • 1/2 cup finely chopped green onions
    • 1 tsp garlic powder
    • black olives, sliced and halved

    Equipment

    • Mixing bowl
    • Plastic wrap
    • Serving platter
    • Small sharp knife
    • Spoon

    Method
     

    1. Combine the softened cream cheese, shredded cheddar, chopped green onions, and garlic powder in a mixing bowl. Mix thoroughly with a spoon until the mixture is smooth, evenly combined, and slightly sticky, with a bright yellow-orange hue.
    2. Transfer the mixture onto a large piece of plastic wrap. Shape it with your hands into a tight, smooth sphere, pressing gently to eliminate cracks. Wrap it securely in plastic and refrigerate for at least 30 minutes to firm up.
    3. Once chilled, carefully unwrap the cheese ball and place it on a serving platter. Use a spoon to smooth out the surface if needed for a clean look.
    4. Gently press sliced black olives onto the top of the cheese ball to create the spider’s body, arranging pieces to resemble a round torso.
    5. Using a small sharp knife, cut additional olive slices in half lengthwise to create the spider’s legs. Carefully insert eight olive halves around the body, four on each side, to mimic spider legs.
    6. Adjust the olives and shape the spider as desired for a balanced, spooky look, making sure the legs are evenly spaced.
    7. Serve immediately with crackers, sliced baguette, or vegetable sticks for a fun Halloween appetizer. The cheese ball can also be made a day ahead and kept refrigerated until ready to serve.

    Notes

    For a more realistic spider, use small pieces of pretzels for legs or add decorative eyes with tiny bits of black olive or peppercorns.

    As the evening winds down, one thing is certain—this Halloween Spider Cheese Ball will leave everyone smiling and snacking. Its combination of tactile textures and savory flavors strikes just the right balance between spooky and tasty. It’s a reminder that holiday treats can be both playful and comforting, even in the midst of the October rush.

    Enjoy crafting this fun dish and watch it become a new Halloween favorite. The gooey, cheesy goodness with its creepy crawly appearance captures the spirit of the season perfectly. With just a little effort, you’ll have a festive something that sparks conversations and keeps the party lively.

  • Frozen Fizz: The Unexpected Art of Vodka Slushies

    Frozen Fizz: The Unexpected Art of Vodka Slushies

    In the heat of summer, most people reach for water or juice, but I like to shake things up with a vodka slushie. It’s a little rebellious, a little nostalgic, and wildly customizable. The idea of freezing alcohol might seem risky, but with the right approach, it becomes a simple way to craft a chilled masterpiece.

    This recipe isn’t just about cooling down. It’s about experimenting with flavors, textures, and even memories of old family gatherings turned spontaneous soirees. I’ve found that turning a simple vodka drink into a slushy can change the entire vibe of an afternoon.

    Vodka Slushie

    A vodka slushie is a chilled frozen cocktail made by blending vodka with sweeteners and flavorings, then freezing until slushy. The final texture is smooth, icy, and scoopable, with vibrant flavors that can be customized to taste. It’s served icy cold, creating a refreshing and slightly rebellious summer treat.
    Prep Time 10 minutes
    Total Time 10 minutes
    Servings: 2
    Course: Main Course
    Cuisine: American
    Calories: 150

    Ingredients
      

    • 1 ½ cups vodka preferably a smooth, neutral vodka
    • ½ cup fruit juice or flavored syrup for flavor and sweetness
    • 2 tablespoons sugar or simple syrup adjust to taste
    • 1 cup water to help with blending and achieve the right slush consistency

    Equipment

    • Blender
    • Measuring cups and spoons

    Method
     

    1. Combine the vodka, fruit juice or flavored syrup, sugar, and water in a blender. Turn on and blend until the mixture is smooth and the sugar is fully dissolved, about 30 seconds.
    2. Pause the blender and give the mixture a quick stir with a spoon to ensure even distribution of flavors.
    3. Transfer the blender jar to the freezer. Let it freeze for about 2 hours, checking every 30 minutes to scrape down the sides with a spoon. This helps break up large ice crystals and promotes a uniform slush.
    4. After the initial freezing time, remove the mixture and blend again for about 15 seconds to break up any large ice chunks and create a smoother, more homogenized slush.
    5. Pour the mixture back into the freezer in a shallow dish or sturdy container. Let it freeze for another 1-2 hours, stirring every 30 minutes to maintain a consistent icy texture.
    6. Once the mixture reaches a scoopable, slushy consistency—similar to softer ice cream—remove from freezer. If it’s too firm, give it a quick pulse in the blender to loosen.
    7. Serve the vodka slushie immediately in chilled glasses, garnished with fresh fruit or herbs if desired. The result is a icy, refreshing cocktail with a vibrant flavor profile and a smooth, scoopable texture.

    Notes

    Adjust the sweetness and flavorings to your preference. For a boozy snow cone, increase the vodka; for a sweeter treat, add more fruit juice or syrup.

    Now, whenever I hear the ice crunching in my freezer, I think of all the fun flavors I still need to try. It’s just so satisfying to sip on something icy, fruity, and with a kick of alcohol. This recipe keeps my summer feelings alive, no matter the weather outside.

    Plus, making these vodka slushies is unexpectedly easy once you get the hang of it. They’re perfect for parties or a quiet night when you want a little something extra in your glass. Cheers to cool, boozy adventures in your kitchen!

  • Spooky Savory: Halloween Stuffed Bell Pepper Jack-o’-Lanterns

    Spooky Savory: Halloween Stuffed Bell Pepper Jack-o’-Lanterns

    Creating Halloween-themed dishes often involves heavy, sugary treats. But this year, I dared to do something different: turning vibrant bell peppers into spooky Jack-o’-Lanterns filled with savory goodness. The visual contrast of orange peppers with melting cheese makes them both a feast for the eyes and the palate.

    This recipe taps into childhood nostalgia while adding a playful, slightly chaotic twist. It’s perfect for those who love a bit of culinary mischief and want to impress guests without a ton of fuss. Plus, it’s a fantastic way to use up leftover vegetables in a fun, festive way.

    Stuffed Halloween Bell Peppers

    This dish features vibrant orange bell peppers hollowed out and filled with a savory mixture of cooked rice, ground meat, vegetables, and seasonings. The peppers are baked until tender and the filling is bubbling, with melted cheese on top for a cheesy, rustic appearance. The final presentation resembles festive Jack-o’-Lanterns with a warm, hearty interior.
    Prep Time 15 minutes
    Cook Time 30 minutes
    Total Time 45 minutes
    Servings: 4
    Course: Main Course
    Cuisine: American
    Calories: 320

    Ingredients
      

    • 4 large orange bell peppers preferably firm and fresh
    • 1 cup cooked rice white or brown rice, cooled
    • 1/2 pound ground beef or turkey/chicken
    • 1 cup chopped vegetables such as onion, celery, or carrots
    • 1 cup shredded cheese cheddar or mozzarella
    • 2 cloves garlic minced
    • 2 tablespoons olive oil
    • 1 teaspoon dried oregano
    • to taste salt and pepper for seasoning

    Equipment

    • Baking dish
    • Chef’s knife
    • Spoon or spatula
    • Cutting Board

    Method
     

    1. Preheat your oven to 375°F (190°C). Slice the tops off the bell peppers and carefully scoop out the seeds and membranes, creating hollow shells. Place the hollowed peppers in a baking dish.
    2. Heat olive oil in a skillet over medium heat. Add the minced garlic and chopped vegetables, sautéing until fragrant and slightly softened, about 3-4 minutes. Transfer the cooked veggies to a bowl and set aside.
    3. In the same skillet, cook the ground meat until browned and cooked through, breaking it apart with a spoon as it cooks. Season with salt, pepper, and oregano. Once done, combine with the sautéed vegetables and cooked rice, mixing well to incorporate all flavors.
    4. Spoon the filling mixture evenly into each hollowed-out pepper, pressing gently to pack the filling. Top each stuffed pepper with a generous amount of shredded cheese.
    5. Cover the baking dish with foil and bake in the preheated oven for 20 minutes, or until the peppers are tender and the filling is heated through. Remove the foil for the last 5 minutes to allow the cheese to melt and bubble.
    6. Carefully remove the dish from the oven and let the peppers cool for a few minutes. Serve hot, showcasing the vibrant orange color and melted cheese topping for a festive presentation.

    Notes

    Feel free to customize the filling with other vegetables or spices for variation. Using a sharp knife makes hollowing out the peppers easier. For a vegetarian version, substitute the meat with beans or additional vegetables.

    The bold colors and cheesy surprises make these stuffed peppers a memorable centerpiece for any Halloween gathering. They bring a cheerful, mischievous energy to the table, pairing well with fall flavors and crisp evening air. Honestly, there’s no better way to enjoy the holiday’s spirit than with a little edible art.

    As the season shifts, embracing playful, eye-catching dishes like these keeps the tradition fresh and exciting. They remind us that cooking can be as much about fun as it is about flavor. So grab your knives and cheeses—let the spooky season inspire a bit of culinary chaos.

  • Bright & Zesty: A Fresh Salsa That Won’t Fail

    Bright & Zesty: A Fresh Salsa That Won’t Fail

    Imagine walking into a kitchen where the aroma of ripe tomatoes, cilantro, and lime fills the air. That’s the magic of this fresh salsa recipe—bright, crisp, and bursting with flavor. It’s perfect for summer gatherings or a quick snack when you crave something vibrant and alive.

    This salsa isn’t just about chopped vegetables; it’s about balancing textures and flavors. I love how each bite offers a mix of juicy, crunchy, and tangy notes that awaken your palate. Making it is almost meditative, an effortless dance of chopping and mixing that rewards you instantly.

    Fresh Tomato Salsa

    This fresh tomato salsa is made by chopping ripe tomatoes, cilantro, and onions, then mixing them with lime juice and seasonings. It has a bright, crunchy texture with a tangy, juicy flavor, and is typically served as a vibrant condiment or dip. The final dish showcases a colorful, chunky appearance with a fresh aroma.
    Prep Time 15 minutes
    Total Time 15 minutes
    Servings: 4
    Course: Main Course
    Cuisine: Mexican
    Calories: 30

    Ingredients
      

    • 4 cups ripe tomatoes diced
    • 1/2 cup red onion finely chopped
    • 1/2 cup fresh cilantro chopped
    • 2 tablespoons lime juice freshly squeezed
    • 1 teaspoon salt to taste
    • 1/2 teaspoon black pepper freshly ground
    • 1 clove garlic minced

    Equipment

    • Chef’s knife
    • Cutting Board
    • Mixing bowl
    • Spoon

    Method
     

    1. Dice the ripe tomatoes into small, uniform pieces and place them in a mixing bowl.
    2. Finely chop the red onion and stir it into the bowl with the tomatoes, ensuring even distribution of flavors.
    3. Chop the fresh cilantro and add it to the mixture, giving the salsa a vibrant green color and fresh aroma.
    4. Juice the lime directly into the bowl, allowing the acidity to meld with the other ingredients and brighten the flavors.
    5. Add the minced garlic, salt, and black pepper to the mixture, then stir everything together thoroughly to combine.
    6. Taste the salsa and adjust the seasoning if needed, adding more salt or lime juice for extra flavor.
    Whenever I need a quick splash of brightness on my plate, this salsa comes to the rescue. It’s a reminder that simple ingredients can create something unforgettable in minutes. Plus, it pairs well with everything from grilled chicken to tortilla chips.

    This recipe also feels like a small celebration of summer’s bounty, even if it’s enjoyed indoors on a cold day. A bowl of this salsa can turn any meal into a lively, colorful experience. No matter the season, it keeps my kitchen vibrant and my mood uplifted.

  • The Secret Chill Behind a Perfect Lemonade Slushie

    The Secret Chill Behind a Perfect Lemonade Slushie

    Imagine biting into a frosty, tangy delight that not only cools you down but also sparks childhood memories of summer fairs. This lemonade slushie isn’t your average frozen drink; it’s a playful twist that sparks joy at every sip. The secret? A clever blend of fresh lemons and just enough sugar, blended to icy perfection.

    Every time I make this slushie, I find a moment of chaos turned calm. Whether it’s a spontaneous heatwave or a lazy weekend craving, this recipe is my go-to for instant refreshment. And trust me, nothing beats the crunch of icy lemon goodness melting on your tongue.

    Lemonade Slushie

    A lemonade slushie is a frozen beverage made by blending fresh lemon juice, sugar, and ice into a frosty, icy drink. It has a bright yellow color, a granular texture, and a tangy, sweet flavor that’s perfect for hot days. The final appearance is a thick, icy mixture that can be served with a straw or a garnish of lemon slices.
    Prep Time 10 minutes
    Total Time 10 minutes
    Servings: 2
    Course: Main Course
    Cuisine: American
    Calories: 120

    Ingredients
      

    • 1 cup fresh lemon juice strained to remove seeds
    • 0.75 cup granulated sugar adjust to taste
    • 2 cups ice cubes crushed or whole
    • 1 cup cold water optional, for consistency

    Equipment

    • Measuring cups and spoons
    • Blender

    Method
     

    1. Measure out fresh lemon juice, ensuring it’s strained to remove seeds, and pour it into the blender.
    2. Add granulated sugar to the lemon juice in the blender.
    3. Pour in the ice cubes, either whole or crushed, into the blender.
    4. Optional: add cold water to help achieve a smoother, more scoopable slushie consistency.
    5. Blend the mixture on high speed until the ice is broken down into a fine, slushy texture, and the drink is frosty and well combined.
    6. Check the texture; it should be thick, granular, and icy. If it’s too loose, add a few more ice cubes and blend briefly.
    7. Pour the lemonade slushie into glasses, garnishing with lemon slices if desired for a bright finish.
    8. Serve immediately with a straw, enjoying the refreshing, icy tang.
    This lemonade slushie feels like breaking a little summer law—frozen, tart, and utterly simple. It’s perfect for backyard gatherings or a quick cooldown after a long day. As the weather turns warmer, I keep reaching for that icy tang, craving another sip of this homemade chill.

    So, here’s to turning simple ingredients into moments of refreshment and fun. Whether you’re celebrating a sunny day or just need a break from the usual, this frozen treat will always be in my kitchen arsenal. Stay cool and enjoy every refreshing spoonful.

  • The Secret Ingredient: Peach Slushie with a Twist

    The Secret Ingredient: Peach Slushie with a Twist

    Ever wondered how to turn a simple summer refreshment into a nostalgic memory? This peach slushie isn’t just your average icy drink; it’s a walk down childhood lanes, where the scent of ripe peaches mingled with the sound of crackling ice. I discovered a way to amplify that classic flavor with a surprising splash of vanilla bean and a hint of chili powder.

    What makes this recipe stand out is its ability to transform. From ripe fruit to frozen masterpiece, each step is infused with a bit of chaos and charm. It’s the perfect way to cool down while adding an unexpected flavor kick that surprises every sip.

    Peach Vanilla Chili Slushie

    This peach vanilla chili slushie combines ripe peaches blended with vanilla bean, chili powder, and ice to create a frosty, vibrant beverage. The mixture results in a smooth, icy texture with a balance of sweetness and heat, topped with a hint of vanilla aroma and a touch of spice.
    Prep Time 10 minutes
    Total Time 10 minutes
    Servings: 2
    Course: Main Course
    Cuisine: Contemporary
    Calories: 120

    Ingredients
      

    • 2 cups ripe peaches, sliced pitted and peeled if desired
    • 1 vanilla bean vanilla bean split lengthwise to scrape seeds
    • 1/2 teaspoon chili powder adjust to taste
    • 2 cups ice cubes

    Equipment

    • Blender
    • Measuring cups and spoons

    Method
     

    1. Place the sliced peaches into the blender with the seeds scraped from the vanilla bean and the chili powder.
    2. Add the ice cubes to the blender.
    3. Blend everything on high speed until the mixture is smooth, frosty, and evenly blended, about 30-60 seconds. You should see a vibrant, slushy texture.
    4. Pause the blender and taste the slushie. Adjust the chili powder if you want more heat, then give it a quick pulse to incorporate.
    5. Pour the slushie into chilled glasses, allowing the icy mix to fill each glass smoothly.
    6. Serve immediately with a straw or a garnish of fresh peach slices if desired, enjoying the refreshing balance of sweet, spicy, and aromatic flavors.

    This peach slushie is a true reflection of summer’s playful spirit. It’s perfect for spontaneous get-togethers or just a quiet afternoon treat to enjoy on your porch. The balance of sweet, spicy, and creamy makes every glass a mini celebration.

    Swapping a touch of honey for sugar or adding a splash of bourbon can adapt this recipe to any mood or gathering. Remember, the best part of a slushie is the joy of creating it—so don’t hold back on experimenting. Cheers to cool moments and memorable flavors!

  • Summer Peach Crumble with a Secret Twist

    Summer Peach Crumble with a Secret Twist

    Few desserts scream nostalgia louder than a bubbling peach crumble. The way the sweet juices mingle with buttery oats is a smell that can warm even the coldest days. But this version? It’s a whisper of a secret ingredient—ginger—that makes every bite unexpectedly bold.

    Imagine slicing into ripe, fragrant peaches just as they release a burst of juice, topped with crispy, golden oats that crackle under your fork. This isn’t just comfort food; it’s an adventure for your taste buds, blending the summery sweetness with a spicy hint of ginger. Perfect for slow afternoons or spontaneous gatherings.

    Ginger Peach Crumble

    This peach crumble combines ripe, juicy peaches with a crispy oat topping infused with warming ginger. The dish is assembled in layers and baked until bubbling and golden brown, resulting in a sweet and spicy dessert with a tender fruit interior and crunchy topping.
    Prep Time 15 minutes
    Cook Time 40 minutes
    Total Time 55 minutes
    Servings: 6
    Course: Main Course
    Cuisine: American
    Calories: 320

    Ingredients
      

    • 4 cups peach slices ripe and fragrant
    • 1 tablespoon granulated sugar for peaches
    • 1 teaspoon ground ginger adds warmth and spice
    • 1 cup old-fashioned oats for topping
    • 1/2 cup all-purpose flour creates crumbly texture
    • 1/2 cup packed brown sugar for sweetness and moisture
    • 1/2 cup unsalted butter cold and cubed for crumble topping

    Equipment

    • Mixing bowls
    • Baking dish
    • Oven
    • Peeler

    Method
     

    1. Preheat your oven to 375°F (190°C). Prepare the baking dish by lightly greasing it or lining with parchment paper.
    2. Slice ripe peaches into thin wedges, discarding pits, and place them in a mixing bowl.
    3. Add sugar and ground ginger to the peaches, then gently toss everything together until the slices are evenly coated and fragrant.
    4. Transfer the coated peaches into the prepared baking dish, spreading them out into an even layer.
    5. In a separate mixing bowl, combine oats, flour, and brown sugar, stirring to blend.
    6. Add the cold, cubed butter to the dry mixture and use your fingers or a pastry cutter to work it in until the mixture resembles coarse crumbs.
    7. Spoon the crumble mixture evenly over the peaches, covering all the fruit with a crumbly layer.
    8. Place the baking dish in the oven and bake for about 40 minutes, or until the topping is golden brown and bubbling around the edges.
    9. Remove from oven and let cool for a few minutes; the juices will thicken slightly as it rests.
    10. Serve warm, perhaps with a scoop of vanilla ice cream or a dollop of whipped cream for added indulgence.

    So, whether you’re celebrating a summer bounty or just craving a cozy dessert, this peach crumble offers a delightful twist. Its smell alone is enough to bring everyone together around the table. No matter the occasion, it’s a simple way to dive into the season’s best flavors.

    Get ready for the aroma of baked peaches mingling with caramelized oats that makes the kitchen smell like a memory in the making. It’s a dessert that’s quick to assemble but waiting to impress. The kind of dish that leaves a little extra space on your plate for the next forkful.

  • The Holiday Twist: Savory Turkey Chili with Cranberries

    The Holiday Twist: Savory Turkey Chili with Cranberries

    Imagine a chilly evening, the aroma of cumin and roasted turkey filling your kitchen. Somehow, this turkey chili becomes more than just comfort food; it turns into a celebration of flavors, especially with the unexpected burst of tart cranberries. I like to make this recipe when I want something warm but also a little adventurous in the usual chili scene.

    What makes this chili stand out? It’s the balancing act of savory turkey with the bright, tangy cranberries that add a festive touch. Each spoonful offers a smoky depth, complemented by a hint of sweetness that keeps everyone coming back for more. It’s perfect for those who love a little twist on classic winter dishes.

    Turkey Cranberry Chili

    This turkey chili combines ground turkey with savory spices, simmered to develop a thick, hearty texture. Bright cranberries are stirred in towards the end, adding a tart contrast to the smoky, savory base. The final dish has a rich, stew-like appearance with a vibrant color from the cranberries.
    Prep Time 15 minutes
    Cook Time 40 minutes
    Total Time 55 minutes
    Servings: 4
    Course: Main Course
    Cuisine: American
    Calories: 350

    Ingredients
      

    • 1 lb ground turkey lean preferred
    • 1 cup chopped onion yellow or white onion
    • 3 cloves garlic minced
    • 1 tbsp cumin ground
    • 1 tbsp chili powder
    • 1 can (14oz) diced tomatoes with juice
    • 1 cup chicken broth
    • 1/2 cup fresh cranberries rinsed and drained
    • 1 tablespoon olive oil
    • to taste salt and pepper for seasoning

    Equipment

    • Large pot or Dutch oven
    • Wooden spoon or spatula
    • Chopping board
    • Chef’s knife

    Method
     

    1. Heat the olive oil in a large pot over medium heat. Add the chopped onions and cook, stirring occasionally, until they become translucent and fragrant, about 5 minutes.
      1 lb ground turkey
    2. Add the minced garlic, cumin, and chili powder to the pot. Stir everything together and cook for another minute until the spices release their aroma.
      1 lb ground turkey
    3. Increase the heat to medium-high and add the ground turkey to the pot. Break it apart with your spoon or spatula, cooking until it’s browned and no longer pink, about 8-10 minutes.
      1 lb ground turkey
    4. Pour in the diced tomatoes along with their juice and the chicken broth. Stir to combine all the ingredients evenly.
      1 lb ground turkey
    5. Bring the mixture to a gentle simmer, then reduce the heat to low. Cover the pot and let it simmer for about 20 minutes to develop flavors.
    6. Remove the lid and stir in the rinsed cranberries. Continue to simmer uncovered for another 10 minutes, allowing the cranberries to soften and burst slightly, adding a tart note and a vibrant red swirl to the chili.
      1 lb ground turkey
    7. Season the chili with salt and pepper to taste, adjusting the seasoning as needed.
      1 lb ground turkey
    8. Once the chili has thickened slightly and the cranberries have integrated, turn off the heat. Serve hot, garnished with your favorite toppings if desired.

    This turkey chili is a perfect way to enjoy a hearty, inviting meal without overly indulgent ingredients. It’s versatile enough to serve for weekday dinners or holiday gatherings with friends. The vibrant mix of flavors lifts the spirit while comforting the soul, which is exactly what we need this season.

    Once you get the hang of the flavor balance, this recipe will become a staple in your kitchen. It’s a simple, nourishing dish that brings a touch of celebration to any table. Enjoy the process of customizing it with your favorite toppings and sharing it with loved ones.