Author: SophiaReed

  • Spooky Webbed Wonder: The Halloween Spider Web Cake

    Spooky Webbed Wonder: The Halloween Spider Web Cake

    Every October, I find myself longing for a dessert that captures the spooky spirit of Halloween while satisfying my sweet tooth. This year, I decided to craft something both visually haunting and delicious—a Spider Web Cake that looks like it came straight from a haunted house. The best part? It’s easy to assemble, even in the chaos of a holiday rush.

    As a baker fascinated by decorating tricks, I love how this cake transforms a simple layered treat into a creepy masterpiece that’s fun to make and even more fun to serve. The web design can be customized with different colors, making it perfect for any spooky theme. Plus, the smell of vanilla and chocolate swirling together as it bakes is pure autumn magic.

    Spider Web Cake

    This Spider Web Cake is a layered chocolate and vanilla sponge adorned with a chocolate web pattern. The cake combines moist, tender crumb textures with a decorative topping that replicates a spooky spider web design, perfect for Halloween festivities.
    Prep Time 30 minutes
    Cook Time 30 minutes
    Total Time 1 hour
    Servings: 8
    Course: Main Course
    Cuisine: American
    Calories: 580

    Ingredients
      

    • 2 cups all-purpose flour sifted
    • 1.5 cups granulated sugar
    • 1/2 cup unsweetened cocoa powder sifted
    • 1 tsp baking powder
    • 1/2 tsp baking soda
    • 1/2 tsp salt
    • 1 cup buttermilk at room temperature
    • 1/2 cup vegetable oil
    • 3 large eggs at room temperature
    • 2 tsp vanilla extract
    • 1.5 cups all-purpose flour sifted for vanilla sponge
    • 1 cup granulated sugar
    • 1/2 tsp baking powder
    • 1/4 tsp salt
    • 1/2 cup milk whole or 2%
    • 1/3 cup vegetable oil
    • 2 large eggs at room temperature
    • 2 tsp vanilla extract
    • 1 pound dark chocolate chopped
    • 1 cup heavy cream
    • 1 cup powdered sugar
    • 1 tsp vanilla extract
    • 1 black gel food coloring for web pattern or black cocoa powder as alternative

    Equipment

    • Mixing bowls
    • Electric mixer or whisk
    • Cake pans (8-inch round)
    • Cooling racks
    • Piping bag with fine tip
    • Spatula

    Method
     

    1. Preheat your oven to 350°F (175°C). Grease two 8-inch round cake pans and line the bottoms with parchment paper for easy removal.
    2. In a large bowl, whisk together 2 cups of sifted flour, sugar, cocoa powder, baking powder, baking soda, and salt until well combined and smooth.
    3. Add the buttermilk, vegetable oil, eggs, and vanilla extract to the dry mixture. Mix on medium speed until the batter is smooth, about 2-3 minutes. Scrape down the sides as needed.
    4. Divide the batter evenly between the prepared cake pans and smooth the tops with a spatula. Bake for 25-30 minutes, or until a toothpick inserted in the center comes out clean.
    5. Allow the cakes to cool in the pans for 10 minutes, then turn them out onto cooling racks to cool completely.
    6. Meanwhile, prepare the chocolate ganache by heating the heavy cream until just simmering, then pouring it over the chopped dark chocolate. Let sit for 2 minutes, then stir until smooth and glossy. Chill until slightly thickened.
    7. Whip the chilled heavy cream with powdered sugar, vanilla, and one teaspoon of vanilla extract until stiff peaks form. Set aside.
    8. Spread a layer of whipped cream frosting over the first cake layer, then top with the second layer. Cover the entire cake with a thin coat of frosting to seal in crumbs, then chill for 30 minutes.
    9. Apply a final smooth layer of frosting over the chilled cake. Pour the cooled ganache over the top, allowing it to drip down the sides naturally for a layered effect.
    10. Fill a piping bag fitted with a fine tip with the black food coloring or cocoa powder mixture. Pipe concentric circles across the top of the cake and use a toothpick to draw lines from the center outward, creating a web pattern.
    11. Finish by adding small spider decorations if desired, or extra web details for a spooky effect. Slice and serve to reveal the layered interior and striking web design.

    Notes

    For best results, chill the assembled cake for at least an hour before decorating. Use a steady hand for piping the web and consider using food coloring gel for vibrant, precise lines.

    This Spider Web Cake is more than just a dessert; it’s an experience that makes Halloween feel a bit more magical and a lot more mischievous. Its haunting design is perfect for parties or a cozy night in with friends and family. As you slice into it, you’ll love how the web pattern holds up, revealing soft layers of chocolate and vanilla.

    With a few simple supplies and a touch of creativity, you can turn an ordinary cake into a spooky centerpiece. The fun of this project lies in the little details—twisted web lines and gooey spider accents—that add charm and chaos to your spooky spread. Here’s to trying new tricks and tasting sweet successes every October.

  • Blueberry Bliss: The Secret Ingredient That Transforms Your Slushie

    Blueberry Bliss: The Secret Ingredient That Transforms Your Slushie

    Every summer, I chase that perfect blend of icy refreshment and bursting flavor. But recently, I stumbled upon an unexpected twist—using a splash of lime zest to elevate a simple blueberry slushie. The tangy aroma of lime pairs surprisingly well with sweet blueberries, making each sip a lively dance on the tongue.

    This recipe isn’t just about cooling down; it’s a way to reconnect with childhood joys while adding a modern, zesty flair. I find myself reaching for it during sunny afternoons, craving that bright burst of flavor and the icy crunch that awakens my senses. It’s a tiny celebration in a cup, a moment of cool bliss amidst the chaos of summer days.

    In developing this recipe, I wanted something that feels both familiar and inventive. It’s a reminder that even the simplest ingredients, when treated with a little curiosity, can surprise us with new favorites. Plus, it’s a fun project that puts a little zing into your standard frozen treat.

    **WHY I LOVE THIS RECIPE?**

    • The tang of lime lifts the blueberries into a new realm of freshness.
    • Perfect for hot days that demand a quick, satisfying cool-down.
    • A versatile base that invites experimentation with different berries.
    • The vibrant purple color makes it as pretty as it tastes—instagram-worthy!
    • It’s easy to make in a blender, no special equipment required.

    **AVOID MY DISASTER (You’re Welcome)**

    • FORGOT to chill the blueberries overnight? Warm berries make a slushie melt super fast—use frozen berries next time!
    • DUMPED too much sweetener? Taste and adjust—sometimes less is more for that fresh fruit flavor.
    • OVER-TORCHED the sugar syrup on the stove? Rinse and start anew; caramel smells take over quick.
    • FORGOT to add lemon juice? Even a splash brightens and balances the sweetness—don’t skip the acid!

    **QUICK FIXES THAT SAVE YOUR DAY**

    • When the slushie isn’t icy enough, add more frozen berries and blend again.
    • Splash a little extra lime juice if flavor feels dull—crackles in your mouth guaranteed.
    • Patch blandness with a teaspoon of vanilla extract—subtle warmth in every sip.
    • Shield melting by serving immediately or storing in a chilled container.
    • When in doubt, a pinch of salt enhances the berry and lime combo—sniff the sweet aroma.

    Blueberry Lime Slushie

    This blueberry lime slushie is a frozen beverage made by blending sweet blueberries with a splash of lime zest and juice, resulting in a vibrant purple drink with a finely crushed icy texture. The process involves pureeing frozen berries with citrus and sweetener until smooth and icy, producing a refreshing treat perfect for hot days.
    Prep Time 10 minutes
    Total Time 10 minutes
    Servings: 2
    Course: Main Course
    Cuisine: fusion
    Calories: 150

    Ingredients
      

    • 2 cups frozen blueberries preferably unsweetened
    • 1 lime lime for zest and juice
    • 2 tablespoons honey or simple syrup adjust for sweetness

    Equipment

    • Blender
    • Measuring cup
    • Lime zester

    Method
     

    1. Zest the lime with a fine grater or zester, avoiding the bitter white pith, and set aside.
    2. Squeeze the juice from the lime directly into the blender, removing any seeds.
    3. Add the frozen blueberries and honey (or syrup) to the blender.
    4. Pour in ½ cup of cold water or ice, depending on how thick you want the slushie.
    5. Secure the lid tightly and blend on high until the mixture is smooth, icy, and vibrant purple, about 30-60 seconds.
    6. Stop the blender and check the consistency; if it’s too thick, add a splash more water and blend briefly again.
    7. Taste the slushie and add more lime juice or honey if desired, blending briefly to combine.
    8. Pour the icy blueberry lime slushie into glasses and garnish with a small lime wedge or extra lime zest if desired.
    This blueberry slushie feels like a breath of fresh air on the hottest days. The zing of lime keeps it lively, while the berries ground you in familiar sweetness. It’s a reminder that even a simple frozen drink can hold a touch of daring, if you’re willing to experiment a little.

    As the seasons shift and berries flood markets, I find comfort in these small, joyful treats. They’re quick to whip up, endlessly customizable, and endlessly satisfying. Sometimes, the simplest pleasures are the best—sip by icy sip.

  • Chill with a Twist: The Frozen Margarita Slushie Journey

    Chill with a Twist: The Frozen Margarita Slushie Journey

    On scorching summer afternoons, there’s nothing quite like a cold drink to turn the chaos into calm. But I’ve discovered a secret gem that elevates the classic margarita into a snowy, slushy masterpiece. It’s vibrant, refreshing, and packed with zesty citrus vibes that make the heat almost forgettable.

    This recipe is not just about beating the heat. It’s a nostalgic nod to lazy poolside afternoons, now reimagined with a playful, frozen twist. Plus, it’s surprisingly easy to whip up, transforming a simple cocktail into a party on a spoon.

    **WHY I LOVE THIS RECIPE?**

    • The way the icy texture melts on your tongue—pure joy!
    • Vibrant lime aroma wakes up my senses instantly.
    • It’s a flexible base—add fruit, herbs, or a splash of soda.
    • Perfect for spontaneous celebrations—just blend and serve.
    • The pop of color always makes photos look appetizing.

    **AVOID MY DISASTER (You’re Welcome)**

    • FORGOT to add enough ice—ended up with a watery mess. Just blend longer and add more ice!
    • DUMPED too much alcohol—left the slush too runny. Fix by adding more frozen fruit and ice.
    • OVER-TORCHED the sugar syrup—made it bitter. Use a quick microwave zap to tone it down.
    • MISSED the salt rim—it was less flavorful. Rim with salt for that perfect tangy kick.

    **QUICK FIXES THAT SAVE YOUR DAY**

    • When too thick—splash in a little lime juice and pulse.
    • Patch with extra frozen fruit if the blend feels too runny.
    • Shield from melting—serve immediately or in a chilled glass.
    • When flavor’s off—add a dash of tequila or triple sec.
    • Splash soda water for an effervescent lift and refreshing aroma.

    This frozen margarita slushie isn’t just a summer treat; it’s a playful way to surprise your taste buds on any sunny day. Bright, cold, and irresistibly charming, it’s perfect for when you need a break from the usual and crave something fun. Plus, it captures the spirit of carefree afternoons with friends, even if only in spirit.

    In times when we seek comfort and a bit of rejoice, a frozen sip of citrusy bliss feels just right. It’s a little reminder that sometimes, simple pleasures like a well-made slushie can turn any moment into a celebration. Cheers to chilled adventures, one spoonful at a time.

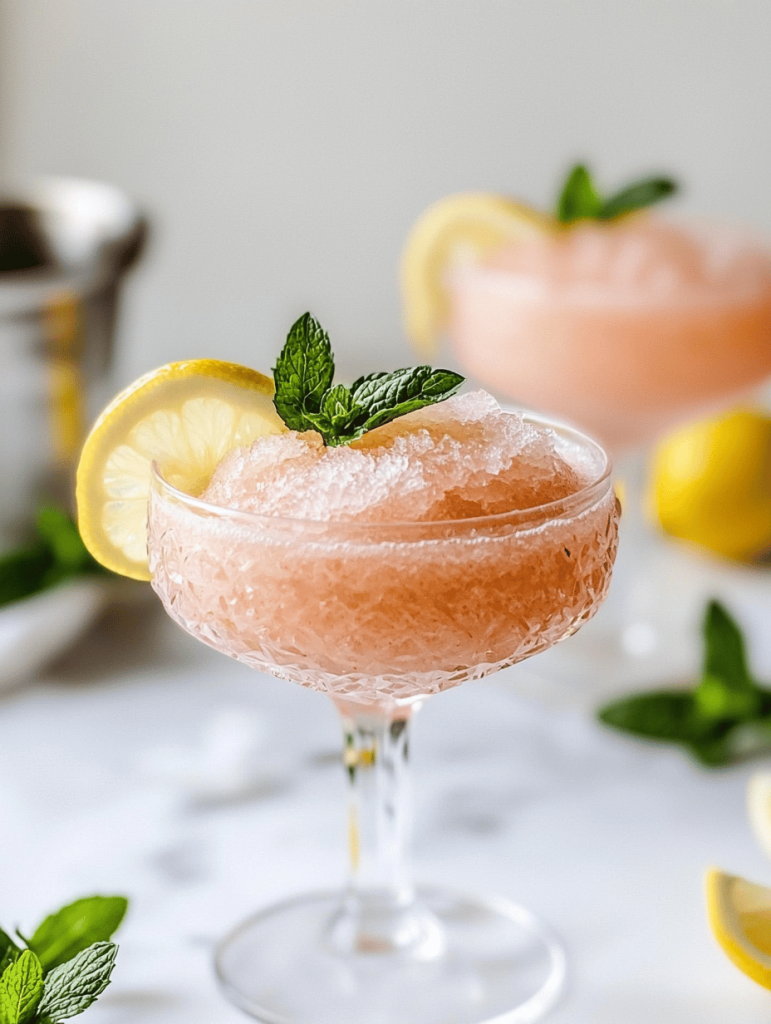
    Frozen Citrus Margarita Slushie

    This frozen margarita slushie is made by blending fresh lime juice, tequila, triple sec, ice, and simple syrup until smooth and icy. The final texture is a vibrant, icy consistency with a bright green hue, resembling a soft, colorful snow cone. It combines citrus flavors with a refreshing, slushy finish, perfect for hot days or festive occasions.
    Prep Time 10 minutes
    Total Time 10 minutes
    Servings: 4
    Course: Main Course
    Cuisine: frozen cocktails
    Calories: 150

    Ingredients
      

    • 1 cup fresh lime juice preferably freshly squeezed
    • 1/2 cup triple sec orange liqueur
    • 1 cup tequila blanco or silver
    • 2 cups ice cubes crushed or whole
    • 1/4 cup simple syrup adjust to taste

    Equipment

    • Blender
    • Measuring cups and spoons

    Method
     

    1. Place the fresh lime juice, triple sec, tequila, simple syrup, and ice cubes into your blender.
    2. Pulse the blender a few times to break up the ice, then gradually increase the speed to blend everything until smooth and icy. The mixture should have a thick, slushy texture with a vibrant green hue.
    3. Stop blending once the mixture is well combined, thick, and scoopable. If it’s too thick, add a splash of lime juice and pulse briefly; if too runny, add more ice and blend again.
    4. Pour the frozen margarita slushie into chilled glasses or bowls. Optionally, garnish with lime wedges or a sprinkle of salt on the rim.
    5. Serve immediately with a spoon or straw, enjoying the icy, citrusy burst of flavor with a refreshing chill.

    Getting creative with your frozen margarita can turn a simple refreshment into a memorable experience. The next time you crave something cool and tart, remember that a quick blend and a sprinkle of salt are all you need to elevate your game. It’s a little ritual that rewards with pure, icy happiness.

    So, keep your freezer stocked with ice and your zest ready—this recipe is a sweet, tangy escape any time the heat starts creeping in. Now, go ahead, sip, smile, and let the cool wave wash over you.

  • Spooky Sweetness: Halloween Pumpkin Cheesecake Bars You Can’t Miss

    Spooky Sweetness: Halloween Pumpkin Cheesecake Bars You Can’t Miss

    Every October, my kitchen transforms into a pumpkin patch of chaos and delight. But this year, I decided to embrace the wild side of Halloween baking with a twist on the classic pumpkin treat. Imagine a creamy, velvety cheesecake layer nestled into a buttery graham cracker crust, all dressed up with spooky, edible decoration.

    What makes these Pumpkin Cheesecake Bars stand out isn’t just the vibrant orange hue or the holiday appeal. It’s the subtle spice, the silky texture, and the way they evoke childhood memories of carving pumpkins and trick-or-treating. Plus, they’re easier to serve than a whole pumpkin-shaped dessert, making them perfect for spooky gatherings.

    Pumpkin Cheesecake Bars

    Pumpkin Cheesecake Bars consist of a buttery graham cracker crust topped with a silky, spiced pumpkin cream cheese layer. The dessert features a smooth, velvety texture with vibrant orange coloring, finished with festive edible decorations. They are baked until set and have a creamy yet firm bite, ideal for seasonal gatherings.
    Prep Time 20 minutes
    Cook Time 30 minutes
    Total Time 50 minutes
    Servings: 12
    Course: Main Course
    Cuisine: American
    Calories: 290

    Ingredients
      

    • 1 1/2 cups graham cracker crumbs about 10-12 whole graham crackers processed
    • 1/4 cup granulated sugar
    • 6 tablespoons unsalted butter melted
    • 16 oz cream cheese softened
    • 3/4 cup packed light brown sugar
    • 1 cup canned pumpkin puree
    • 3 large eggs
    • 1 1/2 teaspoons ground cinnamon
    • 1/2 teaspoon ground ginger
    • 1/4 teaspoon ground nutmeg
    • 1/4 teaspoon ground cloves
    • 1/2 teaspoon vanilla extract

    Equipment

    • 9×13 inch baking pan
    • Mixing bowls
    • Electric mixer or whisk
    • Rubber spatula
    • Measuring cups and spoons
    • Baking sheet
    • Cooling rack

    Method
     

    1. Preheat your oven to 350°F (175°C). In a mixing bowl, combine graham cracker crumbs and granulated sugar. Stir in melted butter until the mixture resembles wet sand. Press this mixture evenly into the bottom of a lined 9×13 inch baking pan to form the crust. Bake for 8-10 minutes, then remove and let cool slightly.
    2. In a large mixing bowl, beat softened cream cheese and light brown sugar with an electric mixer until smooth and creamy, about 2-3 minutes.
    3. Add canned pumpkin puree, eggs, ground cinnamon, ginger, nutmeg, cloves, and vanilla extract to the cream cheese mixture. Whisk or beat until fully combined and the mixture is smooth, about 2-3 minutes. The filling should be bright orange and velvety.
    4. Pour the pumpkin cheesecake filling over the cooled crust, spreading it evenly with a spatula. Smooth the top so it’s flat and level.
    5. Bake in the preheated oven for 25-30 minutes, or until the edges are set and the center has a slight jiggle. The filling may puff up a bit, and the surface will turn a deeper orange hue.
    6. Once baked, remove from oven and transfer to a wire rack to cool completely. Refrigerate for at least 2 hours or until chilled and firm before slicing.
    7. Cut into squares or bars with a sharp knife, creating clean, even pieces. Decorate with edible decorations like candy eyes or sprinkles for a festive look, if desired.

    These bars are not just a dessert; they’re a celebration of the season’s cozy, spicy essence. As the cool air settles in, the scent of cinnamon and pumpkin fills the house, bringing everyone together around the table. It’s amazing how a simple treat can spark such festive cheer.

    Whether for a last-minute party or a quiet night in with a horror flick, these pumpkin cheesecake bars add that extra touch of seasonal charm. They’re a reminder that the best treats don’t have to be complicated — just creamy, spicy, and unexpectedly joyful.

  • Spooky Delight: Halloween Monster Eyeball Cake Pops

    Spooky Delight: Halloween Monster Eyeball Cake Pops

    In the spooky season, baking takes a playful turn. These Monster Eyeball Cake Pops are more than treats; they’re mini works of art that straddle chaos and creativity. The act of sculpting tiny, grotesque eyes from vibrant candies and cake scraps makes every kitchen session a peculiar adventure.

    What makes this recipe special is not just its look but the process. It transforms a simple dessert into a spectacle of spooky fun, perfect for parties or just daring dessert lovers. The smell of vanilla and chocolate mingles with a hint of edible color chaos, creating an irresistible temptation.

    WHY I LOVE THIS RECIPE?

    • The chaos of creating tiny eyeballs sparks my nostalgic childhood DIY projects.
    • Joy explodes when the first creepy eye finally opens up with a gooey, sweet surprise.
    • It’s a proud moment to see guests reaction—both amused and slightly disturbed.
    • It combines the meditative process of baking with the wild fun of Halloween decor.

    AVOID MY DISASTER (You’re Welcome)

    • FORGOT: To chill the cake balls beforehand, they got squishy—freeze for 10 minutes to firm up.
    • DUMPED: The melted chocolate on the table—use parchment to catch drips, clean up is quicker.
    • OVER‑TORCHED: The candy eyeballs—watch carefully to prevent melting, keep a close eye on heat.
    • MISSED: The edible eye details—use a toothpick for precise placement, bad eyesight, good technique.

    QUICK FIXES THAT SAVE YOUR DAY

    • When the chocolate won’t set, splash a bit of coconut oil for gloss and quick setting.
    • Patch a cracked cake ball with extra frosting, then smooth with fingertips dusted in cocoa.
    • Shield your workspace with parchment when dipping—less mess, less stress.
    • If the eyes look flat, add a tiny more detail with melted chocolate.
    • When in doubt, swap candy eyes with mini edible pearls for instant creepy flair.

    Monster Eyeball Cake Pops

    Monster Eyeball Cake Pops are small, spherical confections made from cake scraps and frosting, coated in melted chocolate to resemble creepy eyeballs. Decorated with colorful candies and edible details, they have a glossy finish and a playful, grotesque appearance, perfect for Halloween festivities.
    Prep Time 30 minutes
    Total Time 30 minutes
    Servings: 12
    Course: Main Course
    Cuisine: Halloween
    Calories: 150

    Ingredients
      

    • 2 cups cake crumbs or crumbled baked cake preferably vanilla or chocolate flavor
    • 1/2 cup cream cheese or frosting to bind the cake crumbs into a dough
    • 8 oz melting chocolate white or dark, melted for coating
    • assorted candies candy eyeballs, colorful candies for decoration for the eyeball pupils and decoration
    • optional edible gel or chocolate for fine details for adding eyelids or veins
    • sprinkles or dusting powder colored edible powders for additional chaos and detail

    Equipment

    • Mixing bowls
    • Baking sheet
    • Parchment paper
    • Microwave or double boiler for melting chocolate
    • Toothpicks or small skewers
    • Small brushes or piping bags for details

    Method
     

    1. Place cake crumbs in a large mixing bowl and add cream cheese or frosting gradually, mixing until the mixture is firm and moldable. This creates a sticky dough ready for shaping.
    2. Use your hands to roll the mixture into small, smooth spheres, about the size of a golf ball. Place them on a baking sheet lined with parchment paper and chill in the freezer for 10 minutes to firm up.
    3. While the cake balls chill, melt the chocolate in a microwave-safe bowl or double boiler, heating in short bursts and stirring until smooth and glossy.
    4. Remove the chilled cake balls from the freezer and, using a toothpick or skewer, dip each one into the melted chocolate, coating evenly. Gently tap off excess chocolate and place the coated balls back on parchment to set.
    5. Once the chocolate coating is firm, use small candies to decorate the center as a pupil and add edible gel or chocolate details for veins or eyelids to give each eyeball a creepy, messy look.
    6. Finish by adding colored edible powders or sprinkles around the eyeballs for extra chaos and color. Place all the finished cake pops in a stand or styrofoam block to set completely before serving.

    These Halloween Monster Eyeball Cake Pops turn a simple baking project into a Halloween party standout. The fun lies in their chaotic charm and the satisfaction of crafting something so delightfully grotesque. This season, let your kitchen become a spooky workshop filled with colorful chaos and sweet surprises.

    Each bite delivers a crunch of candy and a burst of chocolate, making them perfect for celebrating the thrill of Halloween. No matter how many goofs occur, the joy of creating something so whimsically macabre makes it all worthwhile. Enjoy the process and the playful, spooky moments it brings to your home.

  • Spiced Pumpkin Cheesecake: A Cozy Autumn Twist

    Spiced Pumpkin Cheesecake: A Cozy Autumn Twist

    WHY I LOVE THIS RECIPE?

    • The nostalgic aroma of fall spices instantly lifts my mood.
    • Perfectly combines creamy texture with the crunch of a graham cracker crust.
    • Unexpectedly simple to prepare, yet looks elegant on any dessert table.
    • The seasonal flavors make it a real conversation starter during gatherings.
    • It’s a warm, inviting dessert that feels like a hug in every slice.

    AVOID MY DISASTER (You’re Welcome)

    • FORGOT to chill the cream cheese—causes lumps. Chill well before mixing.
    • DUMPED too much pumpkin—makes it dense. Measure carefully.
    • OVER-TORCHED the crust—browned too dark. Keep an eye during baking.
    • MISSED adding vanilla—lacks depth. Always add vanilla for richness.

    QUICK FIXES THAT SAVE YOUR DAY

    • When cracks appear, place a warm towel on the baking dish—shrinks stress lines.
    • Splash vanilla extract to deepen flavors if the taste falls flat.
    • Patch a cracked crust with extra crumbs—silences imperfections.
    • Shield the top with foil if it starts to brown too fast.
    • When in doubt, add a dash of cinnamon—the aroma alone saves the dessert.

    Pumpkin Cheesecake Bars

    Pumpkin cheesecake bars are a creamy, smooth dessert layered on a crunchy graham cracker crust. Made with pumpkin puree, cream cheese, and warm fall spices, they have a rich, velvety texture and a visually appealing slice appearance. The dessert is baked until set, resulting in a deliciously festive treat.
    Prep Time 20 minutes
    Cook Time 40 minutes
    Total Time 1 hour
    Servings: 12
    Course: Main Course
    Cuisine: American
    Calories: 350

    Ingredients
      

    • 1 1/2 cups graham cracker crumbs
    • 1/4 cup granulated sugar
    • 1/2 cup unsalted butter melted
    • 16 oz cream cheese softened
    • 1 cup granulated sugar
    • 1/2 teaspoon ground cinnamon
    • 1/4 teaspoon ground ginger
    • 1/4 teaspoon ground nutmeg
    • 1/4 teaspoon ground cloves
    • 1 cup pumpkin puree
    • 2 eggs large eggs
    • 1 teaspoon vanilla extract

    Equipment

    • Mixing bowls
    • 9×13 inch baking pan
    • Whisk
    • Spatula
    • Measuring cups and spoons
    • Food processor or zipper bag and rolling pin

    Method
     

    1. In a mixing bowl, combine graham cracker crumbs and sugar. Pour in melted butter and stir until the mixture resembles wet sand. Press this mixture firmly into the bottom of a parchment-lined 9×13 inch baking pan to form an even crust.
    2. Bake the crust in a preheated oven at 350°F (175°C) for 8-10 minutes until lightly golden. Remove and let it cool slightly as you prepare the filling.
    3. In a large bowl, beat softened cream cheese with a hand mixer or whisk until smooth and creamy, eliminating any lumps. Add sugar and spices, and continue mixing until well combined.
    4. Mix in pumpkin puree, eggs, and vanilla extract, one at a time, mixing well after each addition. The filling should be smooth and slightly fluffy, with a rich, orange hue.
    5. Pour the pumpkin cheesecake filling over the cooled crust, spreading it evenly with a spatula. Tap the pan gently on the counter to remove air bubbles and level the surface.
    6. Bake in the oven at 350°F (175°C) for 30-35 minutes, or until the edges are set but the center still slightly jiggles when gently shaken.
    7. Remove from the oven and let the bars cool completely on a wire rack. Once cooled, refrigerate for at least 2 hours or overnight to fully set.
    8. Cut into squares with a sharp knife, wiping the blade clean between cuts for neat edges. Serve chilled for the best texture and flavor.

    This pumpkin cheesecake captures the essence of autumn—rich, comforting, and layered with memories. It’s a dessert that transforms simple ingredients into something special, perfect for chilly nights or festive gatherings. The balance of spiced pumpkin and silky cream cheese feels like a warm blanket in dessert form.

    Every slice offers a sensual reminder of the season’s bounty, making it a delightful centerpiece. Even after the last crumb, the cozy feeling lingers, inspiring me to savor each moment of fall’s fleeting beauty.

  • The Enchanting Blue Raspberry Slushie: A Childhood Wonderland in a Glass

    The Enchanting Blue Raspberry Slushie: A Childhood Wonderland in a Glass

    • Few treats transport me back to summer nights of chasing fireflies and sipping icy beverages by the porch. The blue raspberry slushie does exactly that, with its electric hue and tangy burst.
    • Choosing this recipe was inspired by an unexpected quest for nostalgia—an urgent craving for the chaotic joy of fairgrounds and icy hand-helds.
    • Its vibrant color and sharp, sweet flavor are more than just a drink; they are a portal to carefree days, now perfected in a simple recipe.

    Blue Raspberry Slushie

    The blue raspberry slushie is a cold, icy beverage made by blending blue raspberry-flavored syrup with crushed ice until smooth and vibrant in color. It has a tangy-sweet flavor and a slushy, semi-frozen texture that is both refreshing and visually striking.
    Prep Time 5 minutes
    Total Time 5 minutes
    Servings: 2
    Course: Main Course
    Cuisine: American
    Calories: 150

    Ingredients
      

    • 2 cups crushed ice
    • 1/4 cup blue raspberry syrup
    • 1 tbsp lemon juice (optional for added tang)

    Equipment

    • Blender
    • Measuring cups

    Method
     

    1. Measure out the crushed ice and set it aside in your blender.
    2. Pour the blue raspberry syrup into the blender with the crushed ice.
    3. If using, add a splash of lemon juice for a hint of extra tang.
    4. Place the lid securely on the blender and pulse a few times to break up the ice.
    5. Blend on high until the mixture becomes smooth, slushy, and vibrant blue, about 30 seconds.
    6. Stop the blender and check the consistency – it should be thick and scoopable with a frosty surface.
    7. Pour the slushie into glasses, using a spoon or straw to serve.
    8. Garnish with extra lemon slices or a colorful straw if desired, and enjoy immediately.

    Notes

    For a thicker slushie, add more crushed ice; for a sweeter taste, add a little more syrup. Serve immediately for best texture.

    This blue raspberry slushie is more than just a cooling summer treat; it’s a shareable moment frozen in time. The bright blue color offers a splash of joy amidst the dull routine of everyday life, making it a perfect pick-me-up.

    As the season’s heat peaks, this icy concoction can turn any moment into a celebration. Whether for friends, family, or just yourself, it’s a colorful alias for simple happiness that whisks you away, glass in hand.

  • The Unexpected Charm of Rustic Peach Crisp

    The Unexpected Charm of Rustic Peach Crisp

    Imagine walking into a kitchen filled with the warm, honeyed aroma of ripe peaches baking in buttery oats. This isn’t your typical dessert; it’s a nostalgic journey wrapped in a crispy topping that crunches with every bite. I love how this peach crisp transforms simple summer fruit into a comforting, unpredictable delight.

    In my version, I add a hint of cardamom, giving each bite a whisper of exotic spice against the sweet, juice-laden peaches. Cooking this dish feels like a small act of rebellion against overly processed treats—embracing rustic charm and imperfect perfection. It’s a recipe that invites chaos, laughter, and a little bit of soul into every serving.

    ## WHY I LOVE THIS RECIPE?
    – It captures spontaneous summer energy with its vibrant flavor.
    – The smell of caramelizing sugar & bubbling fruit makes everyone smile.
    – I love that it’s forgiving, perfect for any skill level.
    – This recipe creates a sense of cozy nostalgia I crave all year round.
    – It feels like a small celebration every time I make it.

    ## AVOID MY DISASTER (You’re Welcome)
    • FORGOT to preheat the oven – the topping turned soggy; reheated with a quick broil fixed it.
    • DUMPED too much sugar – the peaches ran and soaked; added a handful of oats saved the texture.
    • OVER‑TORCHED the edges – the topping blackened; kept a close eye and covered loosely with foil.
    • MISSED adding lemon juice – peaches lacked brightness; a spritz at the end brightened everything.

    ## QUICK FIXES THAT SAVE YOUR DAY
    • When the topping isn’t crispy—splash in a little extra butter & bake 5 more minutes.
    • When the peaches are too tart—patch with a drizzle of honey or maple syrup.
    • When the crisp is soggy—shield with foil and bake 10 minutes longer.
    • When the fruit is undercooked—stir and bake an extra 10 minutes.
    • When the aroma is dull—stand back and crack open a window, the smell gets intense.

    The magic of this peach crisp is that it feels both familiar and unexpectedly exciting. It’s perfect for humble summer gatherings or a quiet evening in. Playing with spices, textures, and a splash of lemon keeps each batch lively and lively. It’s a dessert that truly celebrates the joys of seasonal fruit.

    Peach Cardamom Crisp

    A rustic dessert featuring ripe peaches baked under a buttery, oat-filled topping infused with aromatic cardamom. The dish has a tender, juicy fruit layer topped with a crisp, golden-brown crunch that offers a satisfying texture contrast. The final presentation is a bubbling, fragrant skillet or dish inviting for serving.
    Prep Time 15 minutes
    Cook Time 40 minutes
    Total Time 55 minutes
    Servings: 6
    Course: Main Course
    Cuisine: American
    Calories: 320

    Ingredients
      

    • 4 ripe peaches peeled, pitted, and sliced
    • 1/4 cup granulated sugar divided, for fruit and topping
    • 1 teaspoon ground cardamom freshly ground if possible
    • 1 tablespoon lemon juice to brighten the peaches
    • 1 cup old-fashioned rolled oats for the crumbly topping
    • 1/2 cup all-purpose flour
    • 1/2 cup unsalted butter cold, cut into small pieces
    • 1/4 cup brown sugar packed
    • pinch salt

    Equipment

    • Oven
    • Mixing bowls
    • Baking dish or skillet
    • Measuring cups and spoons
    • Peeler or knife for peeling peaches

    Method
     

    1. Preheat the oven to 375°F (190°C). Peel peaches if desired, then core and slice them into similar-sized pieces. Toss the peaches in a mixing bowl with a tablespoon of lemon juice, half of the sugar, and the ground cardamom to coat evenly.
      4 ripe peaches, 1 teaspoon ground cardamom, 1 tablespoon lemon juice, 1/4 cup granulated sugar
    2. Transfer the peach mixture to a baking dish or skillet, spreading it out in an even layer. Bubble lightly around the edges, signaling they’re starting to cook down.
    3. In a separate bowl, combine oats, flour, remaining sugar, and a pinch of salt. Add the cold butter pieces and use your fingers or a pastry cutter to work it into coarse, crumbly bits. This creates a flaky, crispy topping.
      1 cup old-fashioned rolled oats, 1/2 cup all-purpose flour, 1/2 cup unsalted butter, 1/4 cup brown sugar, pinch salt
    4. Spoon the crumb mixture evenly over the peaches, covering most of the fruit but leaving some peekaboo gaps for a rustic look. Press gently to help it adhere.
    5. Place the dish in the preheated oven and bake until the topping is golden brown and crispy, about 40 minutes. The filling should bubble up around the edges and smell warm and sweet.
    6. Remove from the oven and let cool slightly before serving. The fruit will be tender and juicy, contrasted with the crunchy, caramelized topping. Serve warm, preferably with a scoop of vanilla ice cream or a dollop of whipped cream or Greek yogurt.

    Notes

    Feel free to add a pinch of cinnamon or a splash of honey to customize the flavor. For extra crunch, sprinkle a handful of chopped nuts over the topping before baking.
    As the last scoop of warm peach crisp hits the bowl, I’m reminded how simple ingredients can create something deeply satisfying. Each bite offers a burst of sunshine, a little chaos, and lots of comfort. It’s often the unpretentious dishes like this that leave the longest-lasting impressions.

    When summer peaks, I turn to recipes like this for a taste of nostalgia and spontaneity. It’s a reminder to embrace imperfect moments and find joy even in small sparks of flavor. No matter the occasion, this rustic peach crisp always feels just right.

  • Unearthing Pumpkin Cookies: A Nostalgic Autumn Treasure

    Unearthing Pumpkin Cookies: A Nostalgic Autumn Treasure

    Imagine cutting into a batch of pumpkin cookies and releasing a fragrant cloud of cinnamon and nutmeg. This recipe isnt just about pumpkin flavor; its about capturing those fleeting autumn moments, infused with cozy memories. The dough feels soft and sticky, like a secret worth savoring, as your kitchen fills with the aroma of fall.

    Crafting these cookies is like a mini adventure, where each step unfolds like a autumn story. From the warm, spiced batter to the slight crunch of the edges, every bite takes you back to hayrides and crisp air. You dont need fancy ingredients, just a pinch of nostalgia and a dash of creativity.

    Spiced Pumpkin Cookies

    These pumpkin cookies are soft and slightly chewy on the inside with crisp, golden edges. They are flavored with warm spices like cinnamon and nutmeg, resulting in a fragrant, autumn-inspired treat. The dough is sticky and easy to shape, and once baked, the cookies have a tender crumb with a subtle moistness from the pumpkin.
    Prep Time 20 minutes
    Cook Time 12 minutes
    Total Time 32 minutes
    Servings: 24
    Course: Main Course
    Cuisine: American
    Calories: 120

    Ingredients
      

    • 1 1/2 cups all-purpose flour
    • 1/2 cup granulated sugar
    • 1/2 cup packed brown sugar
    • 1/2 cup unsalted butter softened
    • 1/2 cup canned pumpkin puree
    • 1 large egg room temperature
    • 1 1/2 tsp ground cinnamon
    • 1/2 tsp ground nutmeg
    • 1/2 tsp baking soda
    • 1/4 tsp salt

    Equipment

    • Mixing bowls
    • Whisk
    • Baking sheet
    • Parchment paper
    • Cooling rack

    Method
     

    1. Preheat your oven to 350°F (175°C) and line a baking sheet with parchment paper.
    2. In a large mixing bowl, whisk together the flour, cinnamon, nutmeg, baking soda, and salt until evenly combined. This helps distribute the spices uniformly throughout the dough.
    3. In a separate bowl, cream together the softened butter, granulated sugar, and brown sugar until the mixture is light, fluffy, and smells mildly caramelized, about 2-3 minutes.
    4. Add the egg to the butter and sugar mixture, then beat until well incorporated and smooth.
    5. Stir in the pumpkin puree until the batter is uniform with a slightly thick, sticky texture and a warm, spicy aroma.
    6. Gradually fold the dry ingredients into the wet mixture, mixing just until combined. The dough will be thick and slightly sticky but workable.
    7. Using a tablespoon or a cookie scoop, portion the dough onto the prepared baking sheet, spacing them about 2 inches apart. The dough will be soft and sticky but easy to shape.
    8. Bake the cookies for 12-14 minutes, or until the edges turn golden brown and the centers look set. You may hear a faint sizzling as they bake, and the aroma of spices will fill your kitchen.
    9. Remove the baking sheet from the oven and let the cookies cool on it for 5 minutes, then transfer them to a wire rack to cool completely. The cookies will firm up slightly as they cool, with a tender crumb inside.
    10. Once cooled, enjoy these soft, spiced pumpkin cookies with a cup of tea or coffee, reveling in the cozy aroma and comforting flavor, perfect for autumn days.

    Notes

    For extra texture, fold in chopped nuts or dried cranberries before baking.
    These pumpkin cookies are perfect for lazy weekend baking or festive gatherings. They remind us that some of the best flavors come from simple, heartfelt touches. Enjoy them warm or cooled, with a glass of milk or a splash of cider.

    In a world rushing by, these cookies offer a moment to pause and appreciate the beauty of seasonal baking. Their moist, spiced crumb and the delightful aroma make every bite a small celebration of fall.

  • Whimsical White Pumpkin Wonder: A Fall Soup Revelation

    Whimsical White Pumpkin Wonder: A Fall Soup Revelation

    WHY I LOVE THIS RECIPE?

    • The smell of roasting pumpkin is a spa day for the senses—warm, nutty, and inviting.
    • Balancing the earthy pumpkin with a splash of cream and a sprinkle of sage feels like winning autumn in a bowl.
    • This soup is a nostalgic hug, recalling childhood falls with every velvety sip.
    • It’s a joyful chaos-generation: blending, tasting, adjusting, all with a sense of farm-fresh pride.
    • Perfect for vegetarians, yet hearty enough to satisfy any pumpkin lover’s soul.

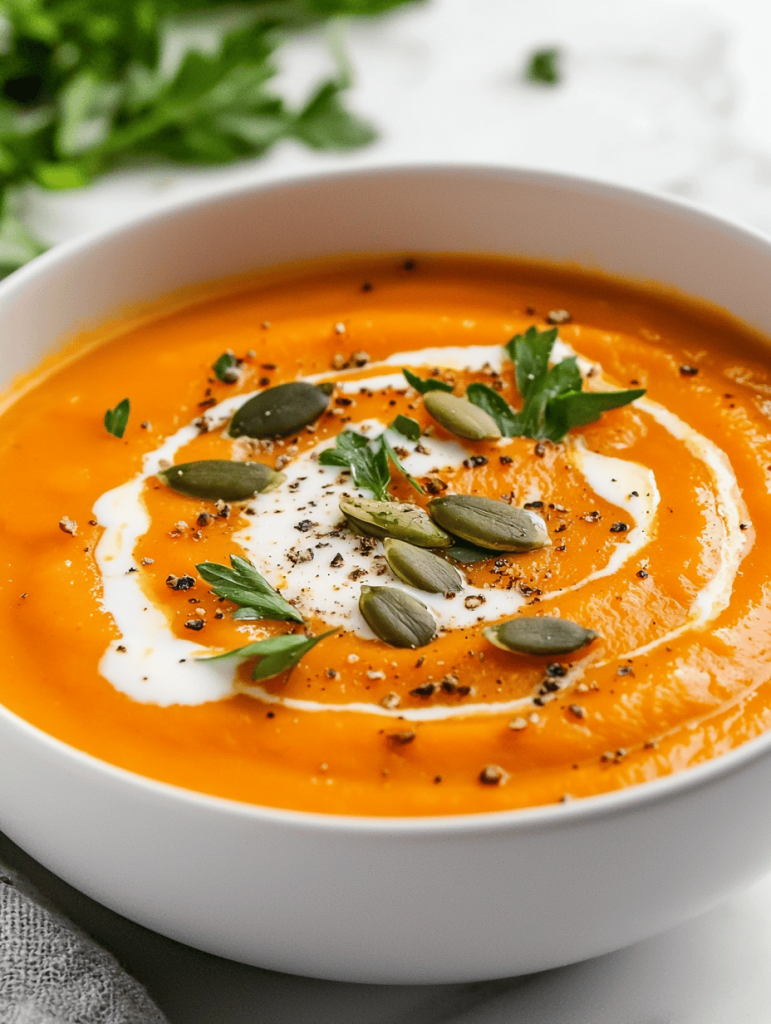
    Roasted Pumpkin Soup

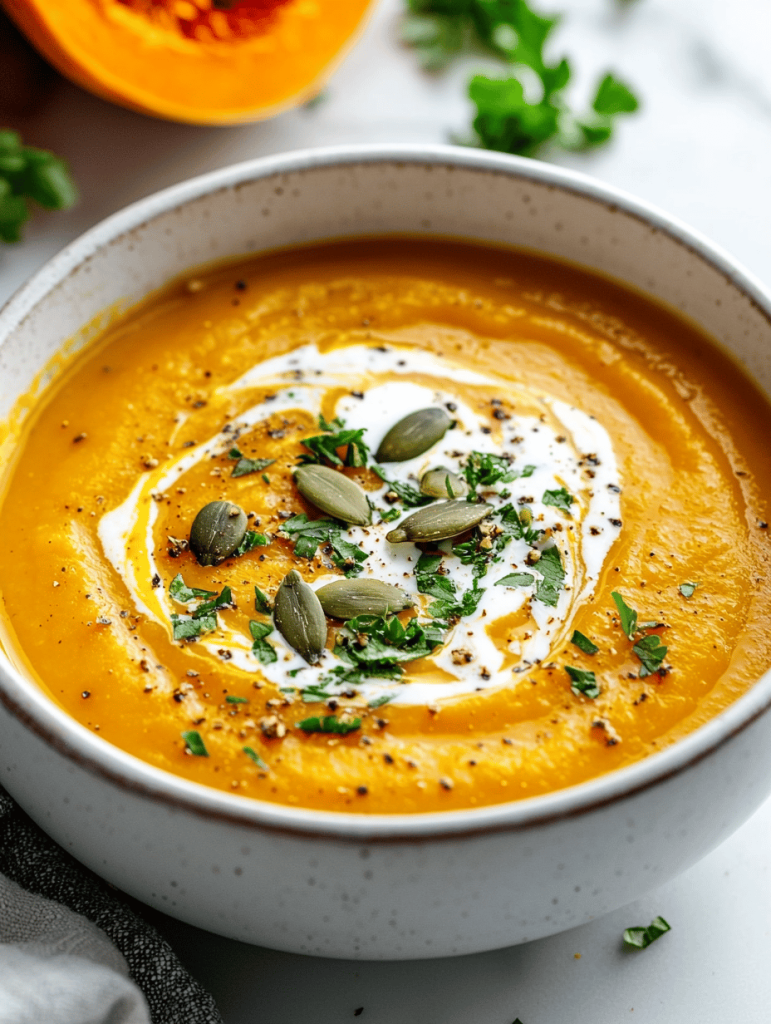
    This roasted pumpkin soup involves halving and roasting fresh pumpkin until caramelized and tender, then blending the softened pumpkin with sautéed aromatics and cream to create a velvety, smooth puree. The final soup has a rich, creamy texture with a warm orange hue, garnished with herbs for a comforting presentation.
    Prep Time 15 minutes
    Cook Time 45 minutes
    Total Time 1 hour
    Servings: 4
    Course: Main Course
    Cuisine: Farmhouse
    Calories: 220

    Ingredients
      

    • 1 kg fresh pumpkin peeled, seeded, cut into chunks
    • 2 tbsp olive oil for roasting and sautéing
    • 1 small onion finely chopped
    • 2 cloves garlic minced
    • 2 cups vegetable broth richer flavor than water
    • 0.5 cup heavy cream for creaminess
    • to taste salt and pepper
    • fresh sage optional leaves for garnish

    Equipment

    • Baking sheet
    • Blender

    Method
     

    1. Preheat your oven to 400°F (200°C), then spread the pumpkin chunks on a baking sheet, drizzle with olive oil, and toss to coat. Roast for about 30-35 minutes until they are golden brown and easily pierced with a fork.
    2. While the pumpkin roasts, heat a tablespoon of olive oil in a large pot over medium heat. Add the chopped onion and cook for 5-7 minutes until translucent and fragrant, with a slight golden color.
    3. Add the minced garlic to the onions and cook for another minute, until it becomes aromatic and slightly softened.
    4. Once the pumpkin is roasted and cools slightly, add the soft, caramelized chunks to the pot with the sautéed aromatics. Pour in the vegetable broth to help blend everything smoothly.
    5. Use an immersion blender or transfer the mixture in batches to a blender, then blend until smooth and velvety. This step creates the creamy, uniform base of the soup.
    6. Return the blended soup to the pot and stir in the heavy cream to enhance richness. Warm the mixture gently until steaming, but avoid boiling.
    7. Season the soup with salt and pepper to taste, adjusting the seasoning as needed for balance and flavor.
    8. Ladle the hot soup into bowls, garnish with fresh sage leaves if desired, and serve immediately with crusty bread or your favorite sides.

    This roasted pumpkin soup embodies autumn’s quiet elegance. It’s simple to make but feels indulgent, filling the house with warmth and nostalgia. As the season shifts, having a cozy, easy recipe like this on hand feels especially comforting.

    Whether served as a starter or a main course, this soup reminds us to slow down and enjoy the fleeting beauty of fall. The gentle glow of roasted pumpkin echoes the soft fading light outside. It’s a comfort that stays long after the last spoonful.